Rasmalai is made of sweet chena balls soaked in a sweet and flavourful rabdi made with milk and aromatic spices. Made in three distinct stages, the steps to make rasmalai at home are quite simple. Learn them from my step-by-step guide.

KEY TAKEAWAYS
- Rasmalai is the most common and popular Indian sweet dish.
- Enjoy it after a meal.
- Rasmalai tastes soft, creamy, and sweet.
- Other similar sweets are rasgulla, cham cham, and rajbhog.
The Ingredients:
For making the chena balls:
- 1 litre milk (cow)
- 2 tbsp vinegar
- 1 tbsp corn flour
For making the rabdi:
- 1 litre milk (cow)
- ¼ cup dry nuts (roughly chopped, optional)
- ½ cup sugar
- Green cardamom (3 to 4 seeds only, crushed)
- ¼ tsp saffron (kesar, optional)
- 1 pinch food colour (yellow, optional)
For making the sugar syrup (chashni):
- 1 cup sugar
- 3.5 cups water

This recipe was shared by a lady I met during a heritage walk in the city. We both had joined out of curiosity. She pulled out a small tiffin during the break and offered me a piece. It tasted traditional yet new. I asked for the method, and she smiled. “It is my grandmother’s recipe with my twist,” she said and gave the recipe to me.
I made it that weekend. My husband loved the old-world flavor, and my sons said it was delicious. Now, it is our favorite sweet dish. That walk reminded me how heritage isn’t only in monuments—sometimes, it lingers in recipes passed on by foot and flavor.
How to Make Rasmalai? (Step by Step Guide with Images)
Step 1: Boil 1 litre of cow milk on a medium flame. When it comes to a boil, add 1 tbsp of vinegar in it first and stir continuously to make chena. Once it starts to curdle, then add the second tablespoon of vinegar and continue stirring.

(Pro tip: Using vinegar in place of lemon juice assures perfect chena. Do not use more than 2 tbsp of vinegar, or else the smell will remain in the chena).
Step 2: Check the chena. The water and chena should be separate. If it is not, boil it for a few minutes more.

Step 3: Strain the chena using a clean cotton cloth.

(Pro tip: Do not use a metal strainer to strain the chena from the water. You will need to tie it up with cloth for achieving the perfect texture).
Step 4: Squeeze out the additional water from the chena by using a pair of tongs.

Step 5: Hang it somewhere for an hour.

Step 6: In the meantime, to make the rabdi, heat another litre of cow milk on a medium flame in a separate pan.

Step 7: Stir it continuously and mix the malai to bring it to a boil until it becomes slightly thick and reduces to 3/4 of the original quantity of milk.

(Pro tip: Scrape the malai from the sides of the pan and mix it with the milk. This will reduce and thicken it quickly).
Step 8: Add ½ cup of sugar to it. Mix it nicely and cook for another 2 to 3 minutes.

Step 9: Now, add 3 to 4 crushed seeds of green cardamom to it along with ¼ tsp of saffron (kesar). Mix them nicely and cook for another minute.

Step 10: Then, add a pinch of yellow food colour. Mix it.

(Pro tip: If you do not have kesar or food colour at home, you can make a white rabdi or add a pinch of turmeric or haldi powder in it).
Step 11: Cook it for another minute and then add a ¼ cup of dry nuts (roughly chopped) in it. This is also optional.

Step 12: Cook for another 2 to 3 minutes so that the nuts become tender and the rabdi a bit thicker. Turn off the flame of the gas stove and let it cool down. It will take about 35 minutes in total to make the rabdi.

(Pro tip: Do not make the rabdi too thick, or else the chena balls will not be able to absorb it nicely and easily).
Step 13: In the meantime, make the chena balls. Take out the chena from the cloth on a plate, and crush and knead it nicely to make a dough.

(Pro tip: If the chena has become too dry, sprinkle a little bit of water and continue kneading for 8 to 10 minutes).
Step 14: Now, add 1 tbsp of corn flour to it and mix nicely for another 5 minutes. Check the doneness by making a small ball of the dough. If you see cracks on the sides, you will need to knead it more until the chena dough is as smooth as butter.

(Pro tip: Adding corn flour is crucial, as it acts as a binding agent and will prevent the chena balls from falling apart in the sugar syrup).
Step 15: Make small pedas from the chena dough.

(Pro tip: Do not make round balls of the dough and then press them to make the pedas. Instead, press them while you are moving the ball between your palms. This will prevent them from developing cracks on the sides).
Step 16: Now, to make the sugar syrup (chashni), take 1 cup of sugar in a separate pan and add 3.5 cups of water. Maintain this ratio of water and sugar. Heat it on a high flame and stir it until the sugar dissolves and the syrup starts boiling.

Step 17: Now, put the chena balls one by one in the boiling sugar syrup very carefully so that they do not break. Cook them on a high flame for about 3 minutes.

Step 18: After 3 minutes, cover the pan and cook the chena balls on a high flame for 8 minutes.

Step 19: After 8 minutes, flip each of the chena balls very carefully and let them cook for another 15 minutes on a low to medium flame without covering the pan and flipping them occasionally in between.

Step 20: Check the doneness of the chena balls after about 26 to 27 minutes of total cooking time. If it is done, turn the flame of your gas stove to high and boil it for another minute. When it is done, switch off the flame and let the chena balls cool down completely.

Step 21: Now, take a separate bowl, squeeze each chena ball, and put it in the bowl.

Step 22: Then, pour the rabdi on every chena bowl, covering all of them. Adding more rabdi is needed because it will be absorbed by the chena balls. Cover it and let it sit for 5 to 6 hours so that the chena balls become spongy by absorbing the rabdi. Do not refrigerate it at this stage because the chena balls will not be able to absorb the rabdi nicely. Refrigerate it after it is done.

(Pro tip: While pouring the rabdi on the chena balls, either of the two must be warm, preferably the rabdi. If the rabdi is too cold, warm it in the microwave oven or gas stove and then pour it on the chena balls).
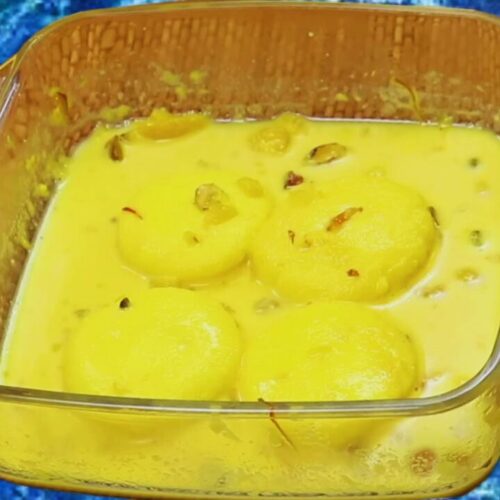
Step 23: Your sweet and tasty homemade rasmalai is ready. Take it out in a serving bowl and enjoy.

Recipe Card
Rasmalai
Ingredients
For making the chena balls:
- 1 litre milk cow
- 2 tbsp vinegar
- 1 tbsp corn flour
For making the rabdi:
- 1 litre milk cow
- ¼ cup dry nuts roughly chopped, optional
- ½ cup sugar
- Green cardamom 3 to 4 seeds only, crushed
- ¼ tsp saffron kesar, optional
- 1 pinch food colour yellow, optional
For making the sugar syrup (chashni):
- 1 cup sugar
- 3.5 cups water
Instructions
- Boil 1 litre of cow milk on a medium flame. When it comes to a boil, add 1 tbsp of vinegar in it first and stir continuously to make chena. Once it starts to curdle, then add the second tablespoon of vinegar and continue stirring. (Pro tip: Using vinegar in place of lemon juice assures perfect chena. Do not use more than 2 tbsp of vinegar or else the smell will remain in the chena).
- Check the chena. The water and chena should be separate. If it is not, boil it for a few minutes more.
- Strain the chena using a clean cotton cloth. (Pro tip: Do not use a metal strainer to strain the chena from the water. You will need to tie it up with cloth for achieving the perfect texture).
- Squeeze out the additional water from the chena by using a pair of tongs.
- Hang it somewhere for an hour.
- In the meantime, to make the rabdi, heat another litre of cow milk on a medium flame in a separate pan.
- Stir it continuously and mix the malai to bring it to a boil until it becomes slightly thick and reduces to 3/4th of the original quantity of milk. (Pro tip: Scrap the malai from the sides of the pan and mix it with the milk. This will reduce and thicken it quickly).
- Add ½ cup of sugar to it. Mix it nicely and cook for another 2 to 3 minutes.
- Now, add 3 to 4 crushed seeds of green cardamom to it along with ¼ tsp of saffron (kesar). Mix them nicely and cook for another minute.
- Then, add a pinch of yellow food colour. Mix it. (Pro tip: If you do not have kesar or food colour at home, you can make a white rabdi or add a pinch of turmeric or haldi powder in it).
- Cook it for another minute and then add a ¼ cup of dry nuts (roughly chopped) in it. This is also optional.
- Cook for another 2 to 3 minutes so that the nuts become tender and the rabdi a bit thicker. Turn off the flame of the gas stove and let it cool down. It will take about 35 minutes in total to make the rabdi. (Pro tip: Do not make the rabdi too thick or else the chena balls will not be able to absorb it nicely and easily).
- In the meantime, make the chena balls. Take out the chena from the cloth on a plate, crush and knead it nicely to make a dough. (Pro tip: If the chena has become too dry, sprinkle a little bit of water and continue kneading for 8 to 10 minutes).
- Now, add 1 tbsp of corn flour to it and mix nicely for another 5 minutes. Check the doneness by making a small ball of the dough. If you see cracks on the sides, you will need to knead it more until the chena dough is as smooth as butter. (Pro tip: Adding corn flour is crucial as it acts as a binding agent and will prevent the chena balls from falling apart in the sugar syrup).
- Make small pedas from the chena dough. (Pro tip: Do not make round balls of the dough and then press them to make the pedas. Instead, press them while you are moving the ball between your palms. This will prevent them from developing cracks on the sides).
- Now, to make the sugar syrup (chashni), take 1 cup of sugar in a separate pan and add 3.5 cups of water. Maintain this ratio of water and sugar. Heat it on a high flame and stir it until the sugar dissolves and the syrup starts boiling.
- Now, put the chena balls one by one in the boiling sugar syrup very carefully so that they do not break. Cook them on a high flame for about 3 minutes.
- After 3 minutes, cover the pan and cook the chena balls on a high flame for 8 minutes.
- After 8 minutes, flip each of the chena balls very carefully and let them cook for another 15 minutes on a low to medium flame without covering the pan and flipping them occasionally in between.
- Check the doneness of the chena balls after about 26 to 27 minutes of total cooking time. If it is done, turn the flame of your gas stove to high and boil it for another minute. When it is done, switch off the flame and let the chena balls cool down completely.
- Now, take a separate bowl, squeeze each chena ball and put it in the bowl.
- Then, pour the rabdi on every chena bowl covering all of them. Adding more rabdi is needed because it will be absorbed by the chena balls. Cover it and let it sit for 5 to 6 hours so that the chena balls become spongy by absorbing the rabdi. Do not refrigerate it at this stage because the chena balls will not be able to absorb the rabdi nicely. Refrigerate it after it is done. (Pro tip: While pouring the rabdi on the chena balls, either of the two must be warm, preferably the rabdi. If the rabdi is too cold, warm it in the microwave oven or gas stove and then pour it on the chena balls).
- Your sweet and tasty homemade rasmalai is ready. Take it out in a serving bowl and enjoy.


