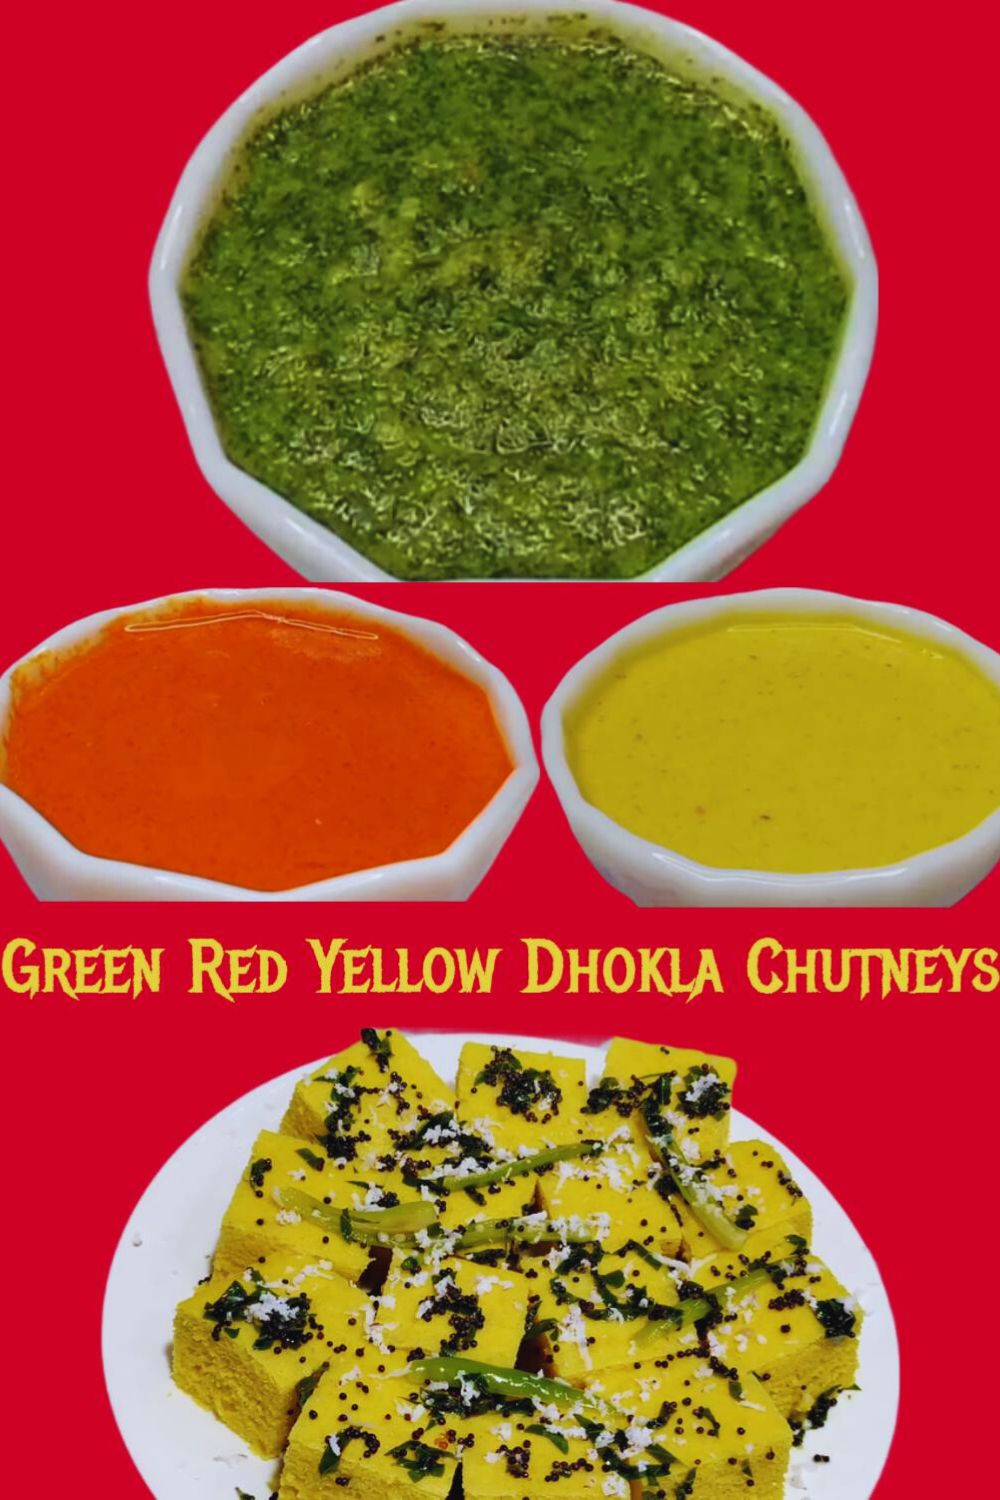
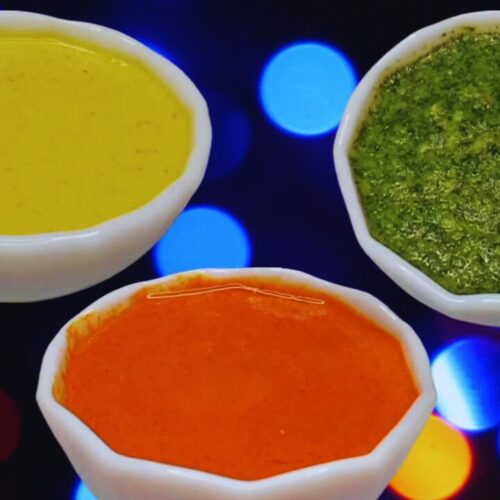
Dhokla chutney can be of different types, made from fresh coriander and mint leaves, green or red chilies, lemon juice and more. Irrespective of the type, it is quite easy to make dhokla chutney at home. Here in my straightforward recipe, you will find three different variants of dhokla chutney. Read on to know the easy steps for each.
KEY TAKEAWAYS
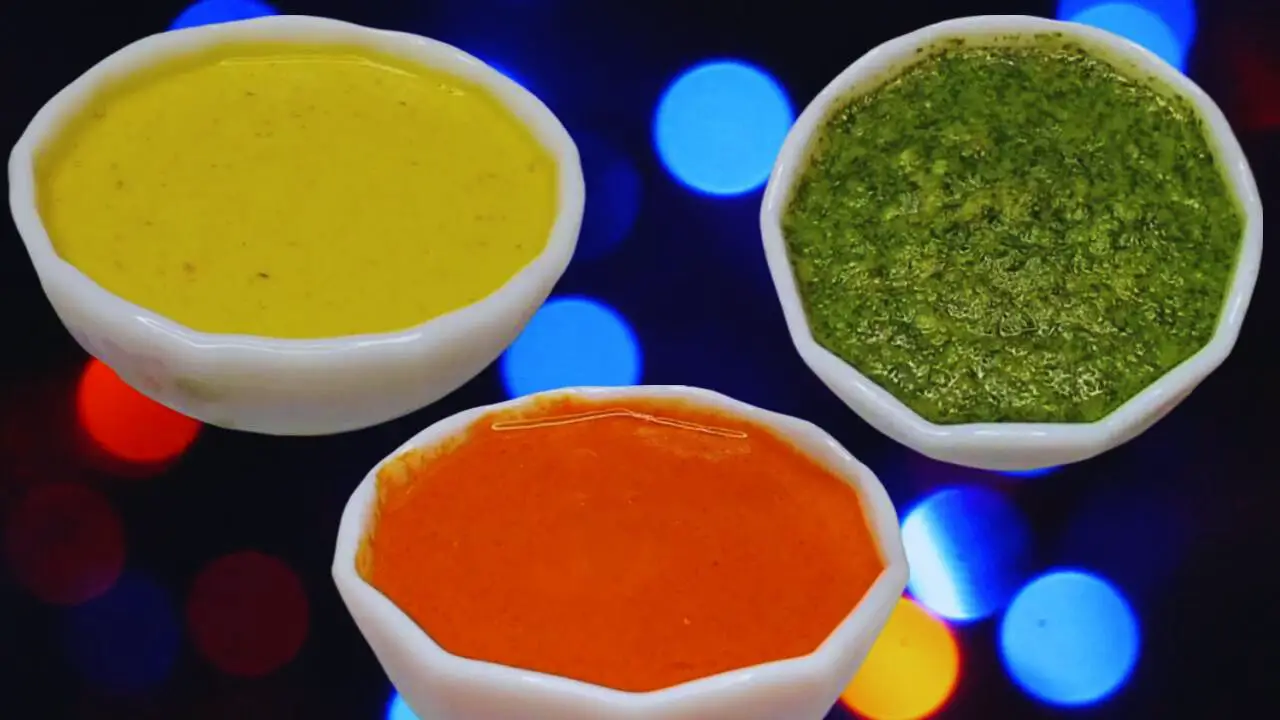
- Elevate the taste of dhokla pairing it with green, red, or yellow chutneys.
- Store the chutneys in separate airtight containers. Put it in the fridge for extended shelf life.
- In addition to dhokla, you may also pair these chutneys with khandvi, samosa, fritters, pakoras, sandwiches, pav bhaji, chaat varieties, aloo tikki, and vegetable stir-fries.
- Dhokla chutneys normally taste spicy, zesty, and citrusy.
- Mint yogurt chutney, coconut chutney, tamarind chutney, and even tomato chutney may resemble the taste of dhokla chutney.
This chutney recipe came from a lady who runs a used book stall near the railway bridge. One rainy day, I was browsing her old magazines while waiting for the rain to stop. She was having her lunch since there were no customers in the shop at that time other than me. She invited me to join her, which I politely declined, but was highly intrigued at the bright colored chutney she was having with her dhokla.
I asked how it tasted and the recipe to make it. While offering me a spoonful, she gave me the recipe from memory. I tried it that night. My husband said it tasted nostalgic, and my sons said it felt “like old stories.” Now, it’s our monsoon comfort. That moment reminded me that wisdom lies not only in pages—but sometimes, in humble food wrapped beside them.
How to Cook Dhokla Chutney? (Step by Step Guide with Images)
For Dhokla Green Chutney
To prepare the green chutney served with dhokla, these are the steps to follow:
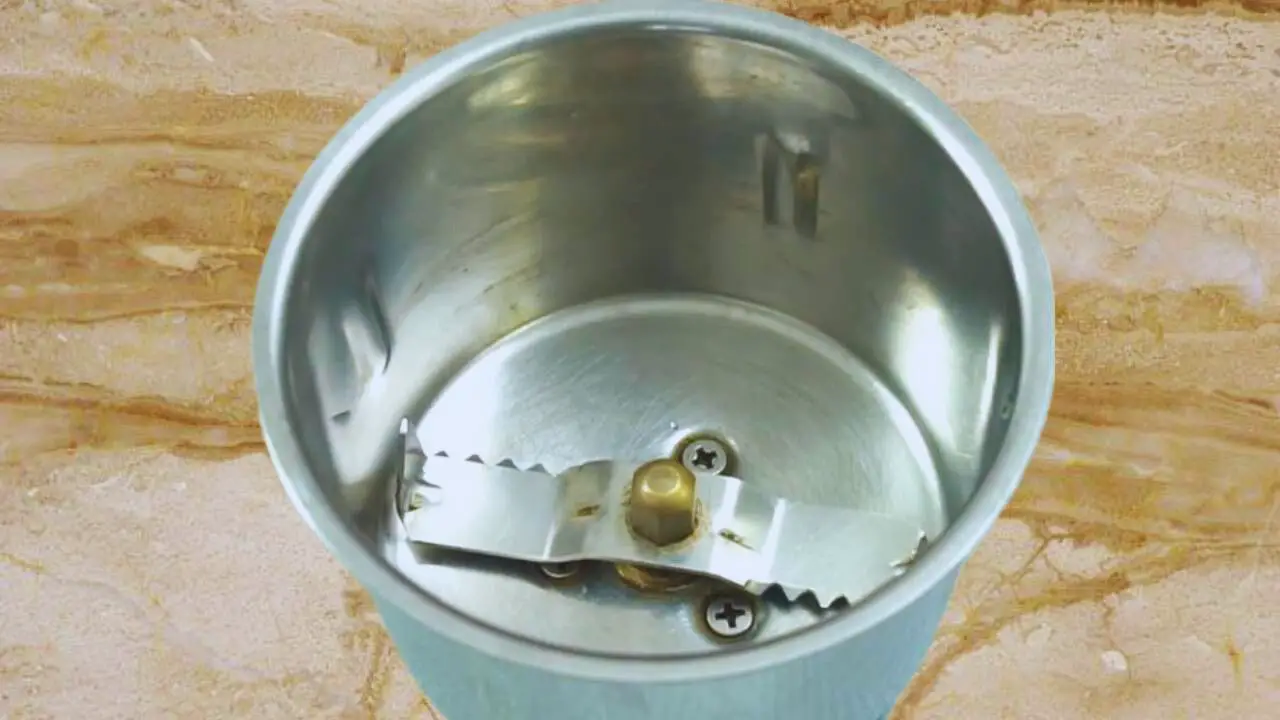
Step 1: Take a clean grinder.
Step 2: Put 1 cup of fresh and green coriander leaves into the grinder.
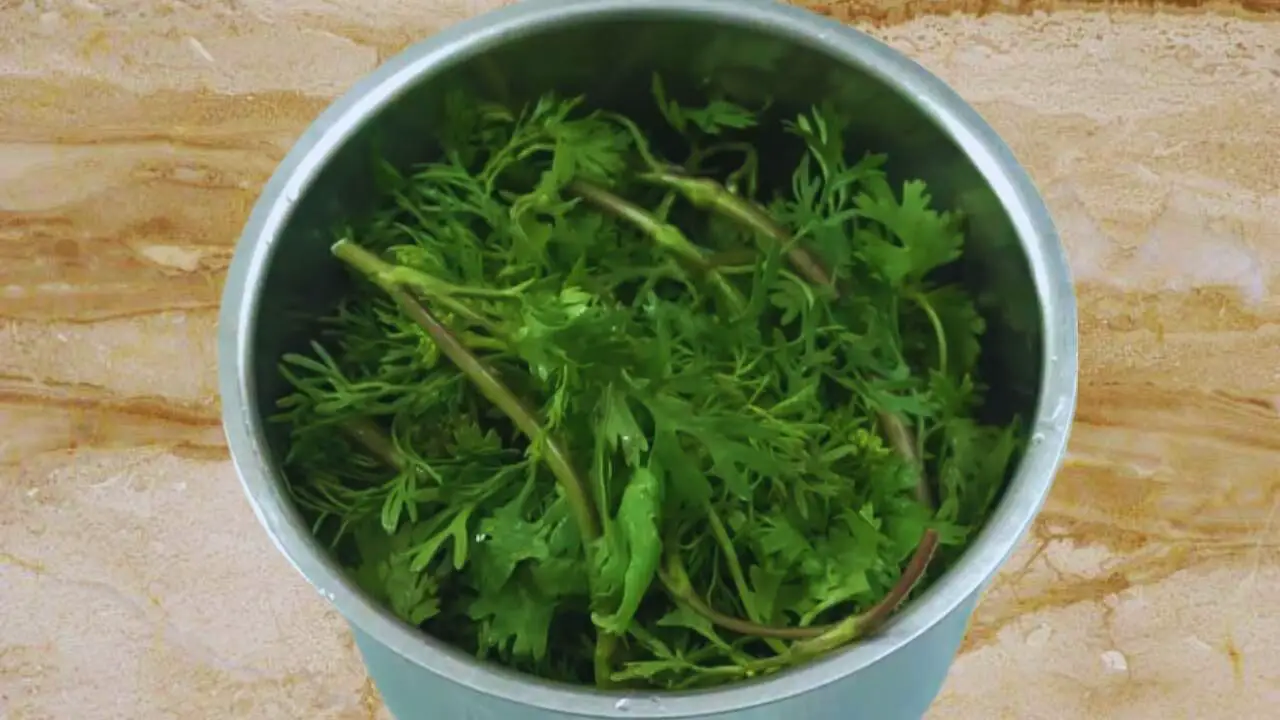
Step 3: Then add ½ a cup of fresh and green mint (pudina) leaves to it.
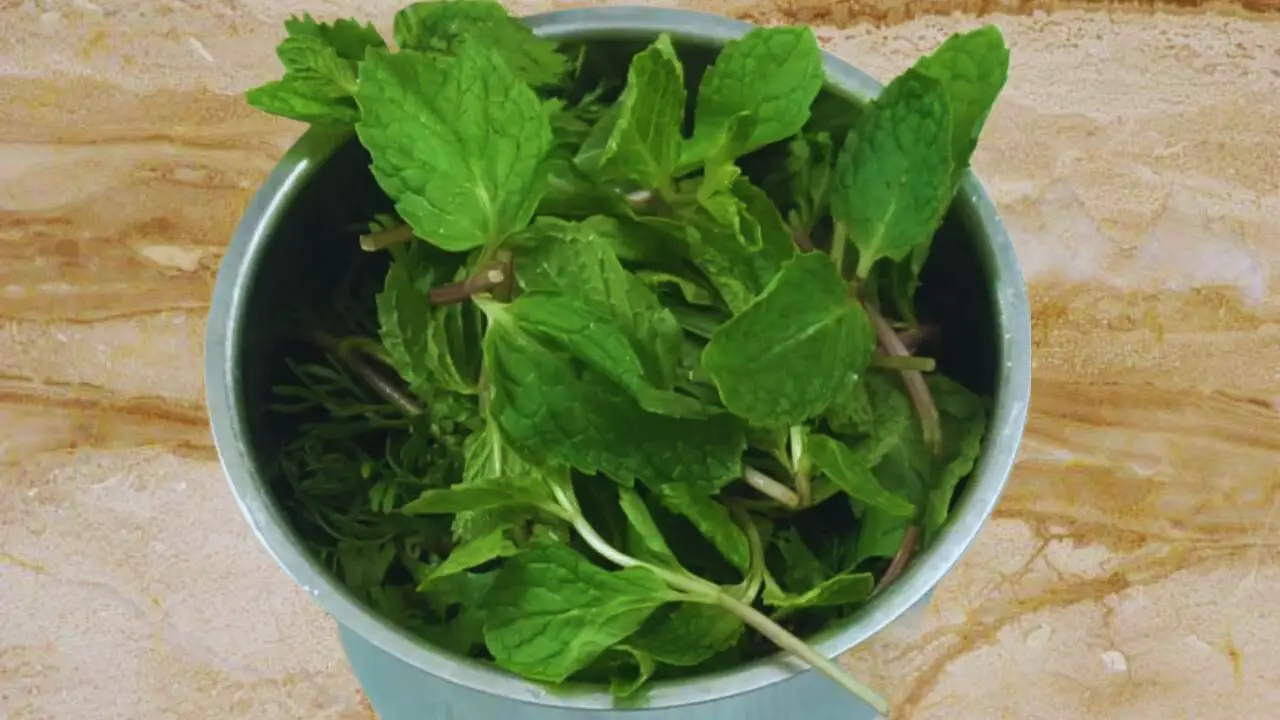
(Pro tip: If you do not like mint leaves, you can skip them. However, adding mint leaves to the green dhokla chutney will give it a distinct taste).
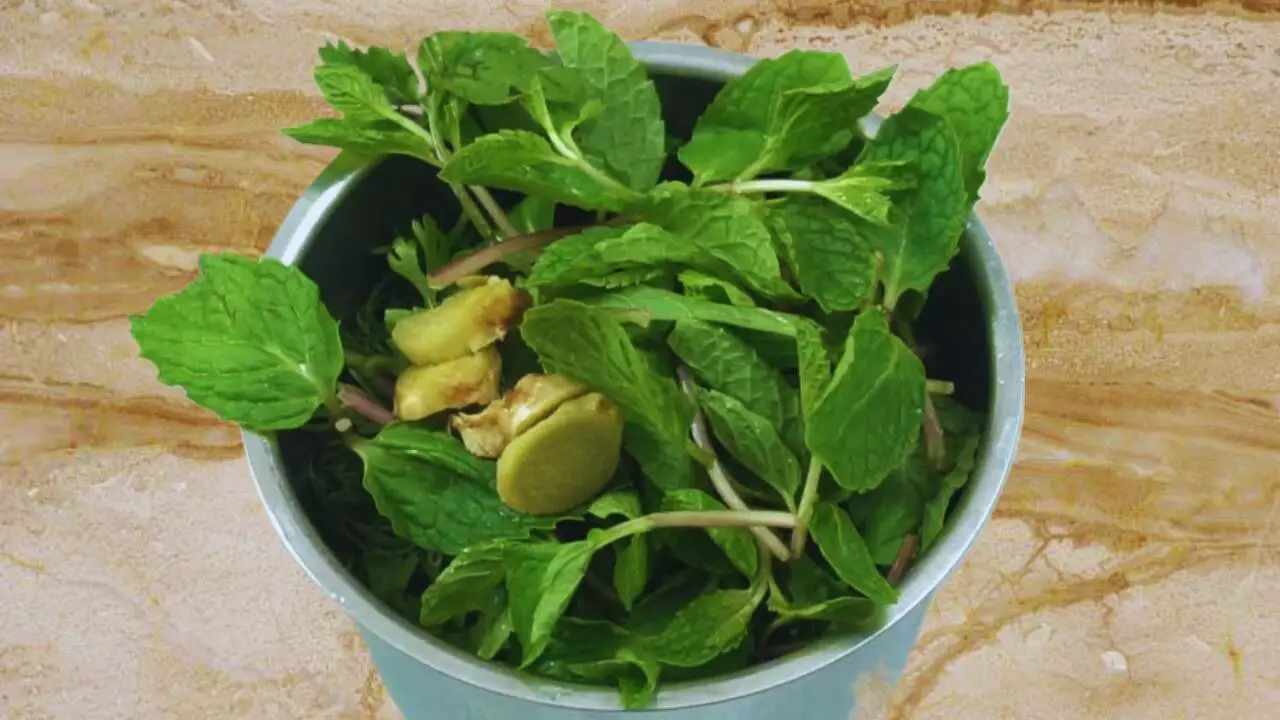
Step 4: Now, add 2 pieces of 1-inch size fresh and deskinned ginger, cut into small pieces, in the grinder.
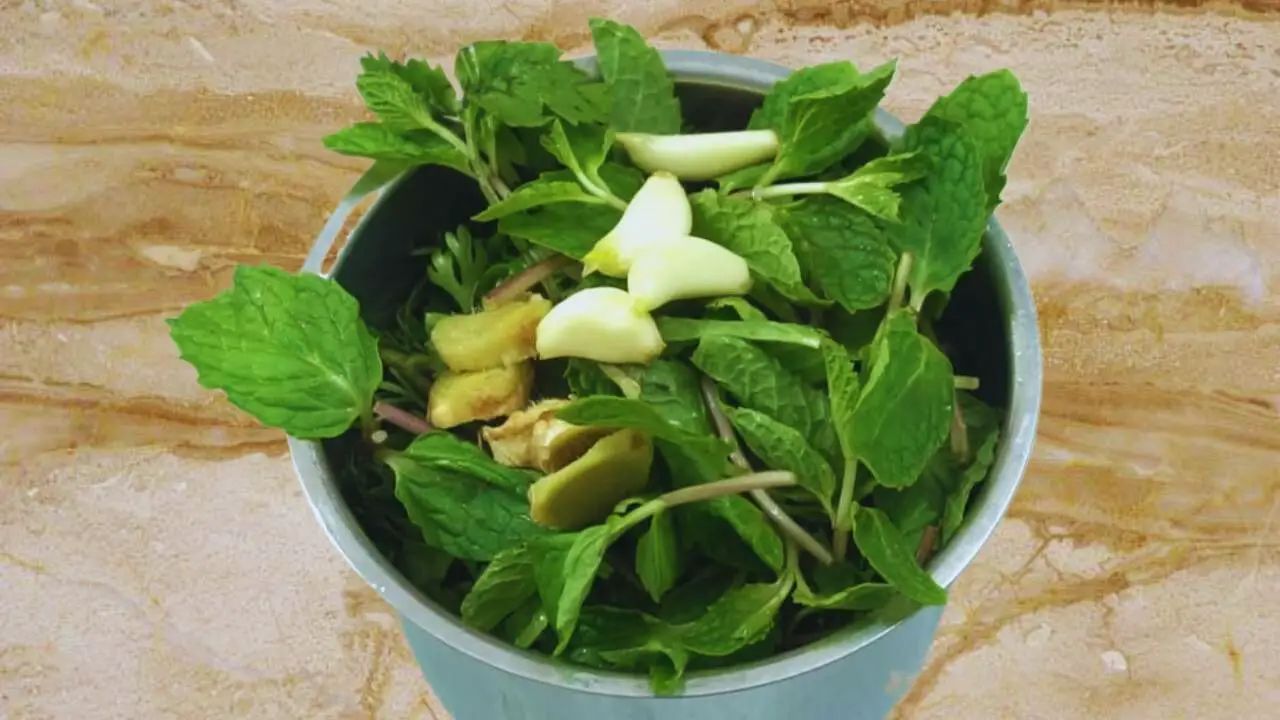
 Step 5: Then add 6 cloves of fresh, deskinned garlic to the content in the grinder.
Step 6: Also add 4 pieces of fresh green chilies to the ingredients, each broken in half.
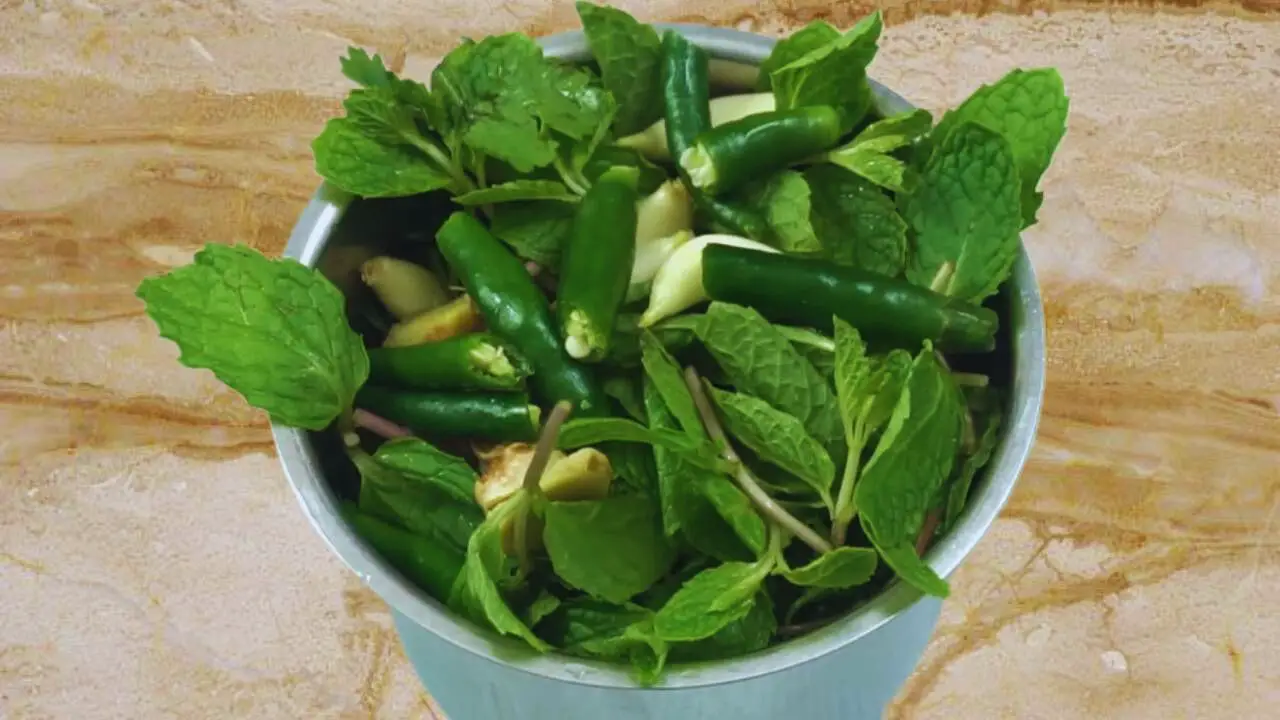
(Pro tip: You can alter the number of fresh green chilies according to your needs and preference of hotness).
Step 7: Now, add ½ tsp of regular table salt to the ingredients.
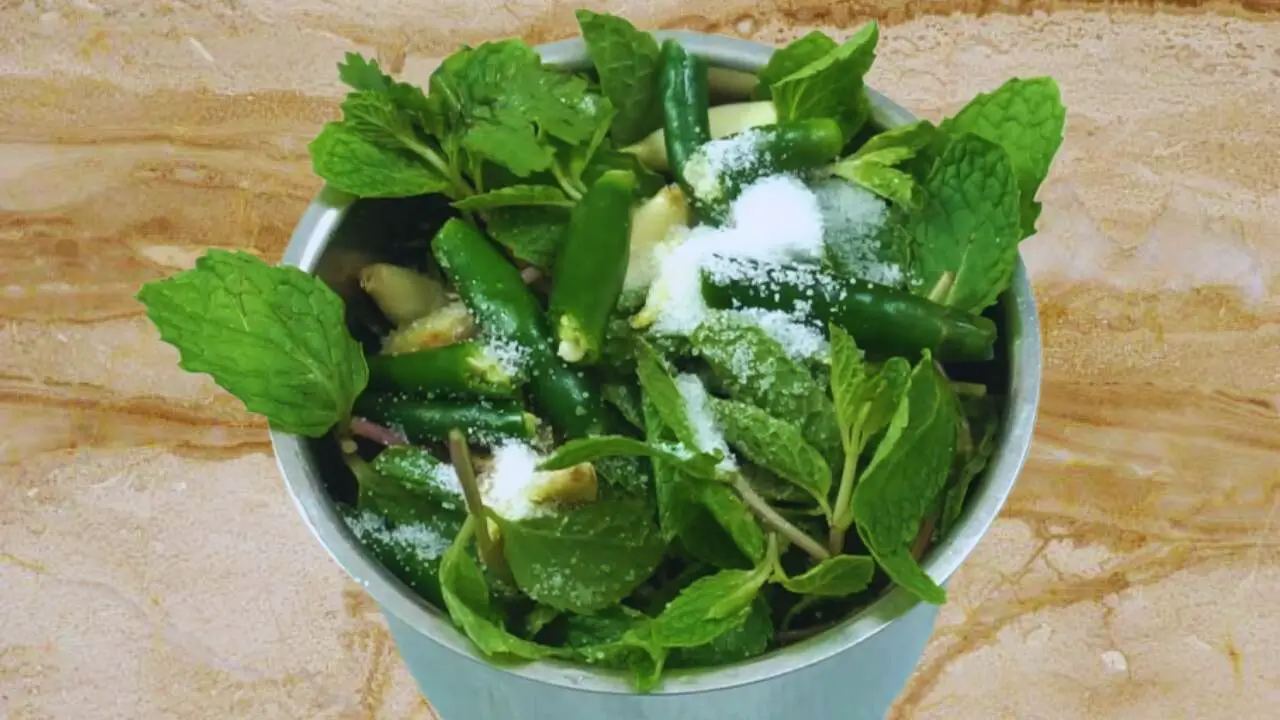
Step 8: Finally, follow it with 1 tsp of fresh lime juice.
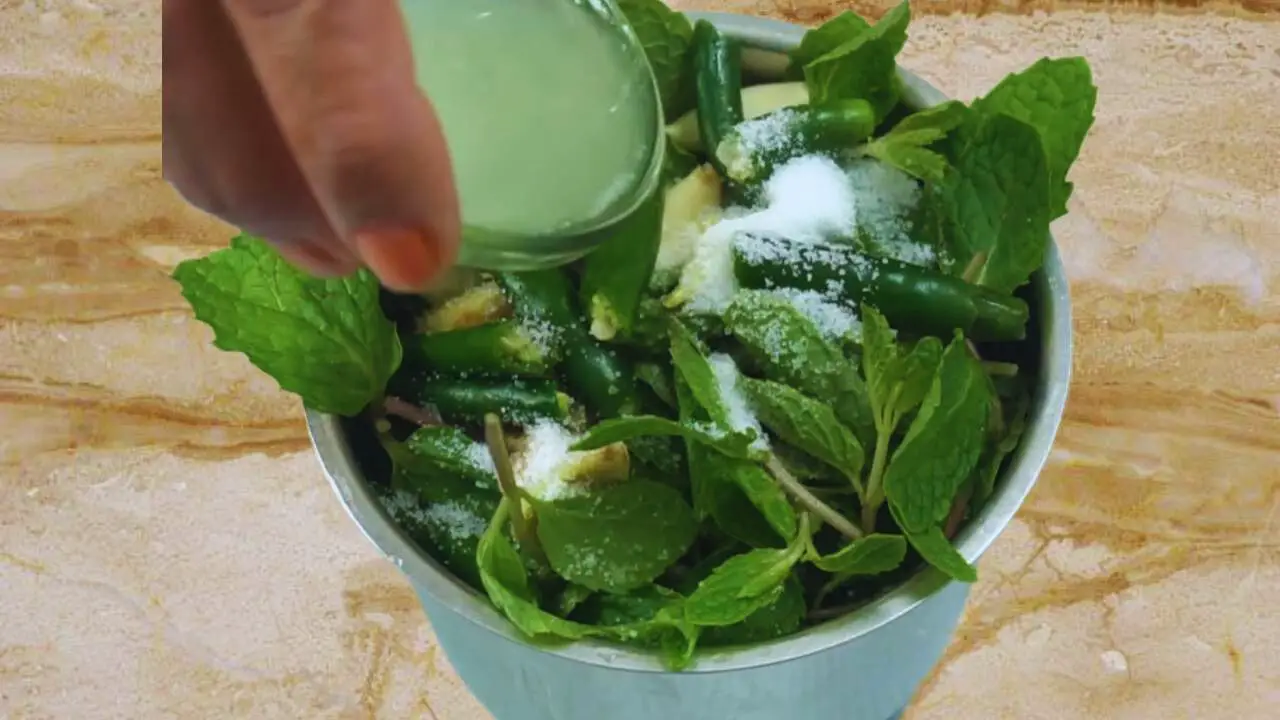
(Pro tip: If you want your green dhokla chutney to be sweet, you can add 1 tbsp of normal sugar to the ingredients in the grinder at this point. You may also add 1 tbsp of peanut oil for added flavor).
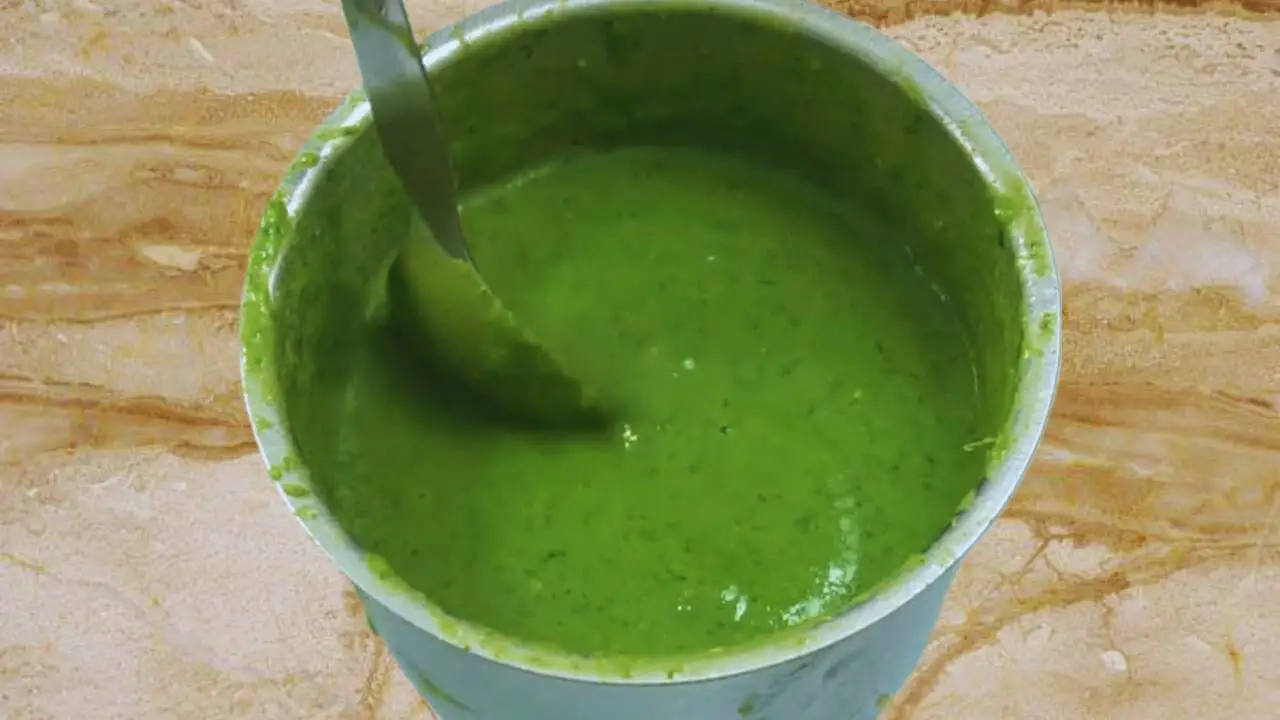
Step 9: Grind the content into a coarser paste.
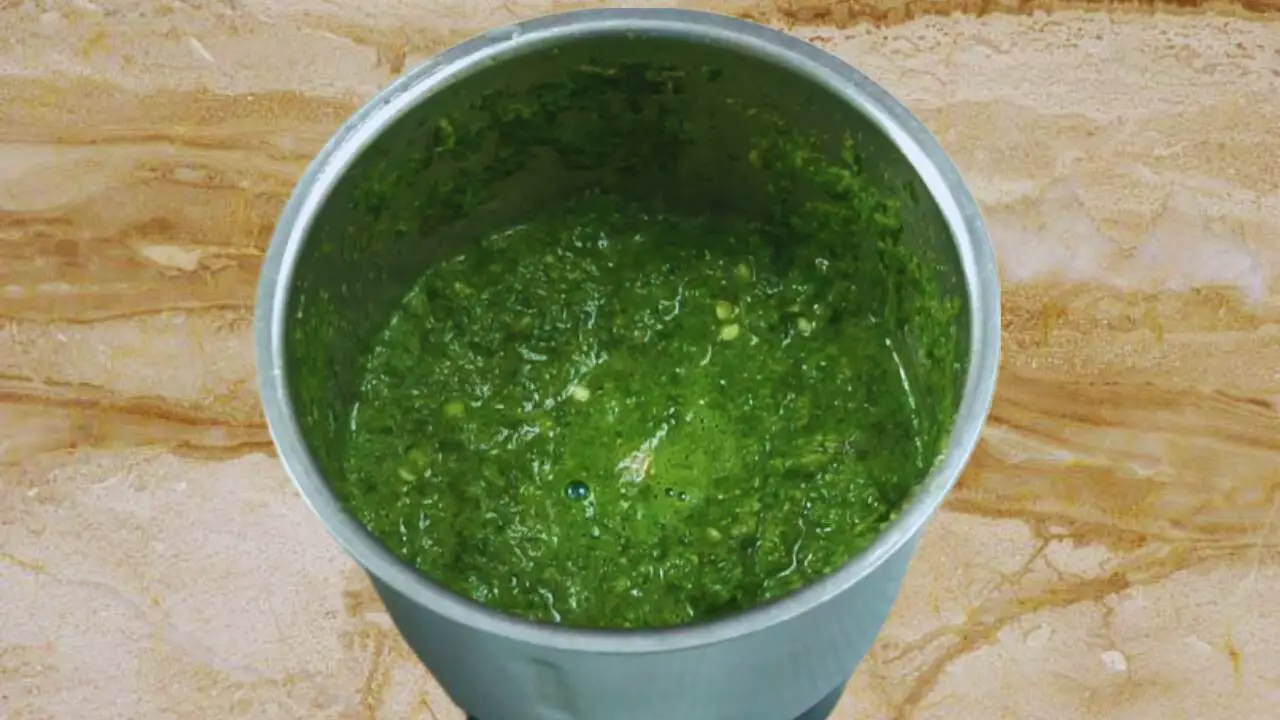
(Pro tip: If the paste is too thick, you may add a spoon of water to make it thinner and blend again).
Step 10: Now, add the 3 pieces of dhokla to the paste. Cut them into small pieces for seamless churning.

(Pro tip: Adding dhokla to the paste will add to the color, texture, and taste of the green chutney).
Step 11: Grind it once again to a finer paste.
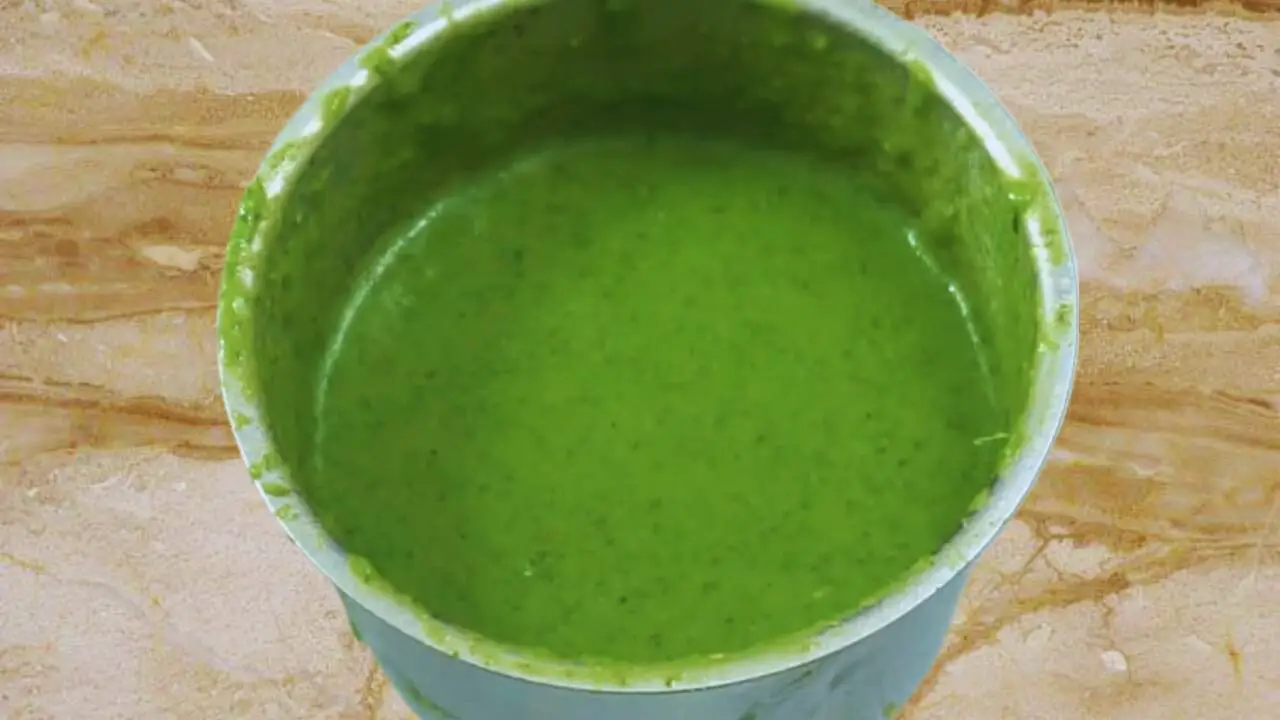
Step 12: Check the consistency.
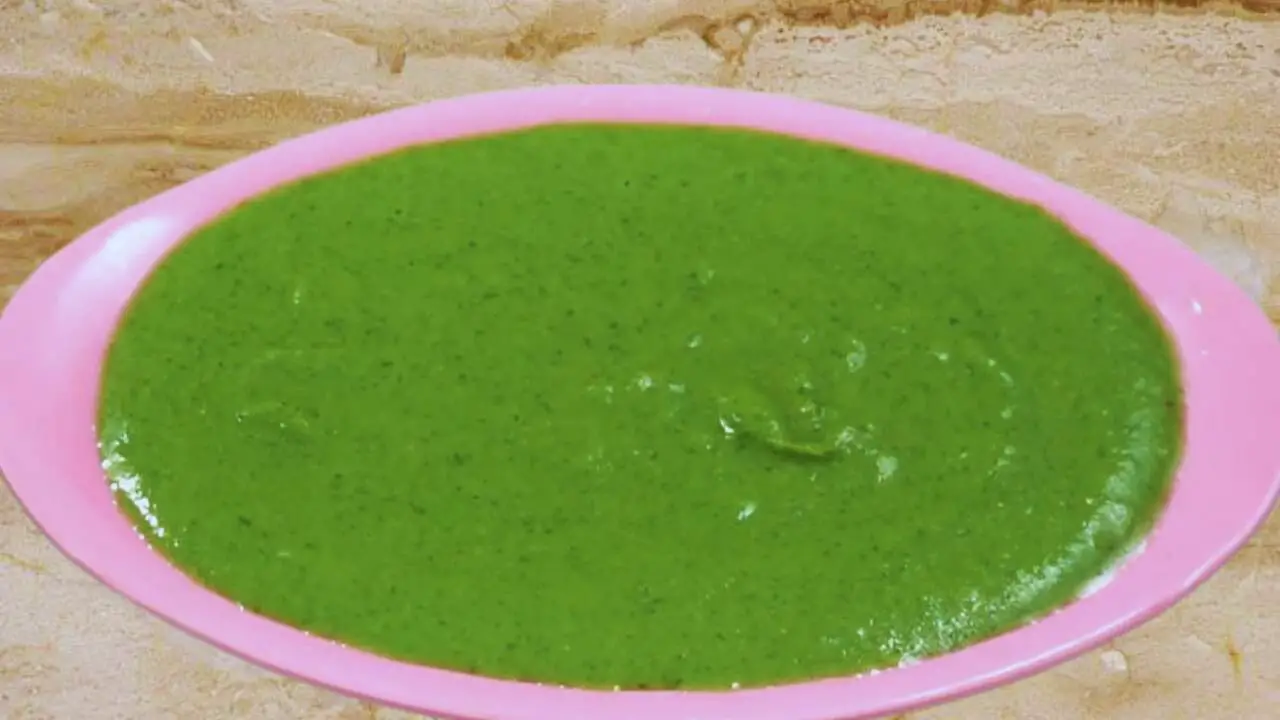
Step 13: If you are satisfied with it, transfer the paste to a plate or bowl from the grinder and the green chutney for dhokla is ready to be consumed.
For Dhokla Red Chutney
To prepare the red chutney served with dhokla, these are the steps to follow:
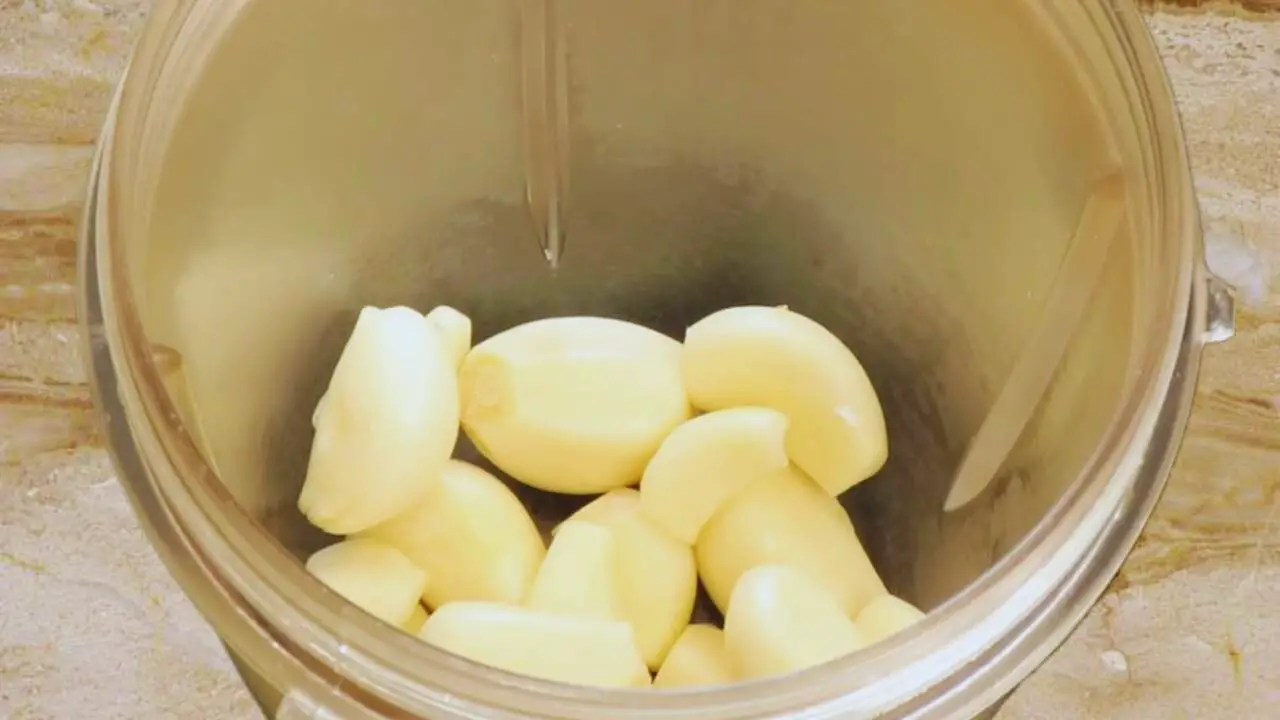
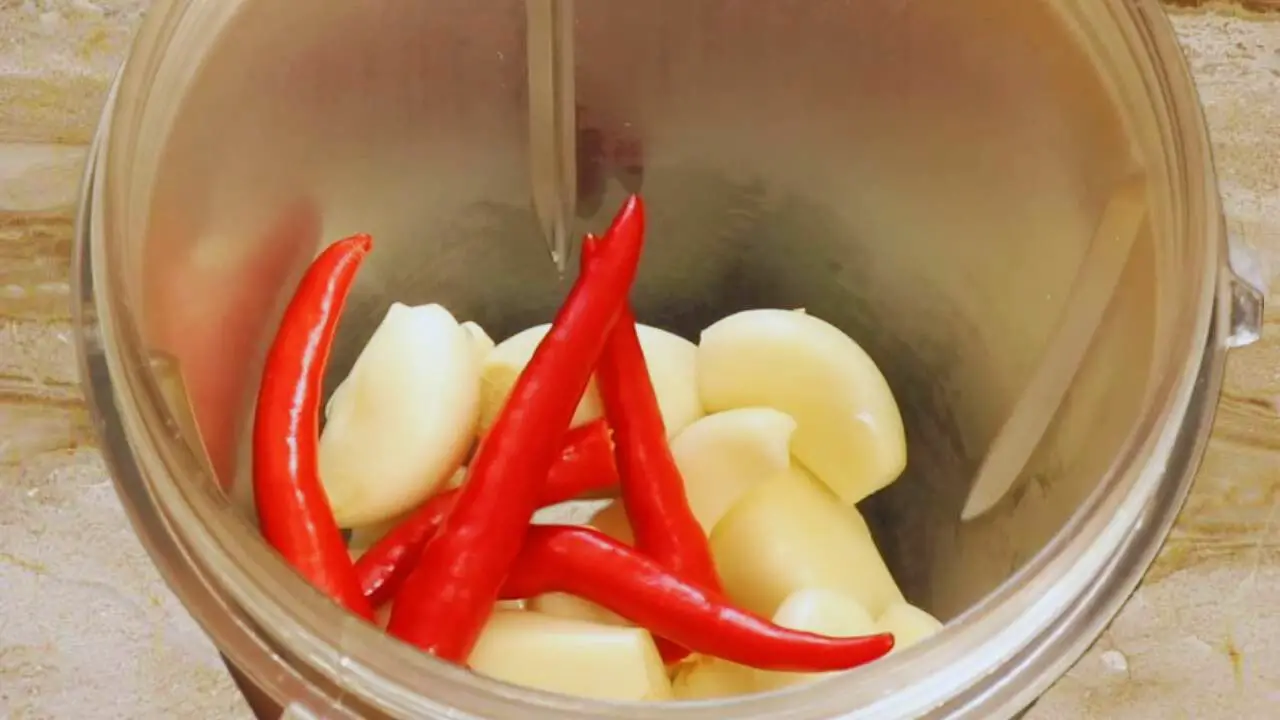
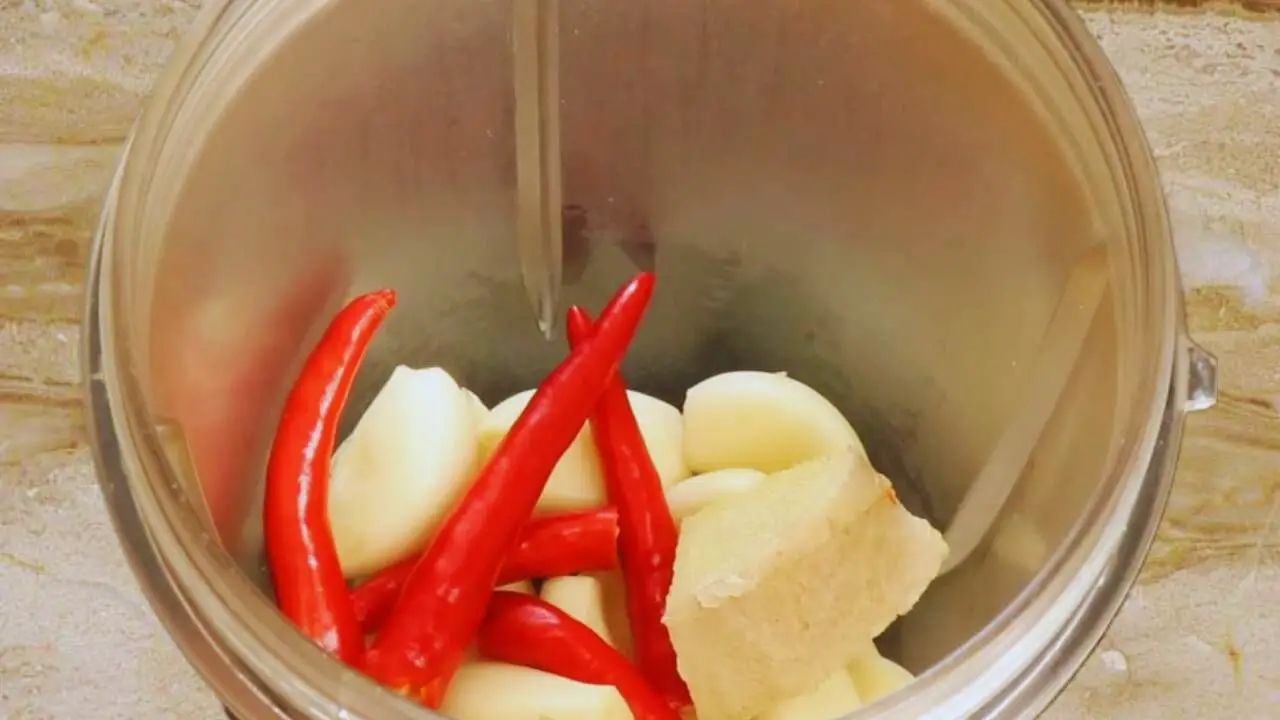
Step 1: Take a grinder and put about 10 to 12 cloves of fresh and deskinned garlic in it.
Step 2: Then add 5 pieces of fresh red chilies into the grinder.
Step 3: Follow it with 1 piece of fresh and deskinned ginger of about 1-inch size. You may cut it into small pieces.
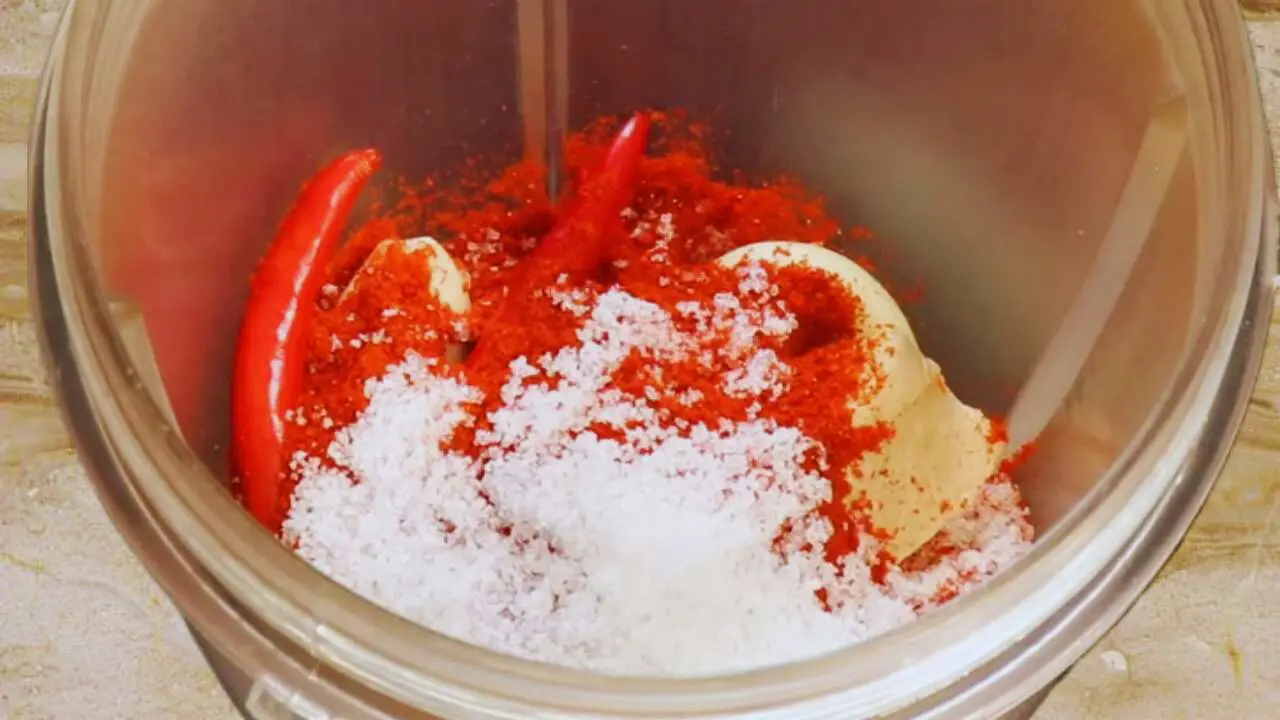
Step 4: Next, add 2 tbsp of Kashmiri red chili powder to it.

(Pro tip: This is the main ingredient that will give the red color of the dhokla chutney. So, be generous with it).
Step 5: Now add ½ tsp of table salt to the ingredients.
Step 6: Then squeeze 1 tbsp of fresh lemon juice to the content in the grinder. One-half of a standard lemon should be enough for it.
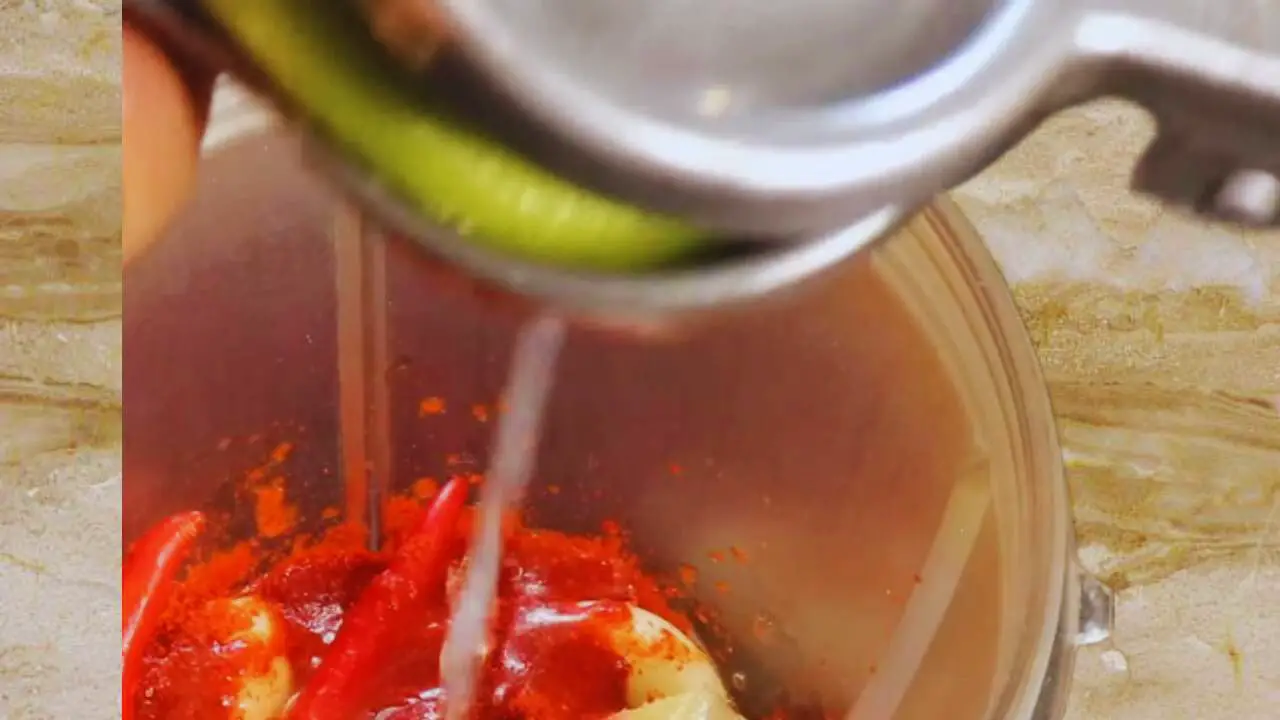
Step 7: Follow it with 1 tbsp of peanut oil.
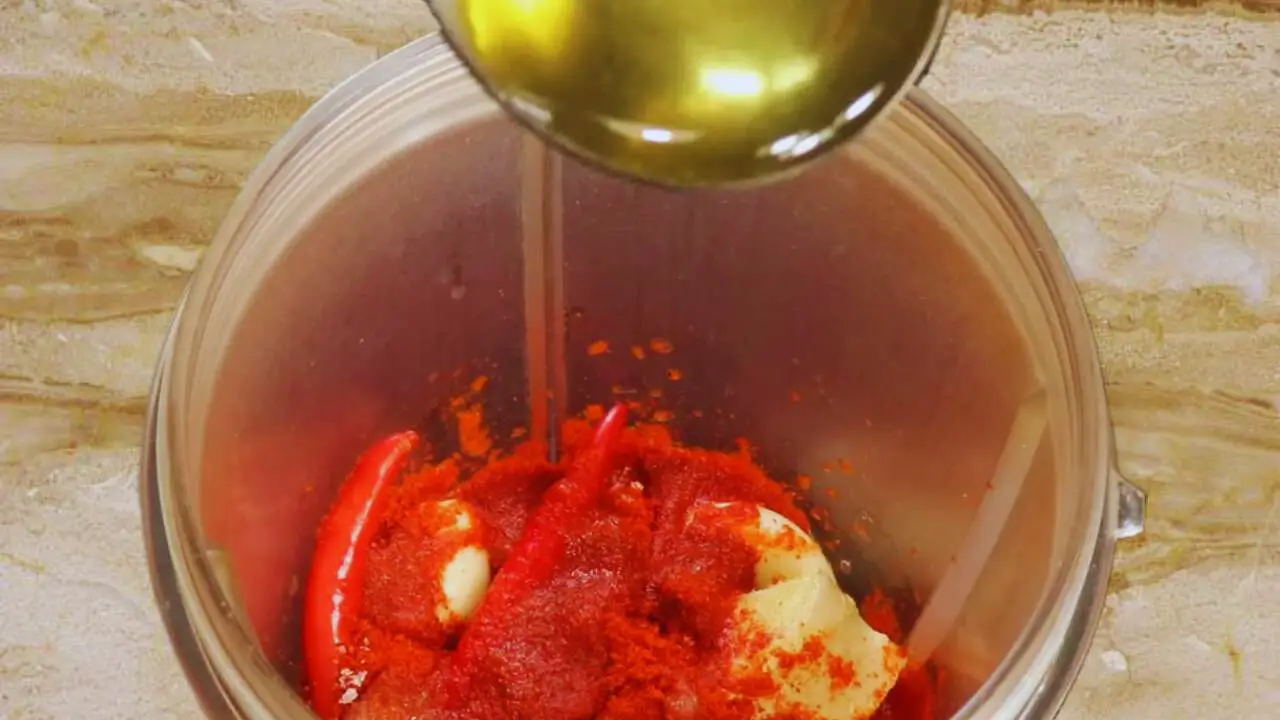
(Pro tip: You may use other varieties of oil for it, such as olive oil, but using peanut oil is better to have a better flavor and taste).
Step 8: Then add 1 piece of dhokla to the content. Make sure you slice it into small halves.
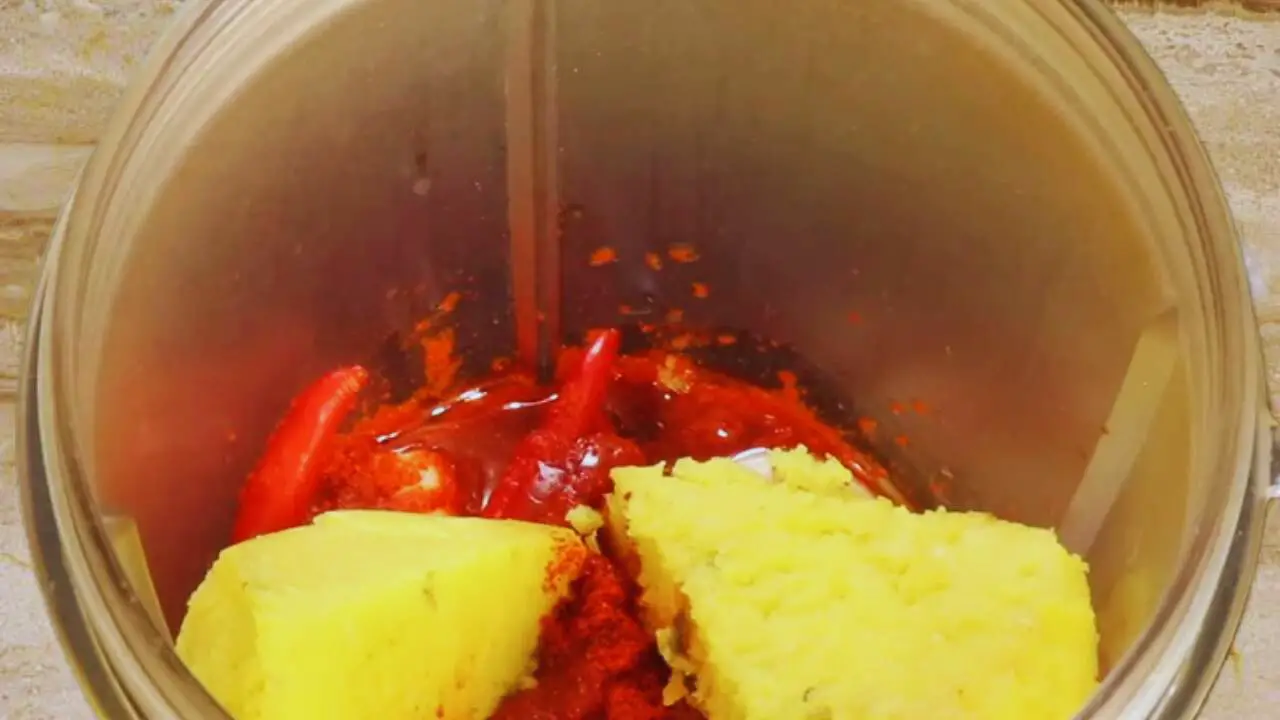
Step 9: Finally, add 2 tbsp of water to the ingredients in the grinder.
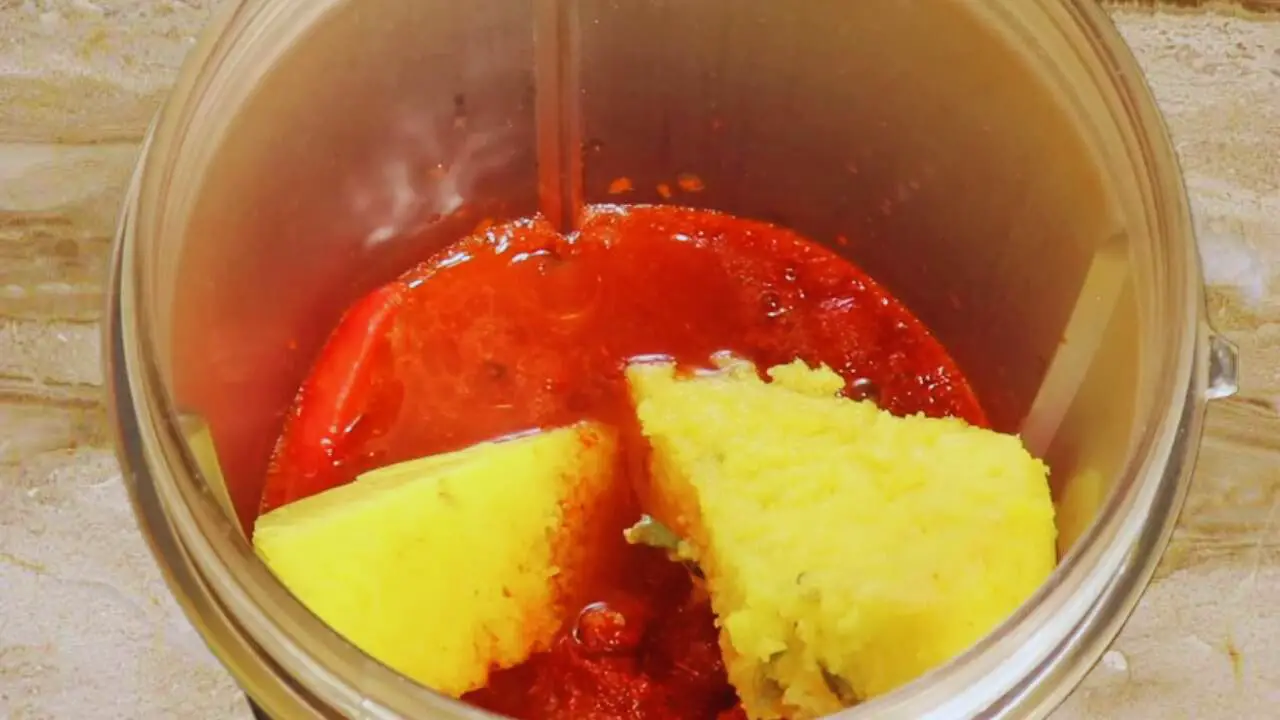
Step 10: Blend the ingredients nicely to get a fine paste.
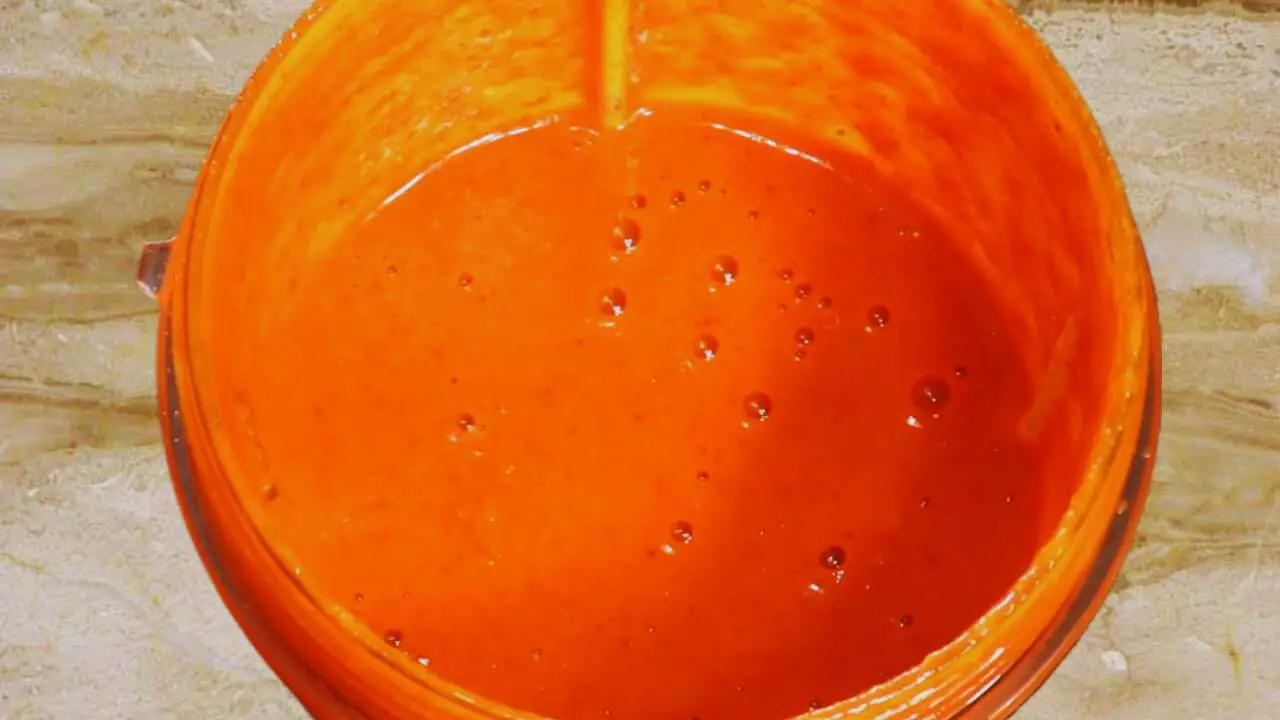
Step 11: Transfer the paste from the grinder to a bowl and the red chutney for dhokla is ready to be served.

For Dhokla Yellow Chutney
To prepare the yellow chutney served with dhokla, these are the steps to follow:
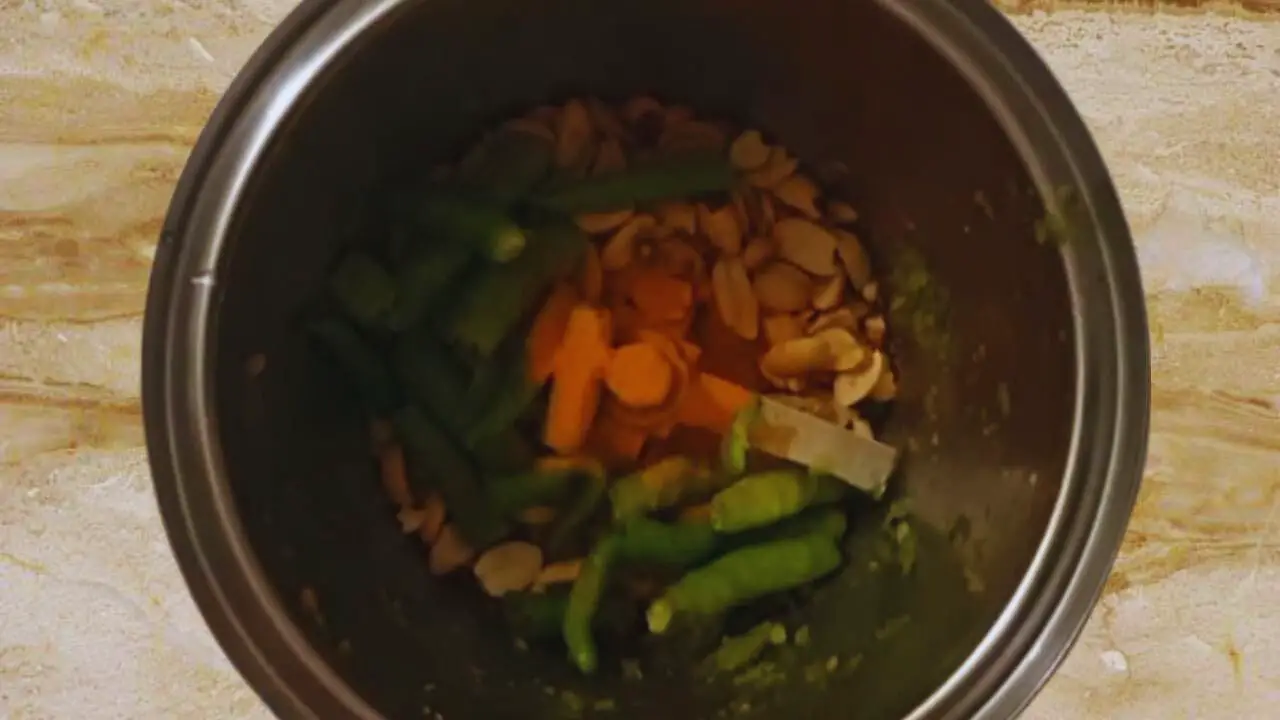
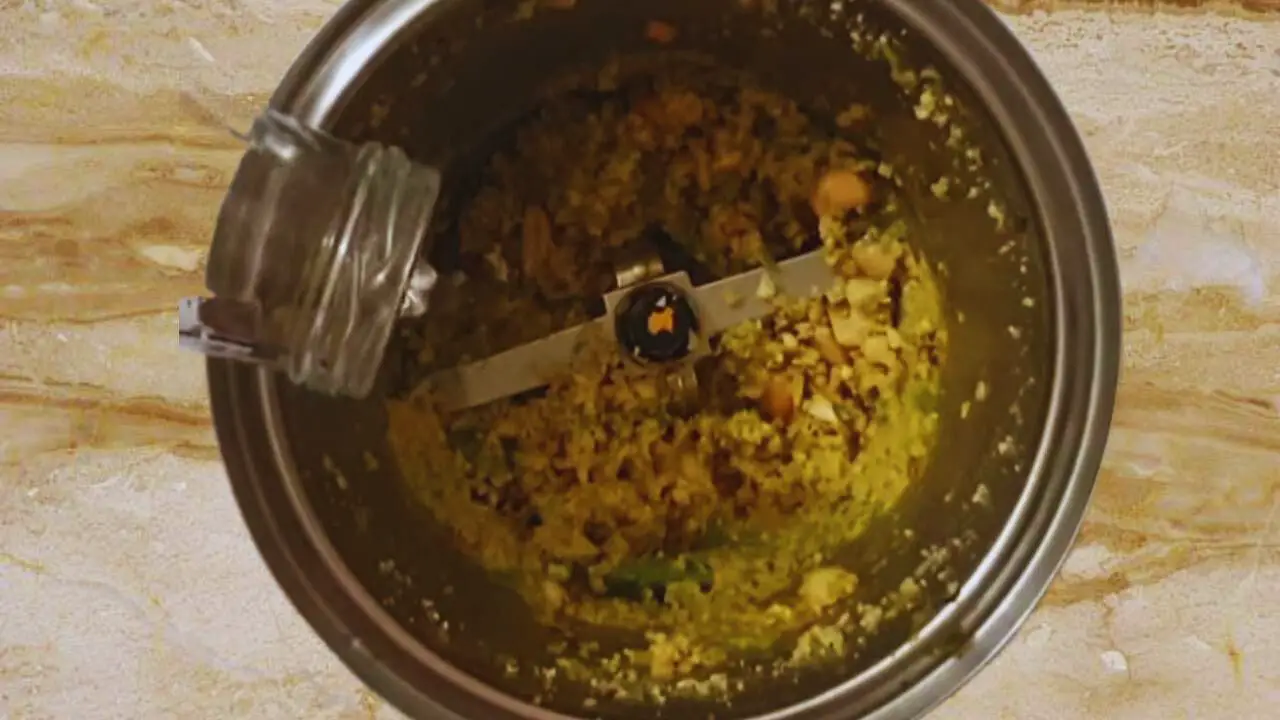
Step 1: Take a grinder and put ½ cup of roasted peanuts, 6 to 8 pieces of fresh green chilies, each broken in half, and ½ tsp of normal table salt in it.
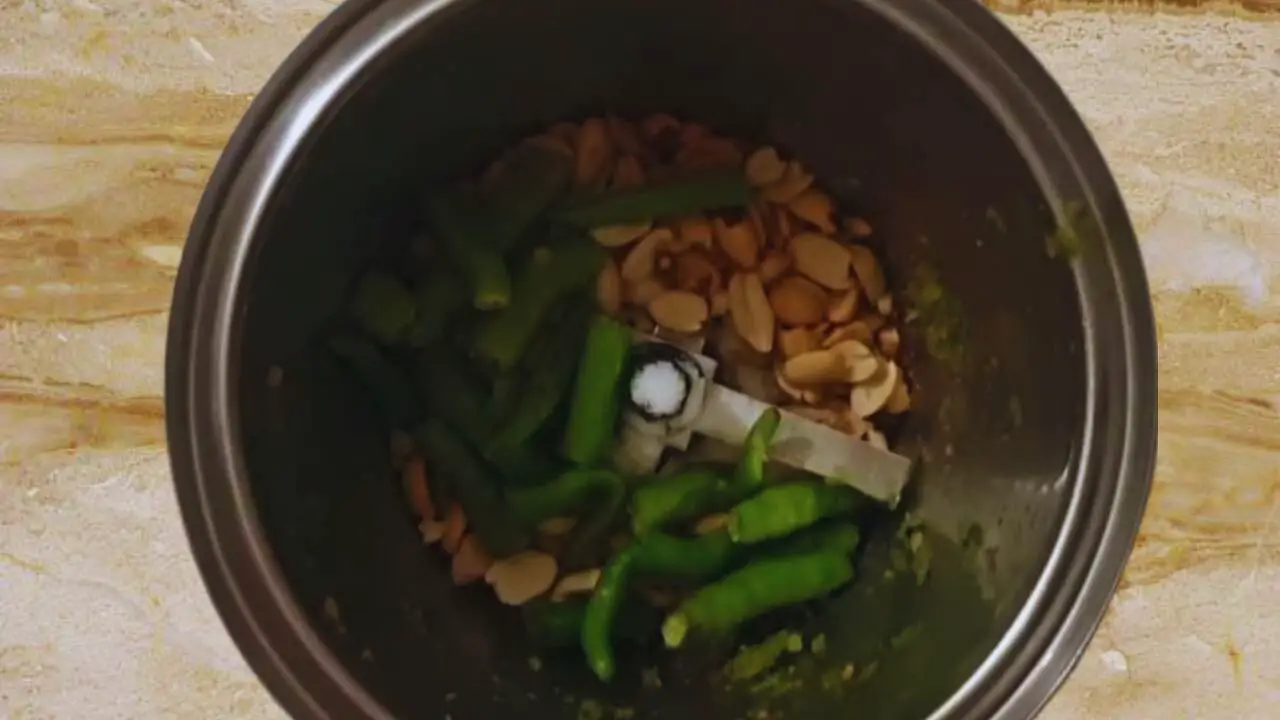
Step 2: Squeeze 1 tsp of fresh lemon juice to the ingredient. About ½ piece of a standard lemon will be enough for that. Keep the other half aside.
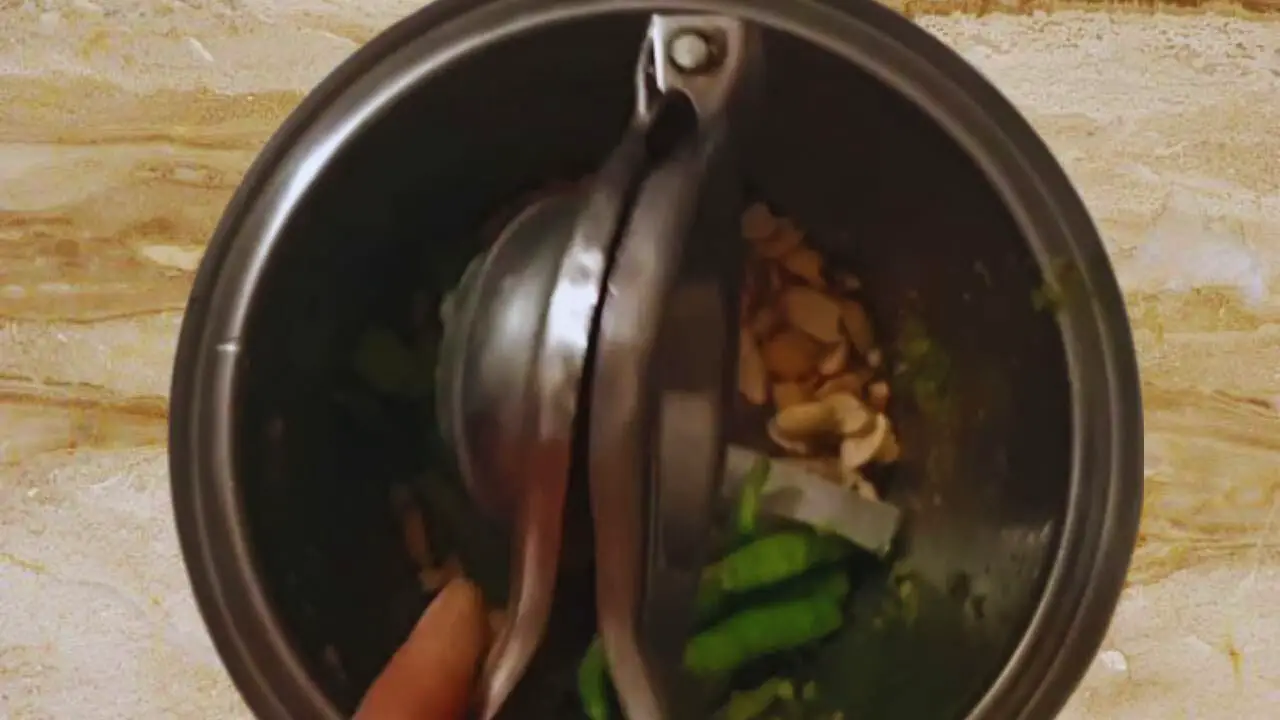
Step 3: Finally, add ½ tsp of turmeric powder to the content in the grinder.
(Pro tip: You may add 1 tbsp of sugar to the content if you want to add some sweetness to the chutney).
Step 4: Now grind the ingredients roughly.
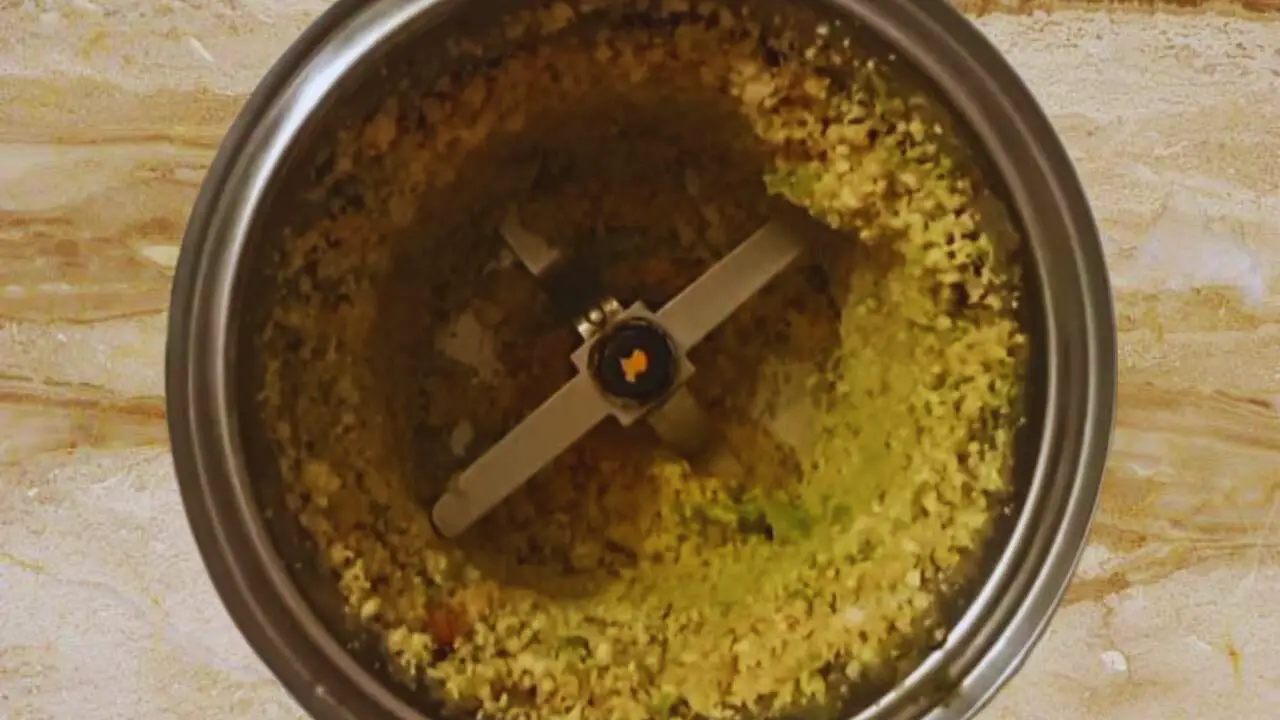
Step 5: Mix them nicely using a spoon and check the coarseness of the paste.
Step 6: Now, according to the coarseness of the paste and the fineness you want in it, add 3 to 4 tsp of water to the mixture.
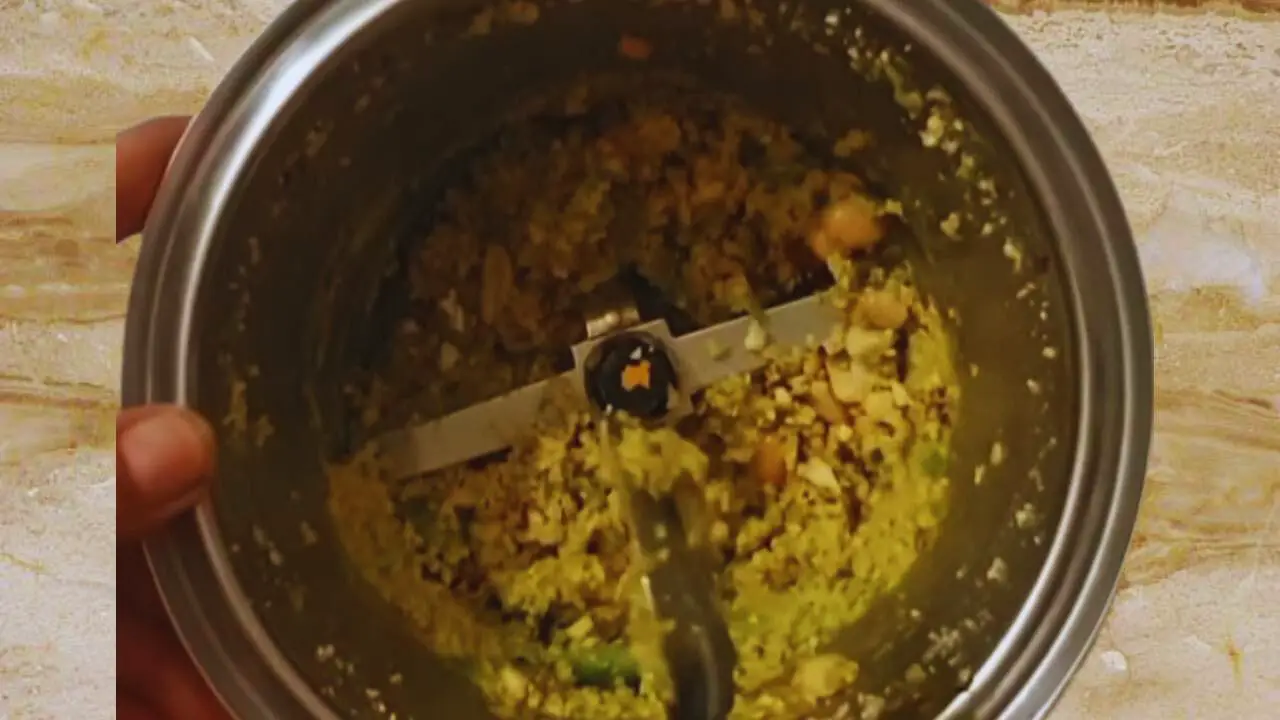
Step 7: Finally, squeeze another teaspoon of fresh lime juice into the content. Use the other half of the lemon that you kept aside earlier.
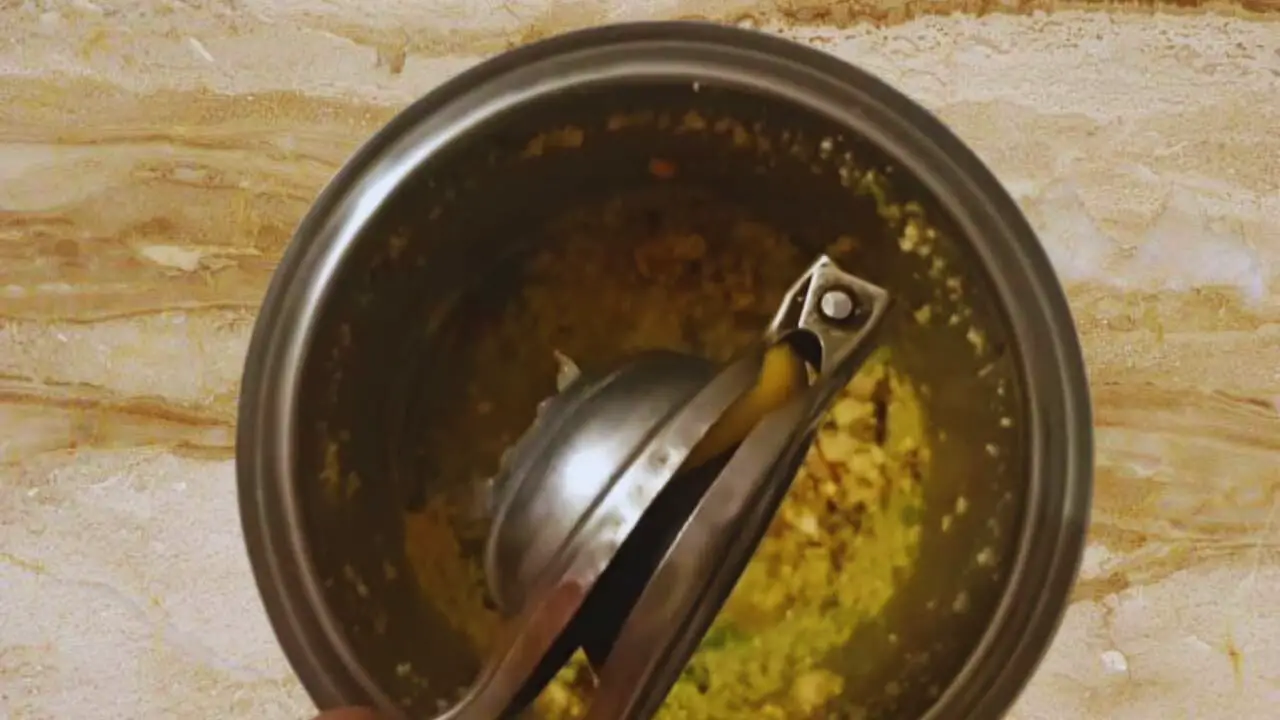
Step 8: Blend them all nicely to get a fine paste.
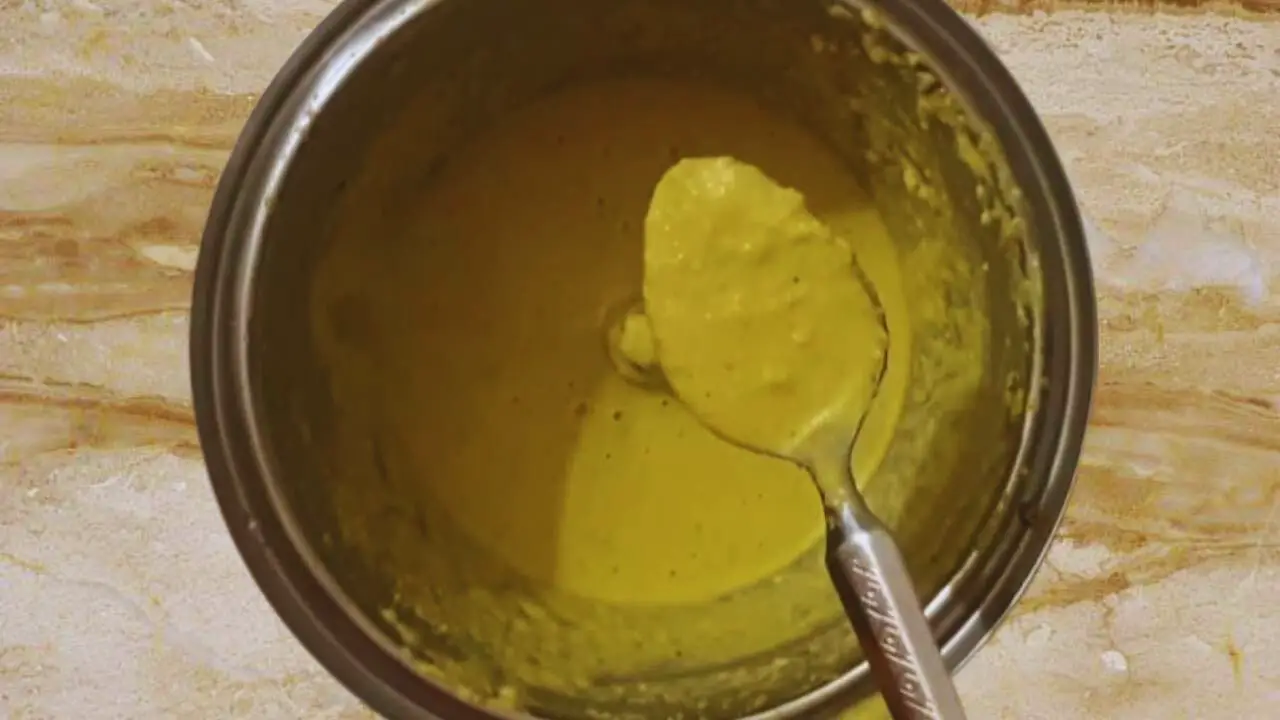
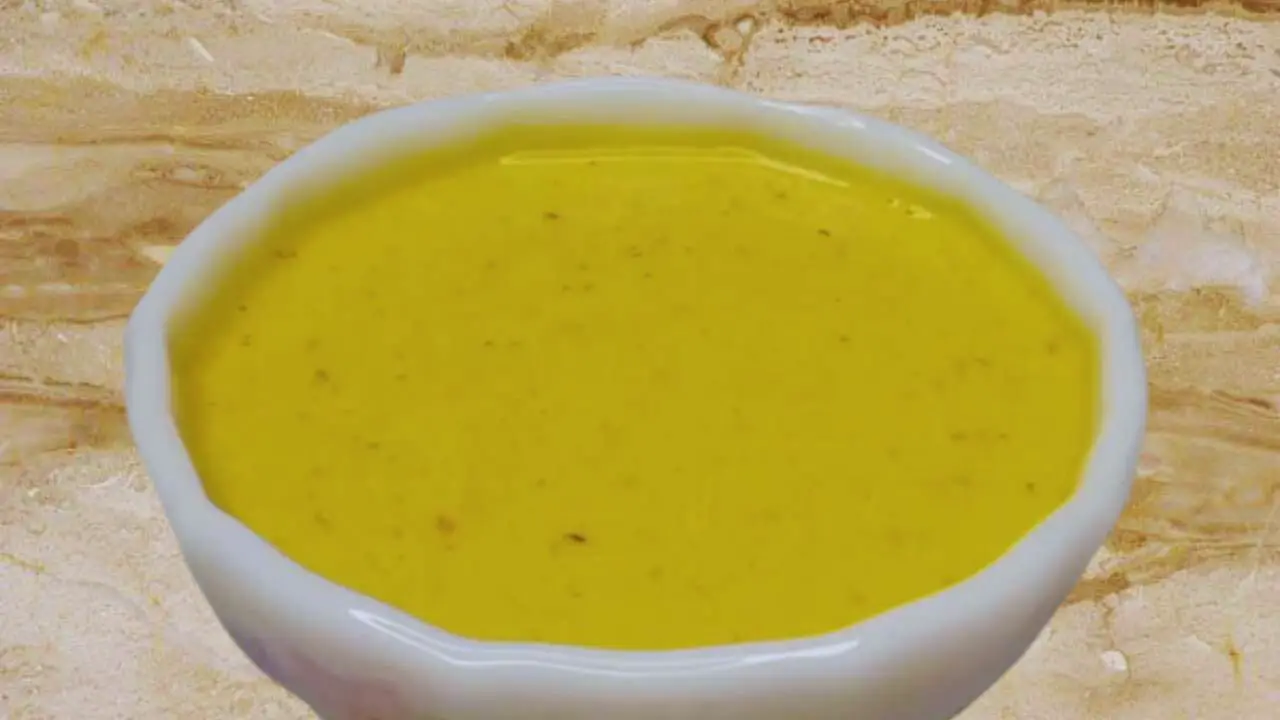
Step 9: Transfer the paste from the grinder to a bowl and your yellow dhokla chutney is ready to be used.
Recipe Card
Dhokla Chutney
Ingredients
For Dhokla Green Chutney
- 3 pieces Dhokla
- 1 cup Fresh coriander leaves
- ½ cup Fresh mint (pudina) leaves
- 6 cloves Garlic
- 2 pieces Ginger 1-inch size (deskinned and cut into small pieces)
- 4 pieces Fresh green chilies medium size
- 1 tbsp Fresh lemon juice
- ½ tsp Table Salt
For Dhokla Red Chutney
- 12 cloves Garlic
- 5 pieces Fresh red chilies
- 1 piece Ginger deskinned piece of 1-inch size (cut into small pieces)
- 2 tbsp Kashmiri red chili powder
- ½ tsp Table salt
- 1 tbsp Fresh lemon juice
- 1 tbsp Peanut oil
- 1 piece Dhokla (sliced in small halves)
- 2 tbsp Water
For Yellow Dhokla Chutney
- ½ cup Roasted peanuts
- 6 pieces Fresh green chilies
- ½ tsp Table salt
- 2 tsp Fresh lemon juice
- ½ tsp Turmeric powder
- 4 tsp Water
Instructions
For Dhokla Green Chutney
- To prepare the green chutney served with dhokla, these are the steps to follow:
- Take a clean grinder.
- Put 1 cup of fresh and green coriander leaves into the grinder.
- Then add ½ a cup of fresh and green mint (pudina) leaves to it. (Pro tip: If you do not like mint leaves, you can skip them. However, adding mint leaves to the green dhokla chutney will give it a distinct taste).
- Now, add 2 pieces of 1-inch size fresh and deskinned ginger, cut into small pieces, in the grinder.
- Then add 6 cloves of fresh, deskinned garlic to the content in the grinder.
- Also add 4 pieces of fresh green chilies to the ingredients, each broken in half. (Pro tip: You can alter the number of fresh green chilies according to your needs and preference of hotness).
- Now, add ½ tsp of regular table salt to the ingredients.
- Finally, follow it with 1 tsp of fresh lime juice. (Pro tip: If you want your green dhokla chutney to be sweet, you can add 1 tbsp of normal sugar to the ingredients in the grinder at this point. You may also add 1 tbsp of peanut oil for added flavor).
- Grind the content into a coarser paste. (Pro tip: If the paste is too thick, you may add a spoon of water to make it thinner and blend again).
- Now, add the 3 pieces of dhokla to the paste. Cut them into small pieces for seamless churning. (Pro tip: Adding dhokla to the paste will add to the color, texture, and taste of the green chutney).
- Grind it once again to a finer paste.
- Check the consistency.
- If you are satisfied with it, transfer the paste to a plate or bowl from the grinder and the green chutney for dhokla is ready to be consumed.
For Dhokla Red Chutney
- To prepare the red chutney served with dhokla, these are the steps to follow:
- Take a grinder and put about 10 to 12 cloves of fresh and deskinned garlic in it.
- Then add 5 pieces of fresh red chilies into the grinder.
- Follow it with 1 piece of fresh and deskinned ginger of about 1-inch size. You may cut it into small pieces.
- Next, add 2 tbsp of Kashmiri red chili powder to it. (Pro tip: This is the main ingredient that will give the red color of the dhokla chutney. So, be generous with it).
- Now add ½ tsp of table salt to the ingredients.
- Then squeeze 1 tbsp of fresh lemon juice to the content in the grinder. One-half of a standard lemon should be enough for it.
- Follow it with 1 tbsp of peanut oil. (Pro tip: You may use other varieties of oil for it, such as olive oil, but using peanut oil is better to have a better flavor and taste).
- Then add 1 piece of dhokla to the content. Make sure you slice it into small halves.
- Finally, add 2 tbsp of water to the ingredients in the grinder.
- Blend the ingredients nicely to get a fine paste.
- Transfer the paste from the grinder to a bowl and the red chutney for dhokla is ready to be served.
For Dhokla Yellow Chutney
- To prepare the yellow chutney served with dhokla, these are the steps to follow:
- Take a grinder and put ½ cup of roasted peanuts, 6 to 8 pieces of fresh green chilies, each broken in half, and ½ tsp of normal table salt in it.
- Squeeze 1 tsp of fresh lemon juice to the ingredient. About ½ piece of a standard lemon will be enough for that. Keep the other half aside.
- Finally, add ½ tsp of turmeric powder to the content in the grinder. (Pro tip: You may add 1 tbsp of sugar to the content if you want to add some sweetness to the chutney).
- Now grind the ingredients roughly.
- Mix them nicely using a spoon and check the coarseness of the paste.
- Now, according to the coarseness of the paste and the fineness you want in it, add 3 to 4 tsp of water to the mixture.
- Finally, squeeze another teaspoon of fresh lime juice into the content. Use the other half of the lemon that you kept aside earlier.
- Blend them all nicely to get a fine paste.
- Transfer the paste from the grinder to a bowl and your yellow dhokla chutney is ready to be used.
Notes
Nutrition Info (Estimation Only)

")


