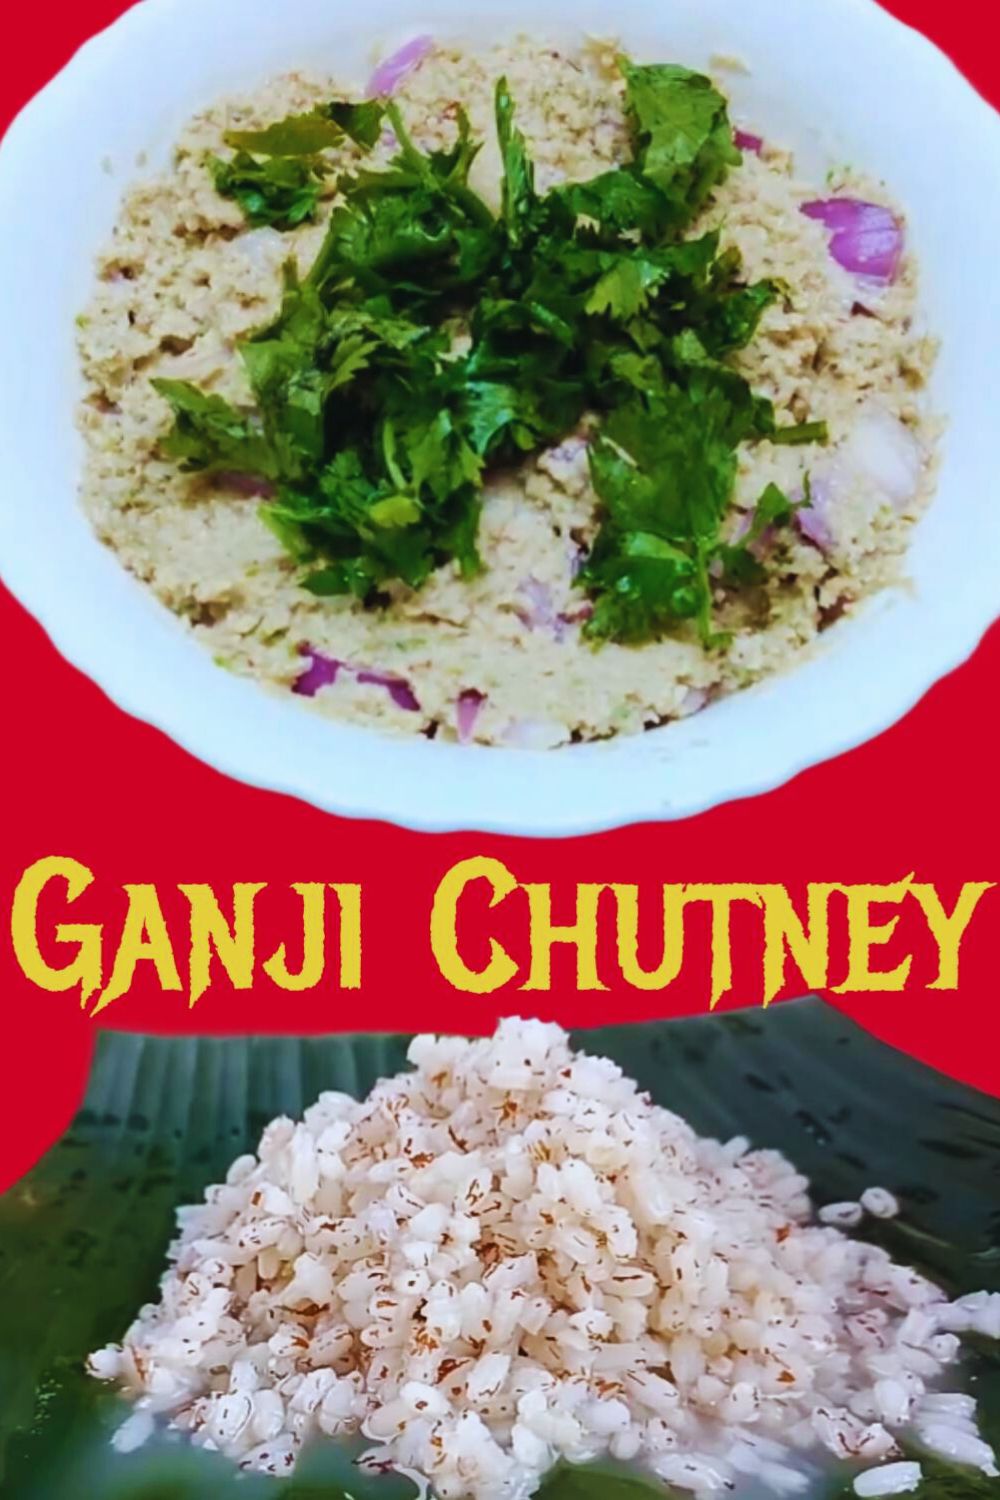
Elevate your culinary experience with the delectable ganji chutney. This is a flavorful accompaniment that adds a burst of taste to your meals.
Crafted with a blend of fresh and vibrant ingredients, this chutney is a delightful combination of grated coconut, tamarind, ginger, green chilies, and more.
In this step-by-step guide, I will unravel the secrets behind creating this enticing chutney that pairs perfectly with various dishes.
So, embark on a culinary journey with me and explore the art of making ganji chutney from scratch.
KEY TAKEAWAYS
- Ganji Chutney combines grated coconut, tamarind, ginger, and green chilies for a vibrant and flavorful condiment.
- Enjoy Ganji Chutney with rice, idli, dosa, or as a side with snacks, adding a zesty kick to your meals.
- The chutney is easy to make, requiring basic ingredients and a quick grind in the mixer for a homemade treat.
- Store Ganji Chutney in an airtight container in the refrigerator for a few days or freeze in small portions for future use.
- Explore other Indian chutneys like mint, peanut, or ginger as flavorful alternatives to Ganji Chutney in various dishes and snacks.
How to Make Ganji Chutney? (Step by Step Guide with Images)
Step 1: Take a clean grinder.

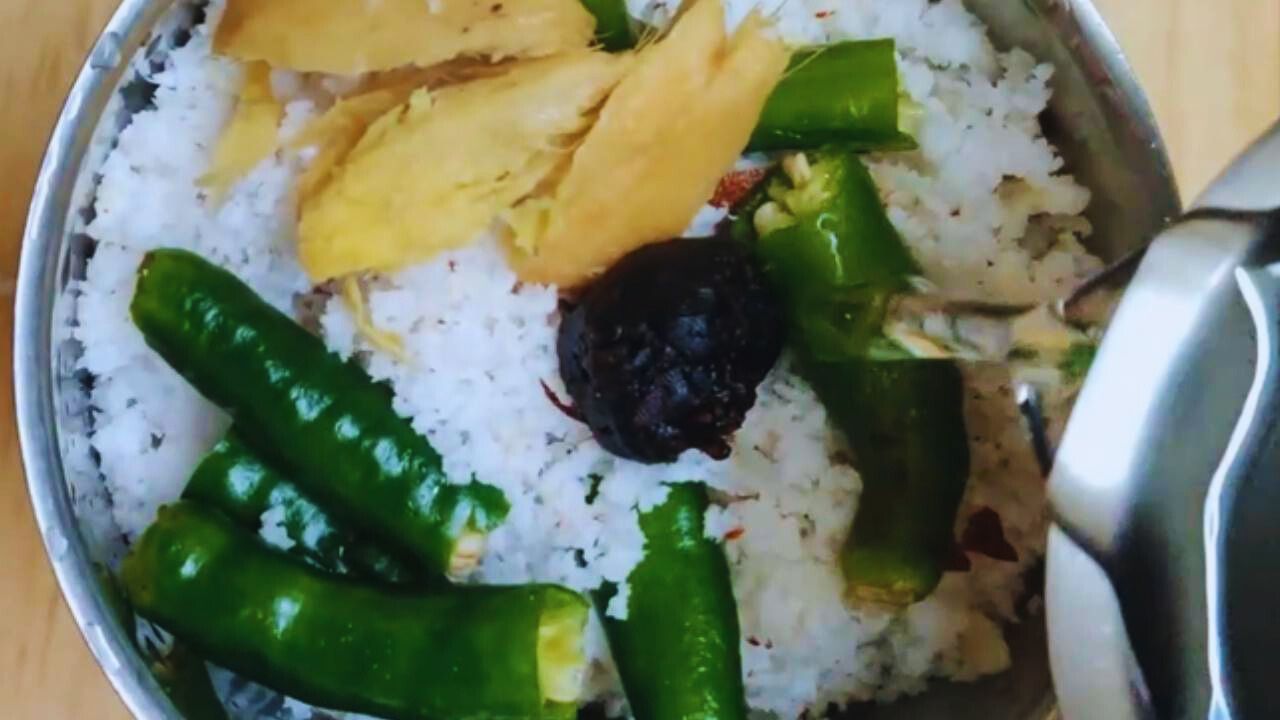
Step 2: Put 1 cup of grated coconut, 1 small piece of tamarind, a piece of fresh ginger not more than ½-inch in size, and 4 pieces of fresh green chilies in the grinder.
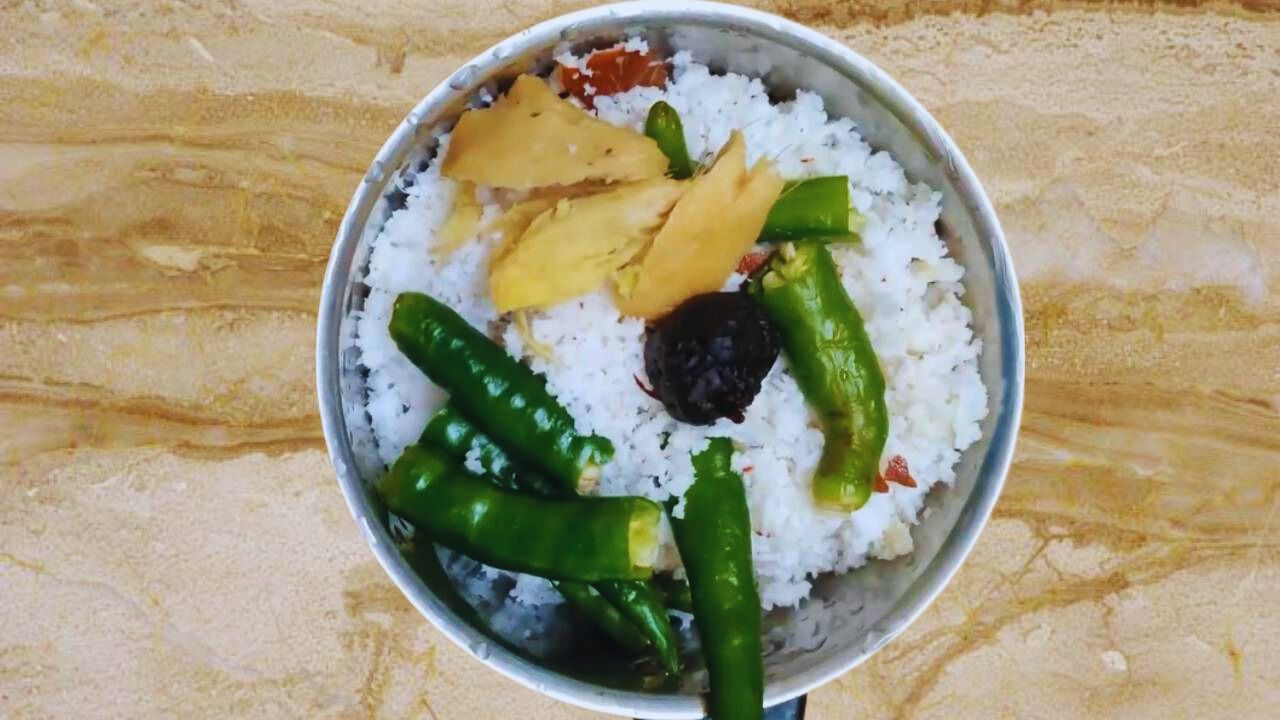
(Expert tip: You may cut the ginger into small pieces and break the green chilies in half for better blending).
Step 3: Now, add about 4 tbsp of water to the ingredients in the grinder.
Step 4: Follow it with ½ tsp of table salt.
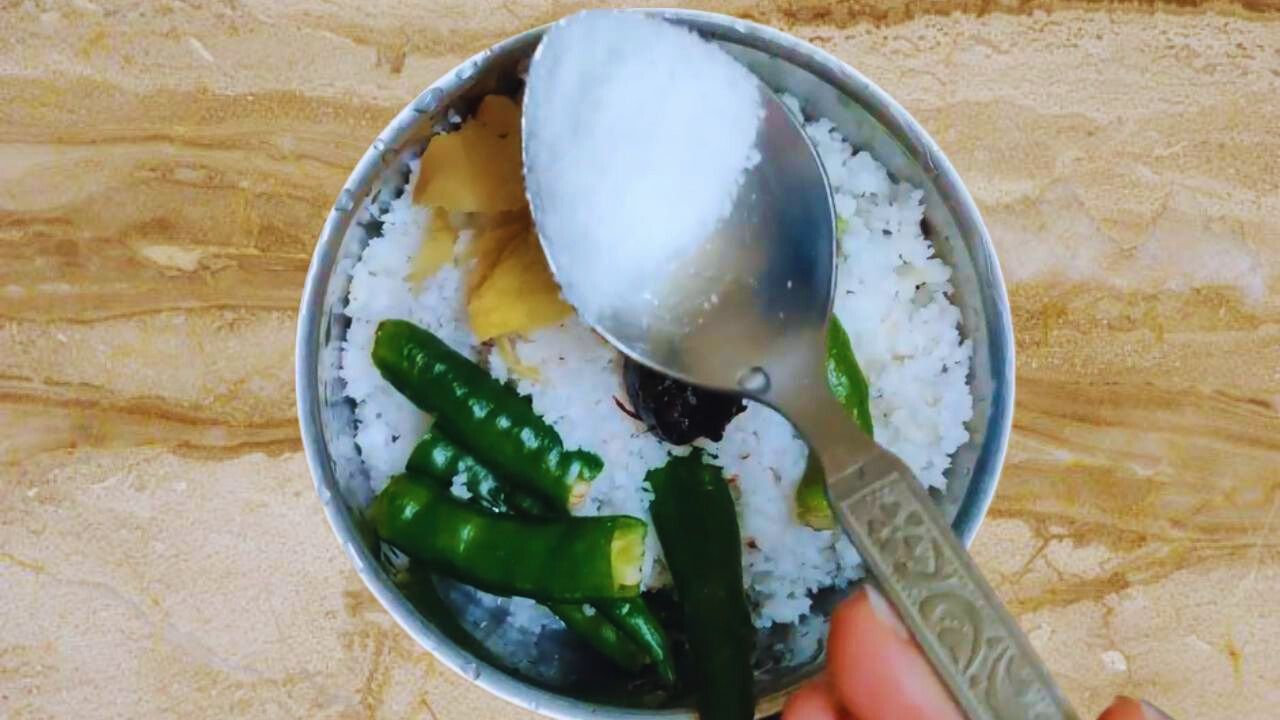
Step 5: Grind the ingredients to a fine paste.
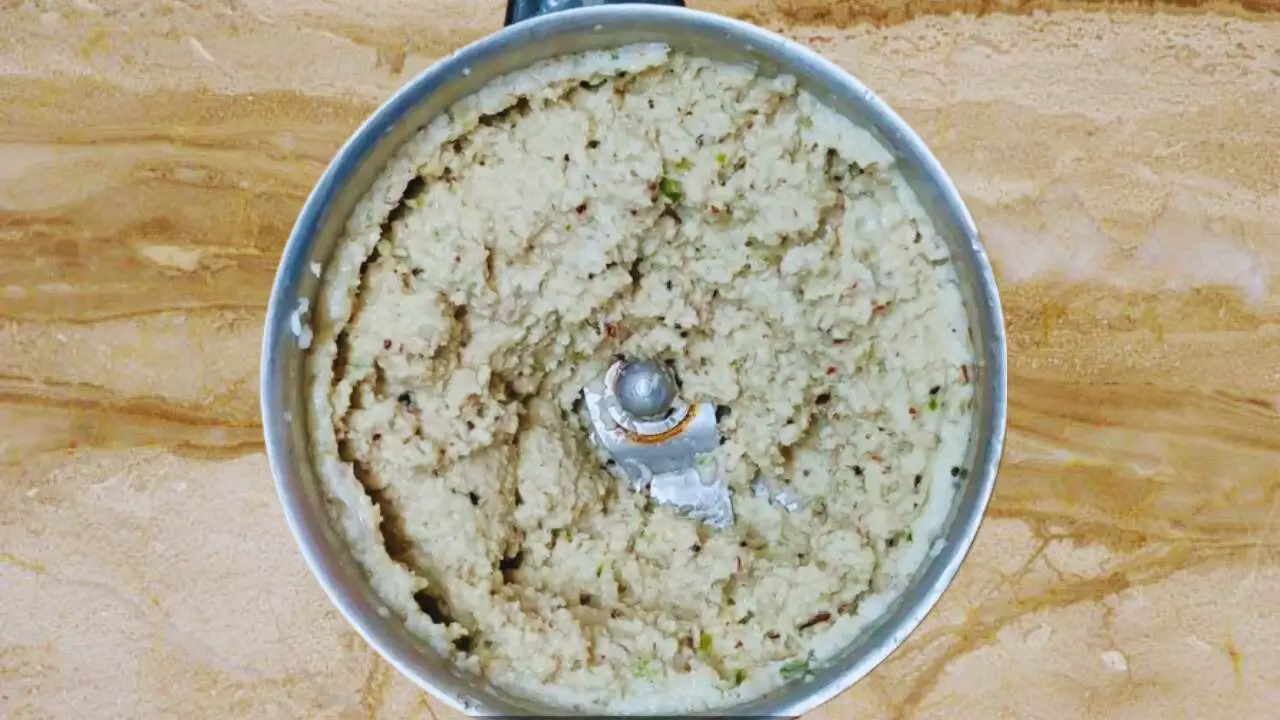
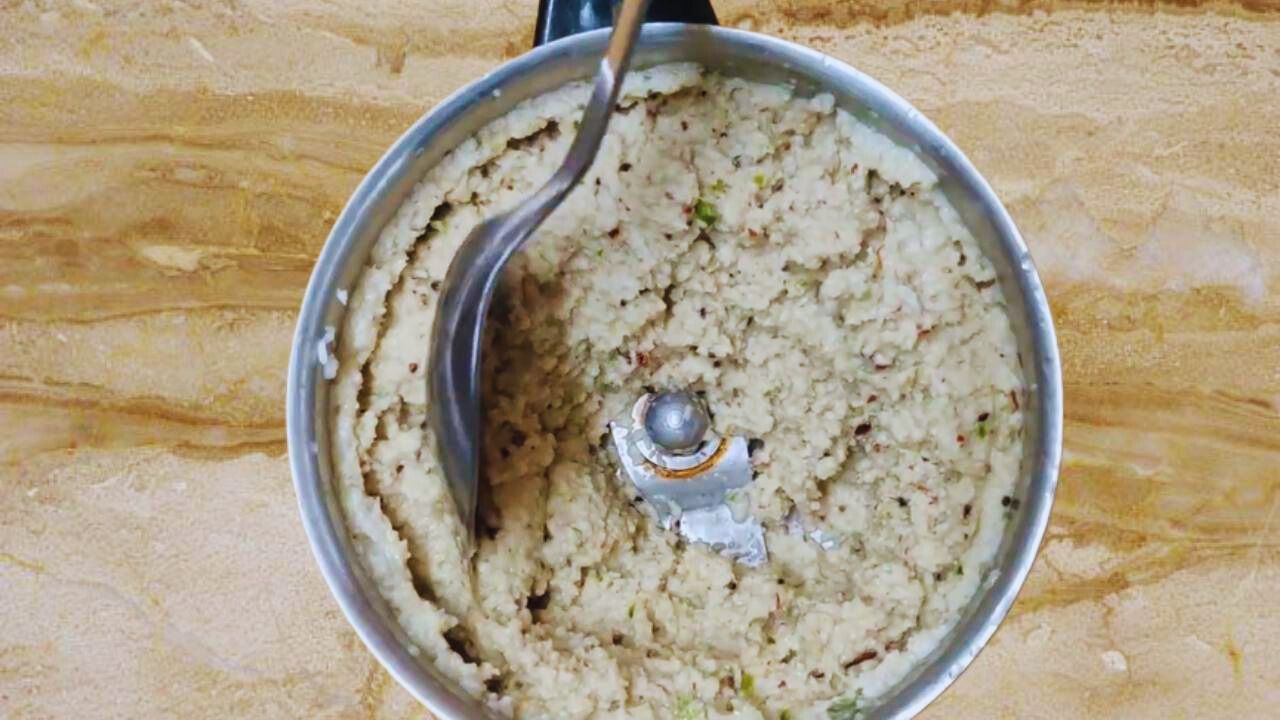
Step 6: Mix it with a spoon nicely. Check the consistency. If it is too thick, add a few tablespoons of water more and blend it again in the grinder.
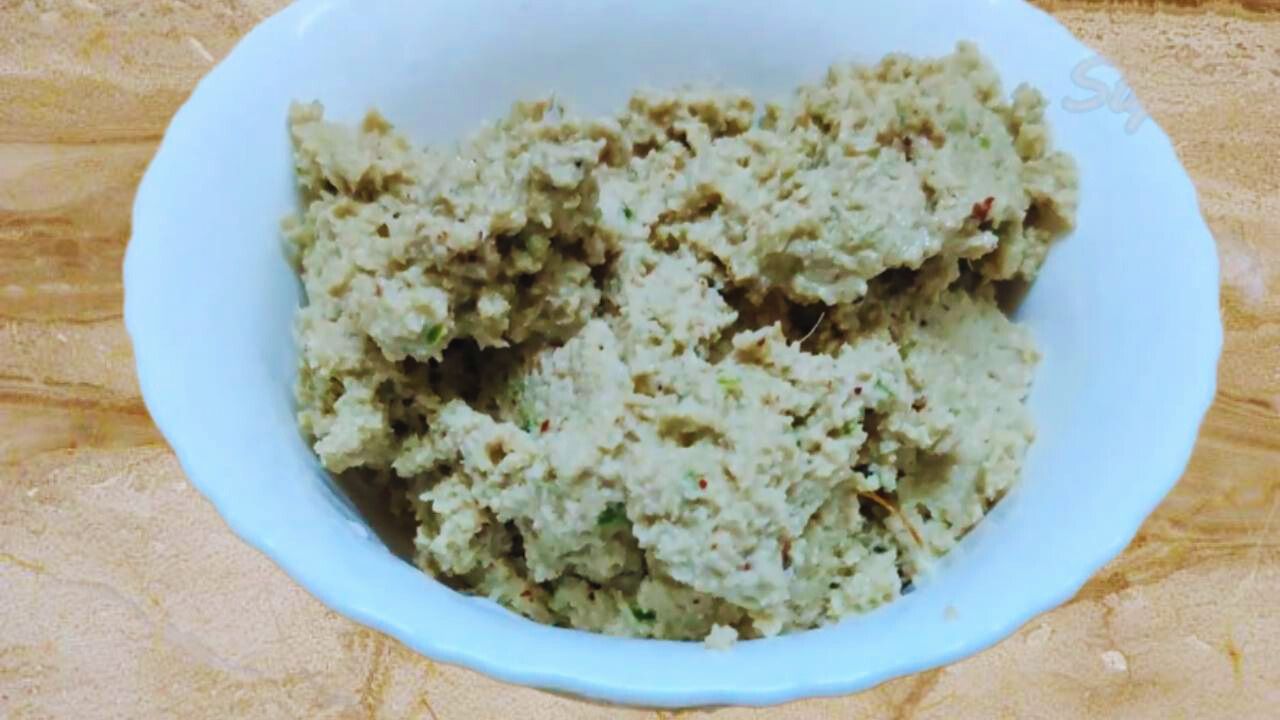
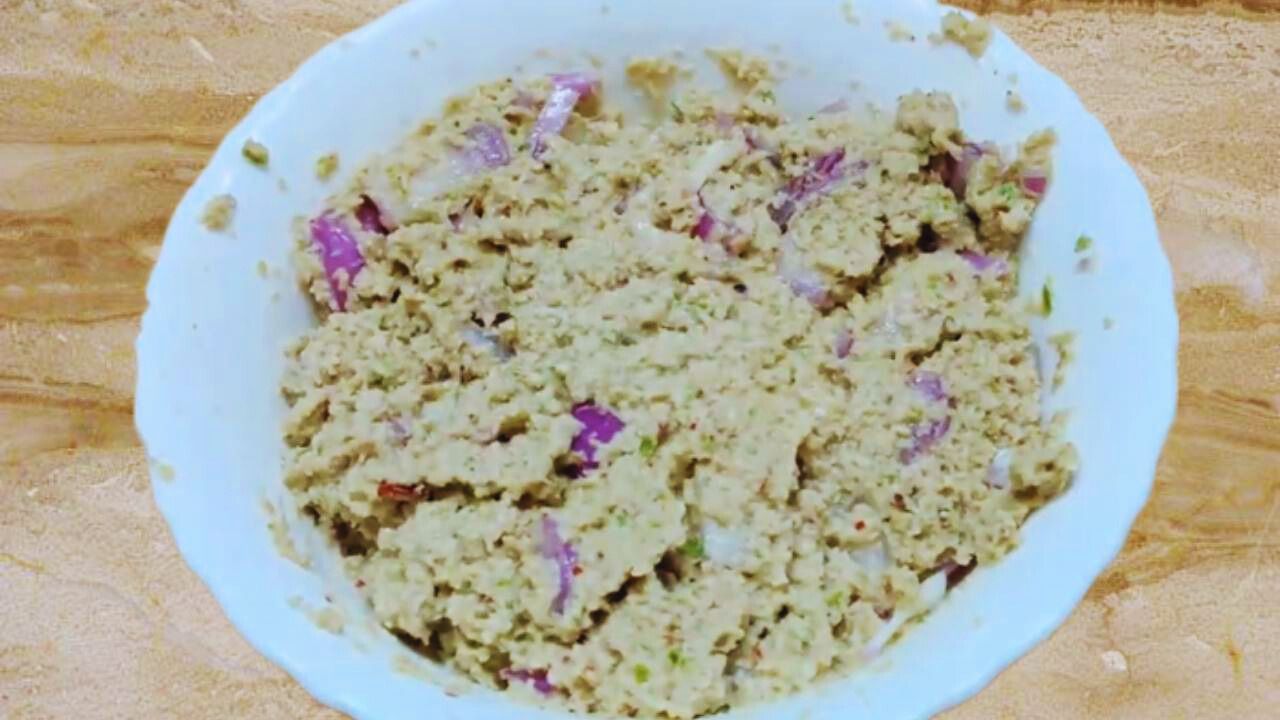
Step 7: Now pour the chutney into a bowl.
Step 8: Add 1 tbsp of finely chopped onion in it.
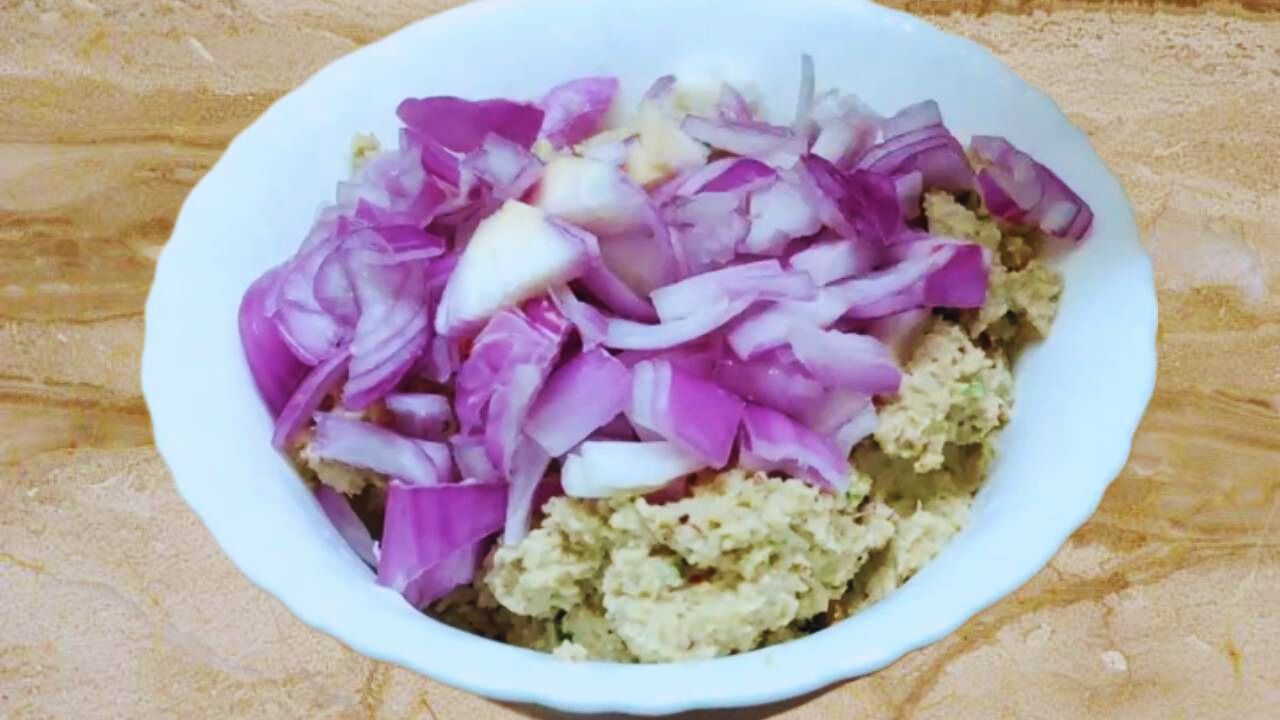
Step 9: Mix it nicely with the chutney.
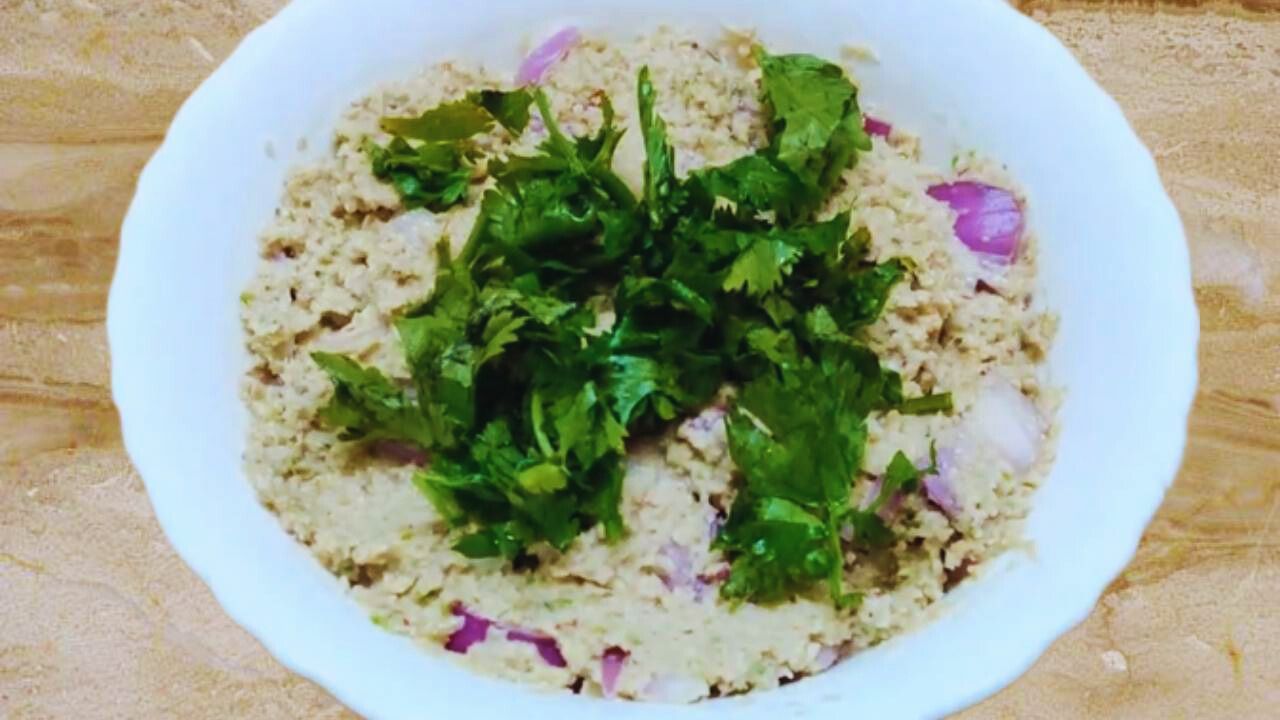
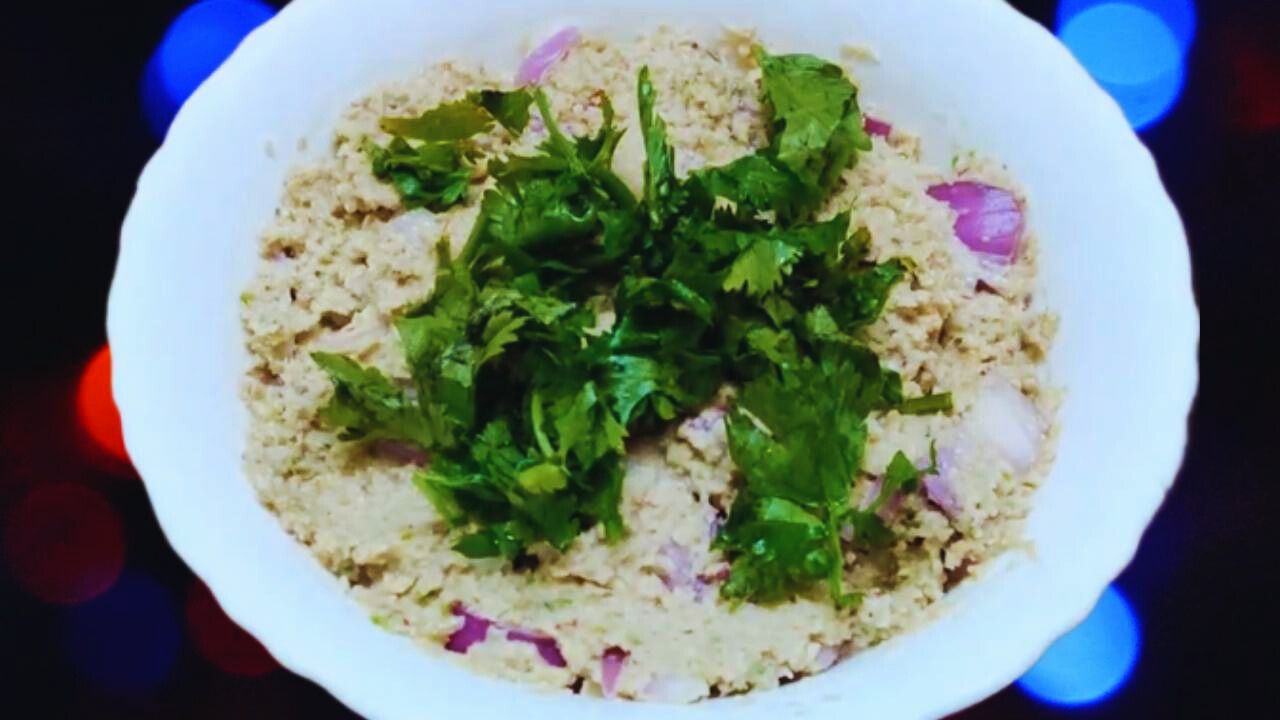
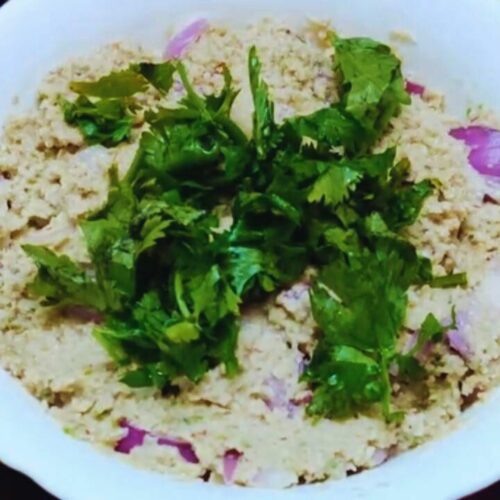
Step 10: Garnish it with a few fresh coriander leaves and your ganji chutney is ready to be consumed.
Pro Tips for Making Ganji Chutney
Freshness Matters: Opt for the freshest ingredients, especially coconut, ginger, and green chilies, to enhance the chutney’s flavor.
Ginger Hack: Cutting the ginger into smaller pieces and breaking the green chilies in half before grinding ensures smoother blending.
Texture Tweak: Adjust the chutney’s consistency by adding water gradually. If it’s too thick, blend in a few extra tablespoons of water until you achieve the desired texture.
Onion Magic: Adding finely chopped onion not only contributes to the chutney’s texture but also enhances its overall taste.
Mix with Care: Stir the chutney carefully and precisely to ensure all ingredients are well combined, offering a harmonious flavor profile.
Garnish Gracefully: The final touch with fresh coriander leaves not only adds visual appeal but also introduces a burst of freshness to your ganji chutney.
Ganji Chutney Storing Tips
Airtight Oasis: Preserve the freshness of your homemade ganji chutney by storing it in an airtight container. This helps prevent air exposure, maintaining its vibrant flavors.
Refrigeration Rule: For extended shelf life, keep the chutney stored in the refrigerator. The cool environment slows down any potential spoilage and keeps the chutney at its best.
Avoid Moisture: Ensure that the container and the chutney are moisture-free before refrigerating. Excess moisture can compromise the texture and taste of the chutney.
Freeze for Future: If you anticipate not using the chutney within a few days, consider freezing it in smaller portions. Thaw it in the refrigerator when needed, ensuring minimal flavor loss.
How Does Ganji Chutney Taste?
Zesty and Tangy: The infusion of tamarind brings a zesty kick to the chutney, creating a delightful tanginess that dances on your taste buds.
Spicy and Fragrant: The presence of fresh green chilies not only adds a spicy punch but also imparts a fragrant aroma, making each bite a flavorful experience.
Creamy and Rich: Grated coconut contributes to the chutney’s creamy texture, offering a richness that complements the vibrant flavors of the other ingredients.
Warm and Earthy: Fresh ginger, when blended in, introduces a warm and earthy undertone, adding depth to the overall taste.
Balanced and Savory: The careful mix of salt ensures a well-balanced and savory profile, enhancing the various elements without overpowering the palate.
Bright and Fresh: Garnished with fresh coriander leaves, the chutney receives a final touch that not only elevates its visual appeal but also imparts a bright and fresh finish to every spoonful.
Ganji Chutney Alternatives
If you are specifically looking for alternatives to ganji chutney, you must consider its unique combination of coconut, tamarind, ginger, and green chilies. Here are more fitting alternatives:
Pudina Pachadi (Mint Chutney): Fresh mint leaves, green chilies, and a hint of tamarind create a refreshing chutney with a different flavor profile.
Kara Chutney: A spicy and tangy chutney made with tomatoes, red chilies, and garlic, offering a bold alternative to ganji chutney.
Peanut Chutney: Ground peanuts blended with spices provide a nutty and flavorful option that differs from the coconut base of ganji chutney.
Allam Pachadi (Ginger Chutney): A chutney centered around ginger, typically combined with tamarind and red chilies, providing a unique and robust taste.
While these may not replicate ganji chutney exactly, they offer distinct flavors that could be enjoyed as alternatives.
What Dishes Can Ganji Chutney Be Served with?
Ganji and Other Rice Items: Serve ganji chutney with plain steamed rice, pulao, or biryani for an extra layer of flavor.
Idli and Dosa: Enjoy ganji chutney as a side for traditional South Indian breakfast items like idli and dosa.
Curries and Gravies: Use ganji chutney as a side accompaniment with vegetable curries or gravies to add a spicy and tangy element.
Roti or Chapati: Pair ganji chutney with Indian bread like roti or chapati for a unique twist to your meal.
Upma or Poha: Elevate the taste of upma or poha by serving it with a dollop of ganji chutney.
Pakoras or Bhajis: Dip your fried snacks such as pakoras or bhajis into ganji chutney for an extra burst of flavor.
Samosa: Use GANJI CHUTNEY as a dipping sauce for samosas, enhancing their taste with its zesty and tangy notes.
Sandwiches: Spread ganji chutney on sandwiches for a spicy kick, especially when combined with vegetables and cheese.
Vada Pav: Elevate the iconic Mumbai Street food, vada pav, by adding a generous serving of ganji chutney.
Bread Rolls: Serve ganji chutney with bread rolls or stuffed bread pockets for a delightful snacking experience.
Bajji (Fritters): Pair ganji chutney with various fritters like mirchi bajji or onion bajji for a spicy and tangy contrast.
Recipe Card
Ganji Chutney
Ingredients
- 1 cup Grated coconut
- 1 piece Tamarind small
- 1 piece Fresh ginger ½-inch size
- 4 pieces Fresh green chilies
- 4 tbsp Water
- ½ tsp Salt
- 1 tbsp Chopped onion
- 1 tbsp Fresh coriander leaves for garnishing
Instructions
- Prepare the Ingredients:Break the ginger into smaller pieces and split the green chilies in half for easier blending.
- Grinding Process:Put grated coconut, tamarind, ginger, and green chilies into the grinder.Add 4 tablespoons of water and ½ teaspoon of salt.Grind everything into a smooth paste.
- Check Consistency:Mix the paste thoroughly. If it's too thick, add a few more tablespoons of water and blend again until it's smooth.
- Transfer and Mix:Pour the chutney into a bowl.Add finely chopped onion and mix it well with the chutney.
- Garnish and Serve:Sprinkle fresh coriander leaves on top for garnish.
Notes
Nutrition Info (Estimation Only)
Conclusion
In conclusion, ganji chutney adds a burst of flavor to your meals with its unique blend of ingredients.
Whether paired with traditional dishes or snacks, this homemade delight brings a touch of homemade goodness to your dining experience.


