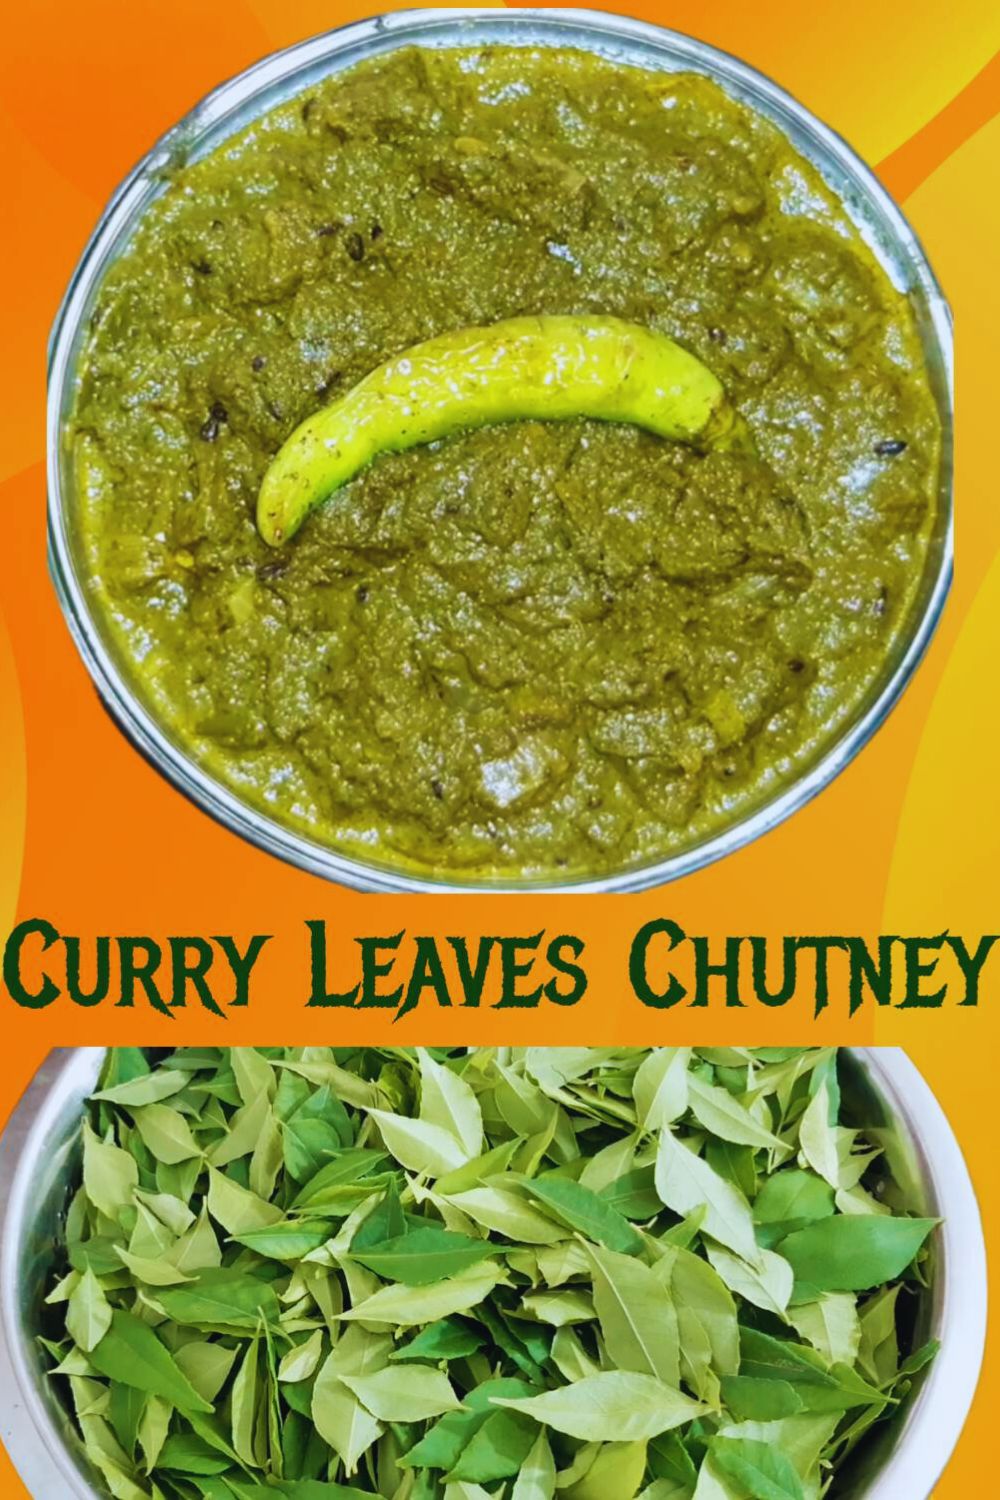
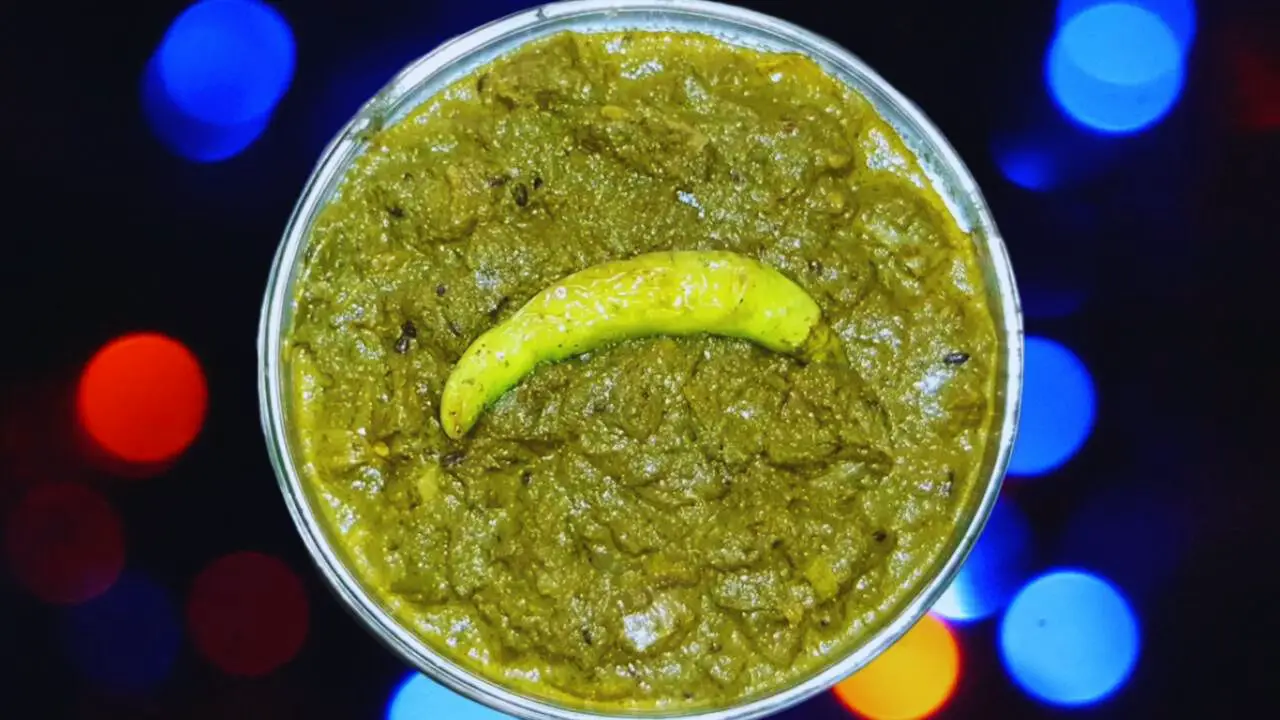
Curry Leaves Chutney Recipe

5 from 1 vote
Jump to Recipe Print Recipe

Delight your taste buds with the rich and aromatic flavors of curry leaves chutney, a versatile condiment that adds a burst of taste to a variety of snacks and dishes.

This step-by-step guide will walk you through the process of creating this delectable chutney, ensuring a perfect blend of curry leaves, spices, and a tempering that elevates its taste to new heights.

Follow along to discover the art of crafting this culinary masterpiece that will leave you craving more.

Curry Leaves Chutney

KEY TAKEAWAYS

  • Curry leaves chutney is a versatile condiment that enhances the taste of a variety of snacks and Indian dishes.
  • Enjoy a unique blend of rich, earthy curry leaves, spices, and tempering, creating a flavor profile that’s both savory and aromatic.
  • With a simple step-by-step guide, making homemade curry leaves chutney is easy, ensuring a burst of fresh flavors.
  • Ideal for dosa, idli, rice, and various snacks, this chutney is a perfect accompaniment for both traditional and fusion dishes.
  • Follow pro tips such as choosing fresh curry leaves, adjusting spice levels, and proper storage to elevate your curry leaves chutney to culinary perfection.

How to Cook Curry Leaves Chutney? (Step by Step Guide with Images)

Step 1: Take any cooking pot (a stainless-steel pot is a good choice) and half-fill it with water.

A stainless-steel pot

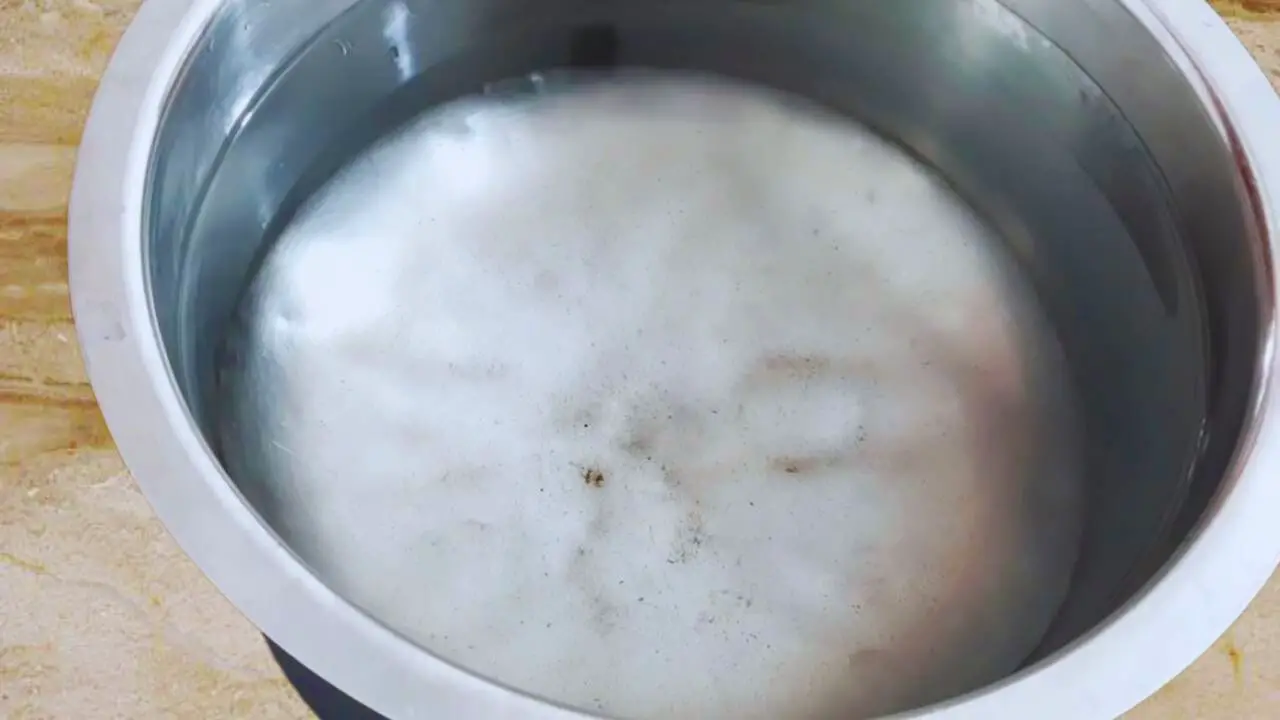
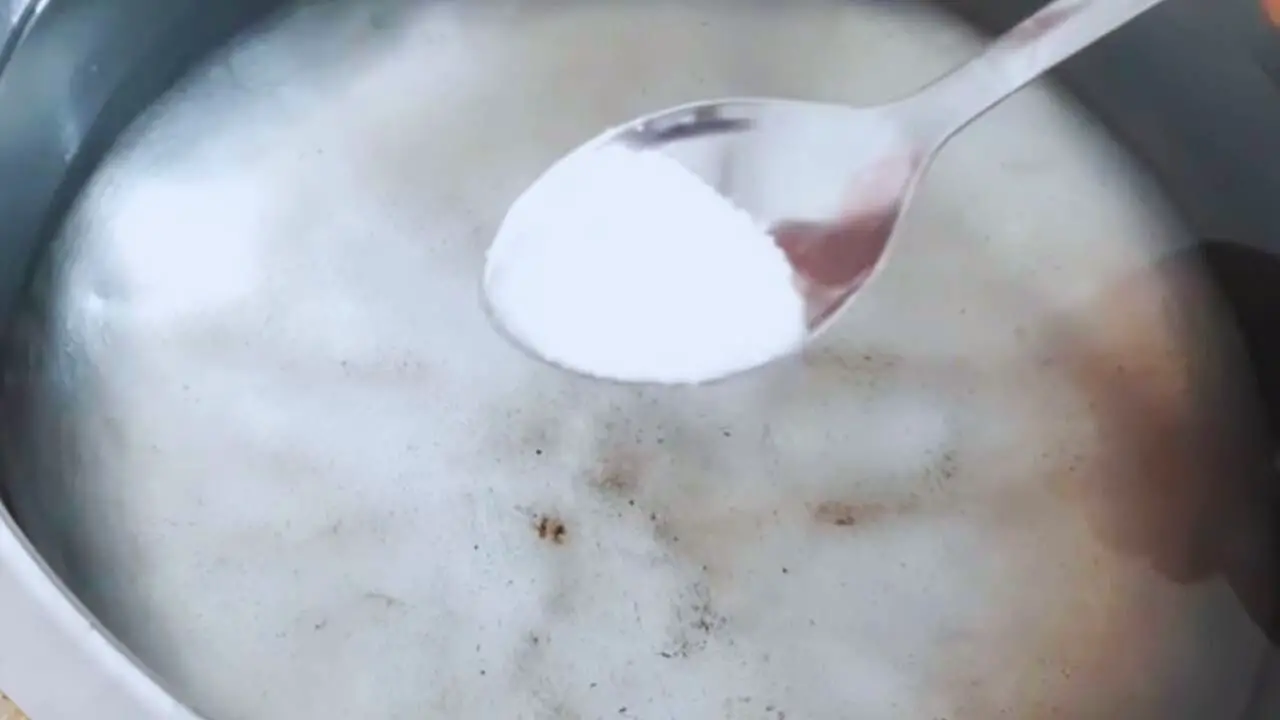
Step 2: Add ½ tsp of salt to the water and heat it on your gas stove. You may cover it.

Add ½ tsp of salt to the water

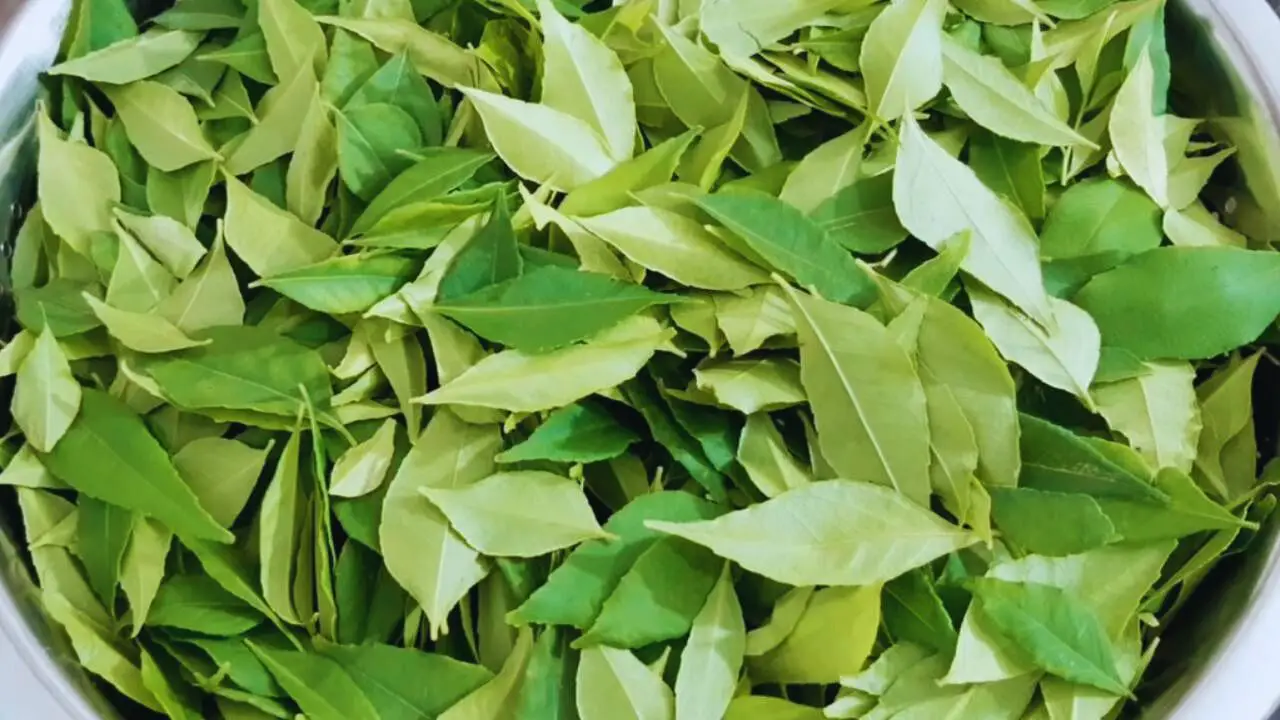
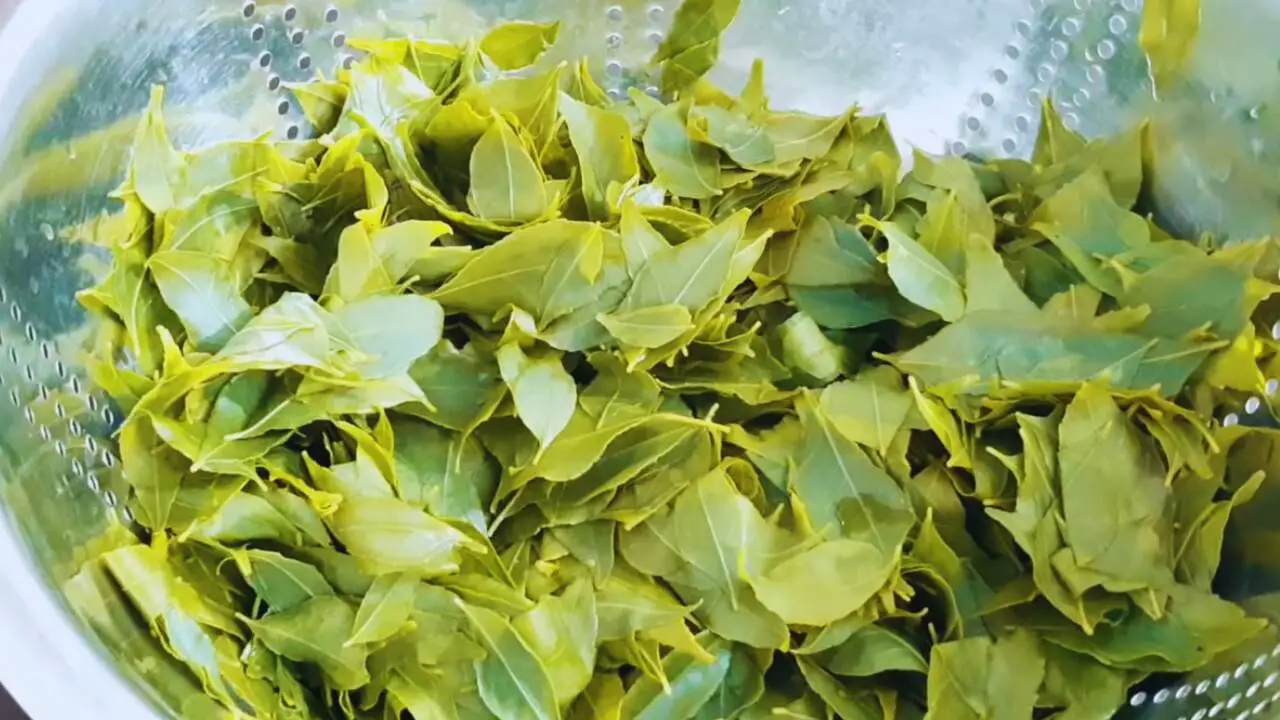
Step 3: Add 1 large bowl of fresh curry leaves when the water is hot enough.

Adding 1 large bowl of fresh curry leaves when the water is hot enough

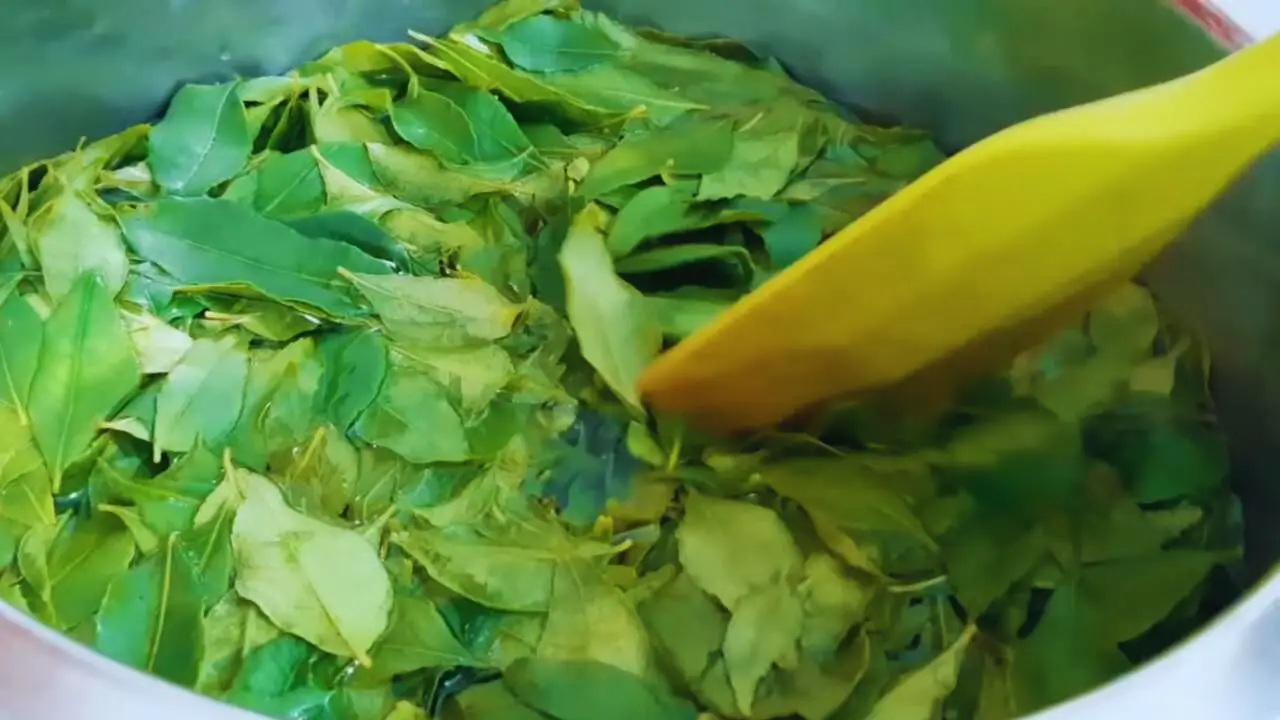
Step 4: Stir it to soak all of the curry leaves nicely.

Stirring it to soak all of the curry leaves nicely

Step 5: Cover it and let it cook for 2 to 3 minutes until the water comes to a boil and the leaves soften.

Cooking for 2 to 3 minutes

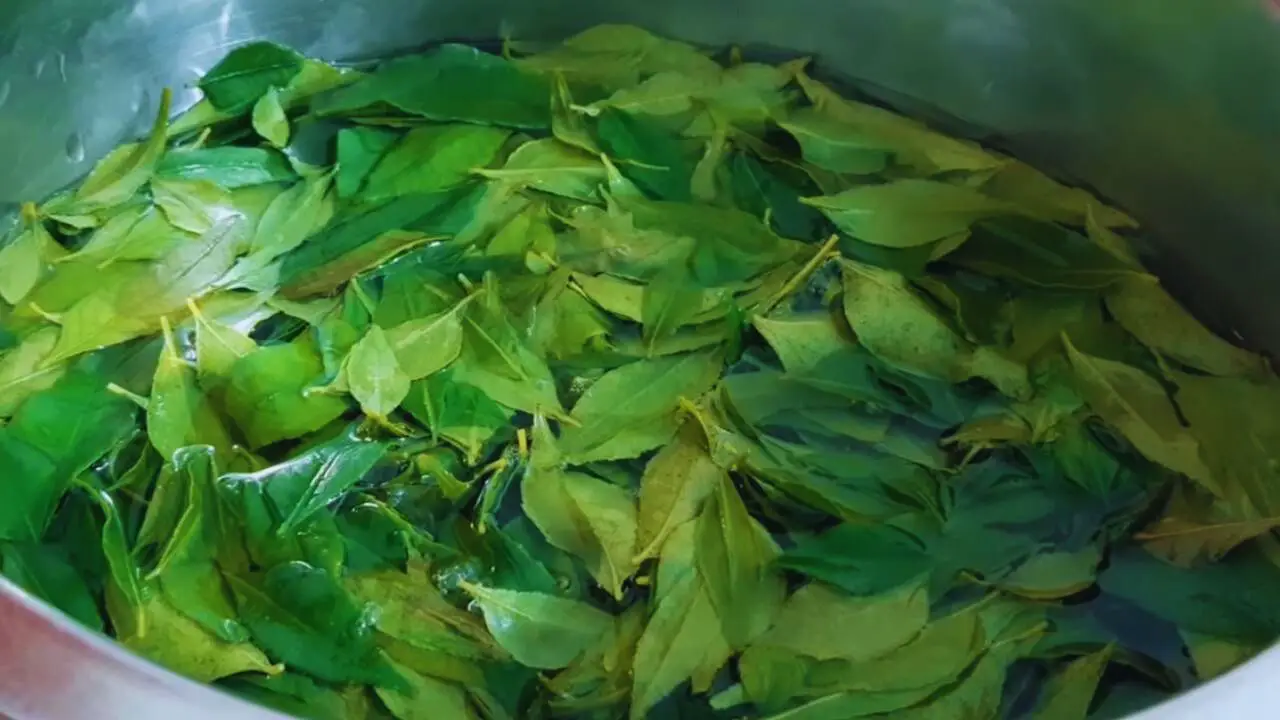
Step 6: Check the softness of the leaves.

Checking the softness of the leaves

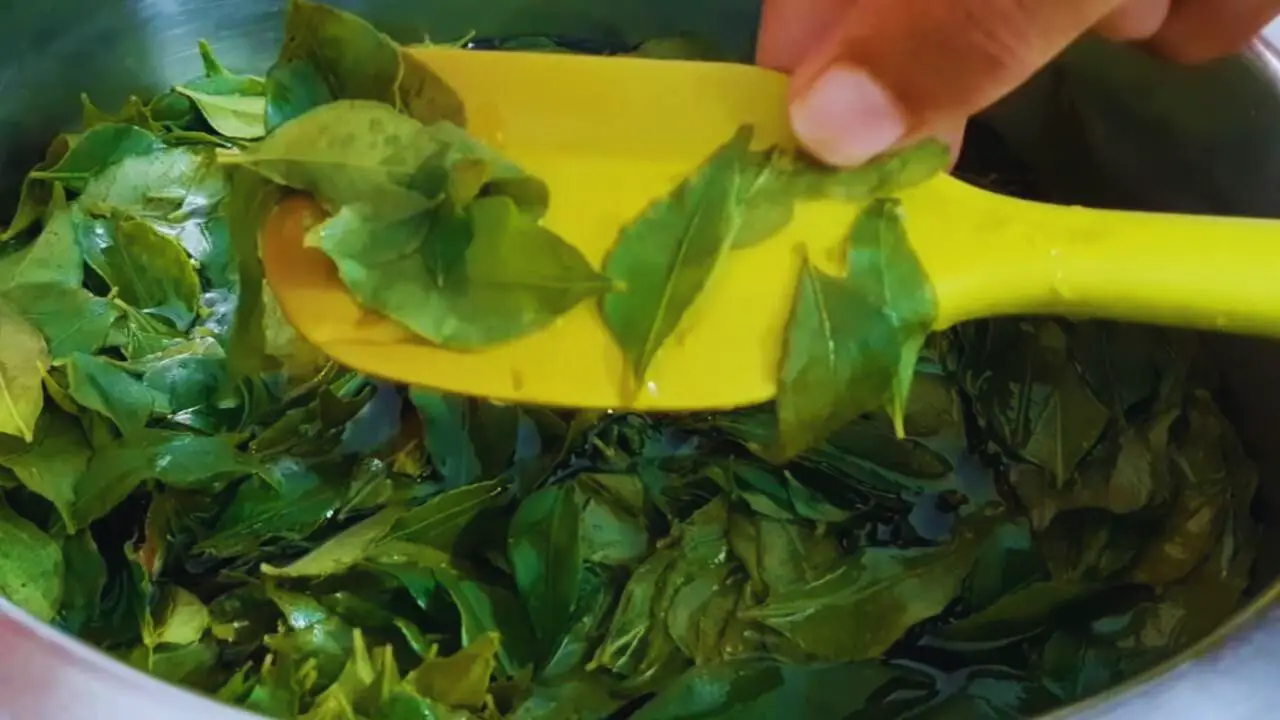
Step 7: Cook it for some more time till the leaves lose their fresh green color. Turn the flame of your gas stove off. Strain the water to separate the curry leaves. Set it aside to cool down.

Straining the water to separate the curry leaves

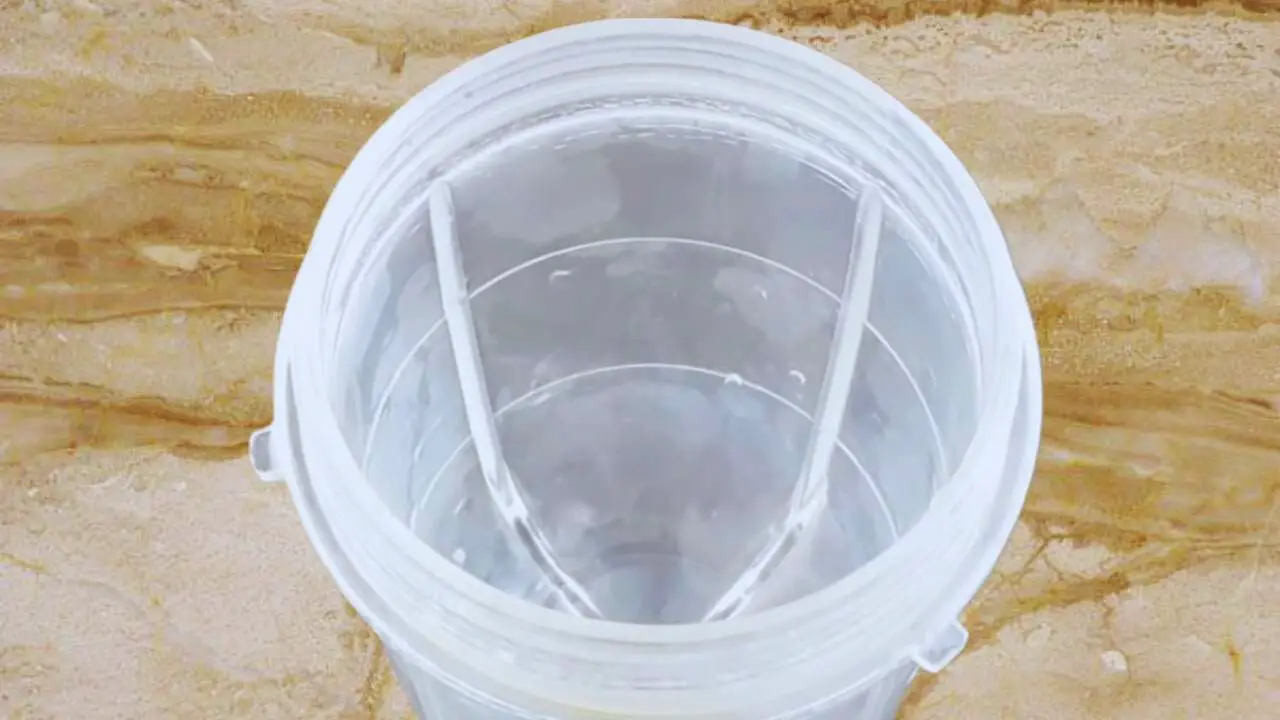
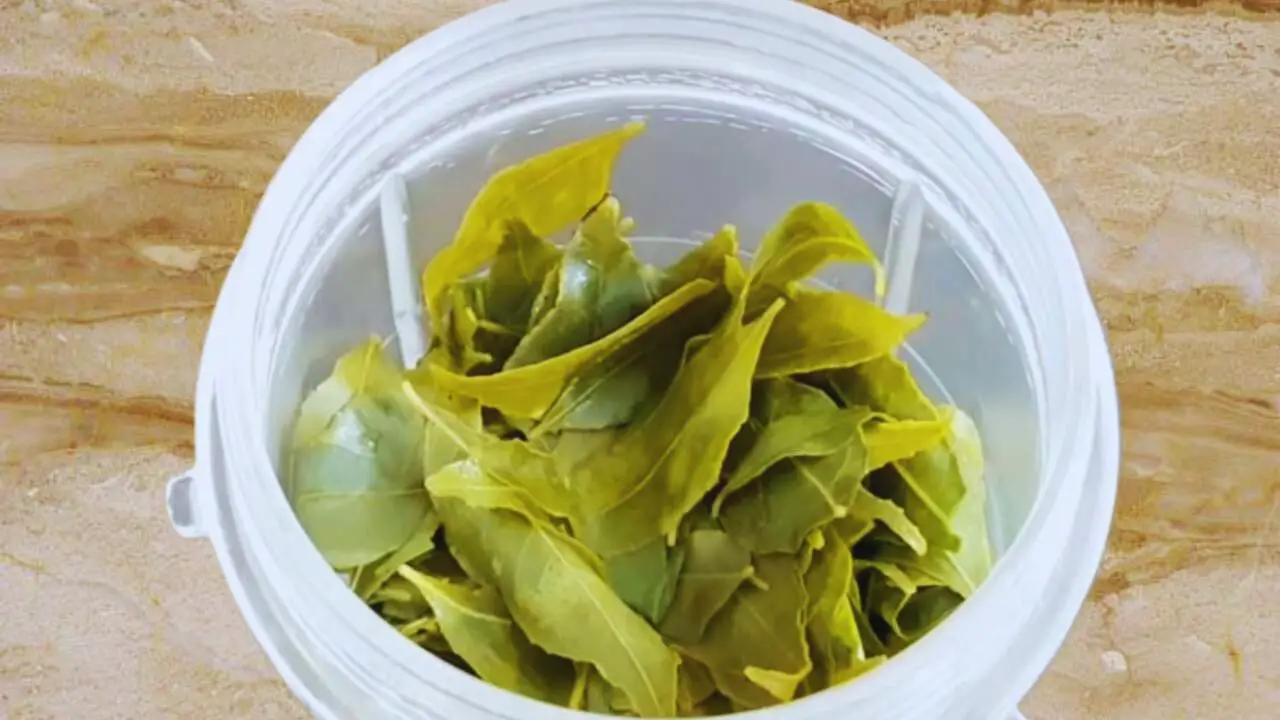
Step 8: When the leaves are cool enough, take a clean grinder.

A clean grinder

(Expert tip: You can use a grinding stone (sil batta) or mortar & pestle set (haman dista) for a better taste, but that will need some effort in grinding the leaves. I prefer using a grinder).

Step 9: Add the soaked curry leaves into the grinder.

Adding the soaked curry leaves into the grinder

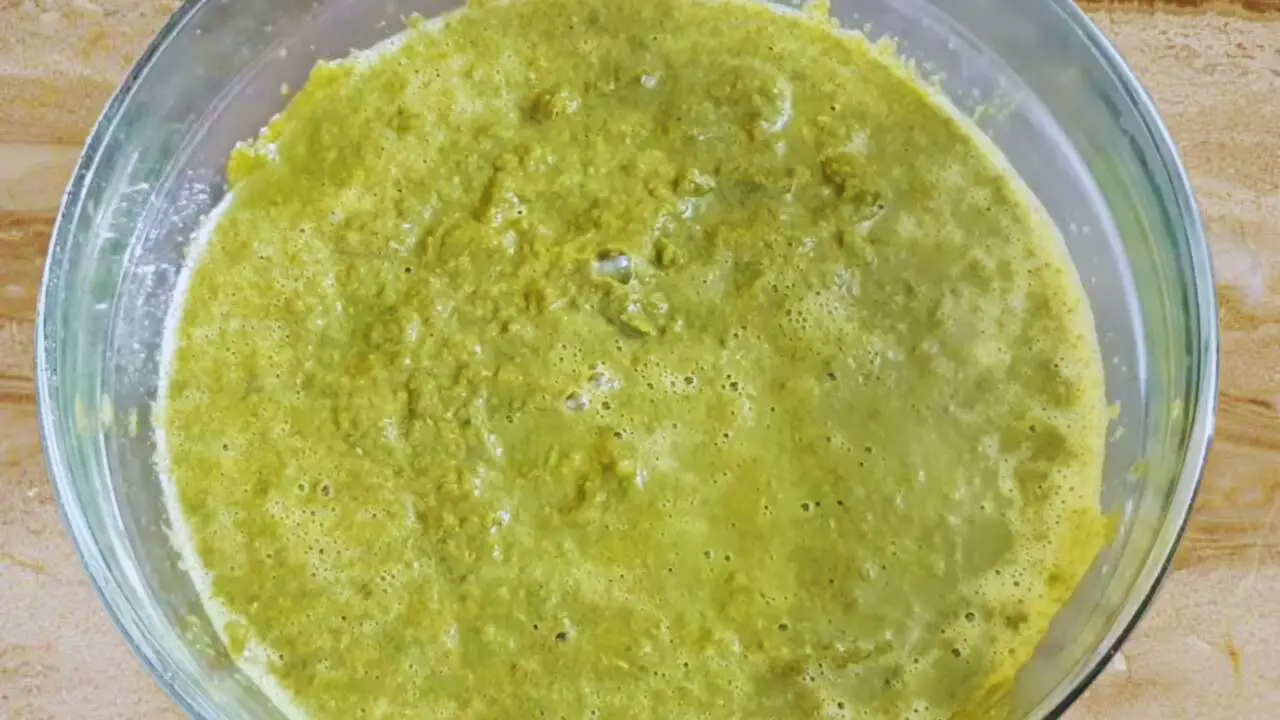
Step 10: Grind the leaves to get a fine paste.
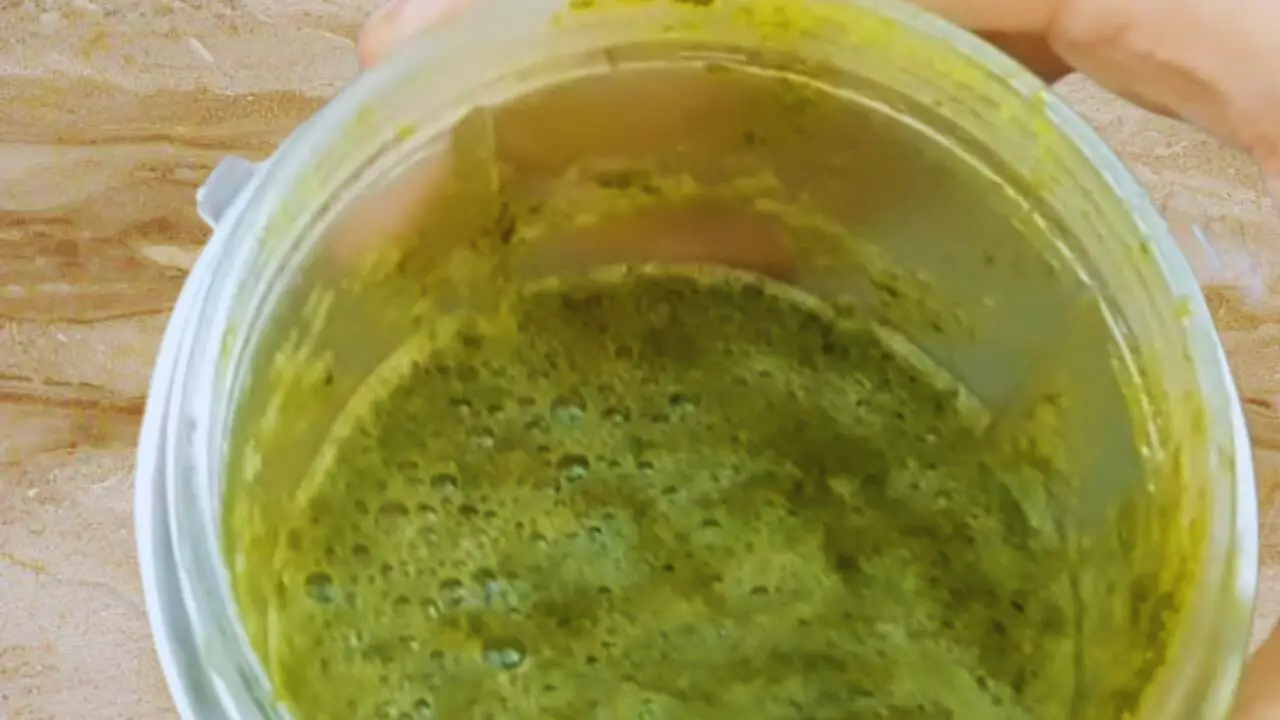
Grinding the leaves to get a fine paste

(Expert tip: You may use a spoonful or two of the strained water if you want to liquify the paste, as I have).

Step 11: Take a clean bowl.

A clean bowl

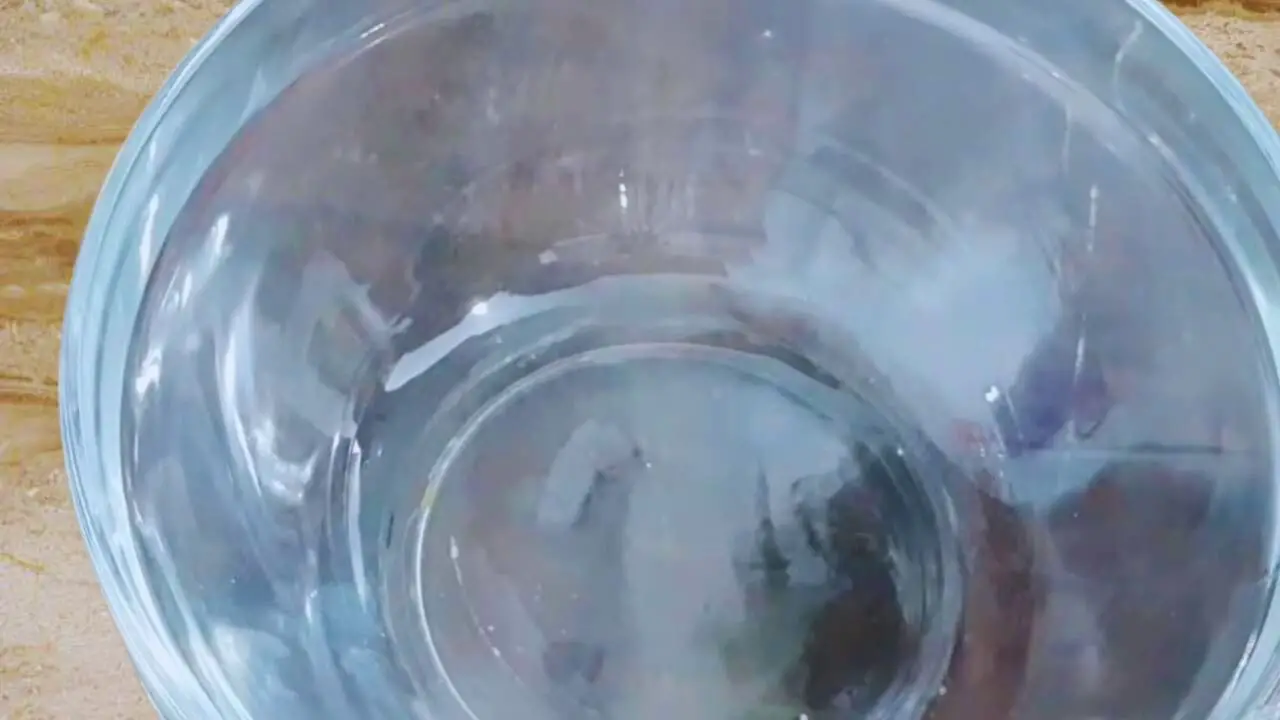
Step 12: Pour the paste into it. Keep it aside.

Pouring the paste into it

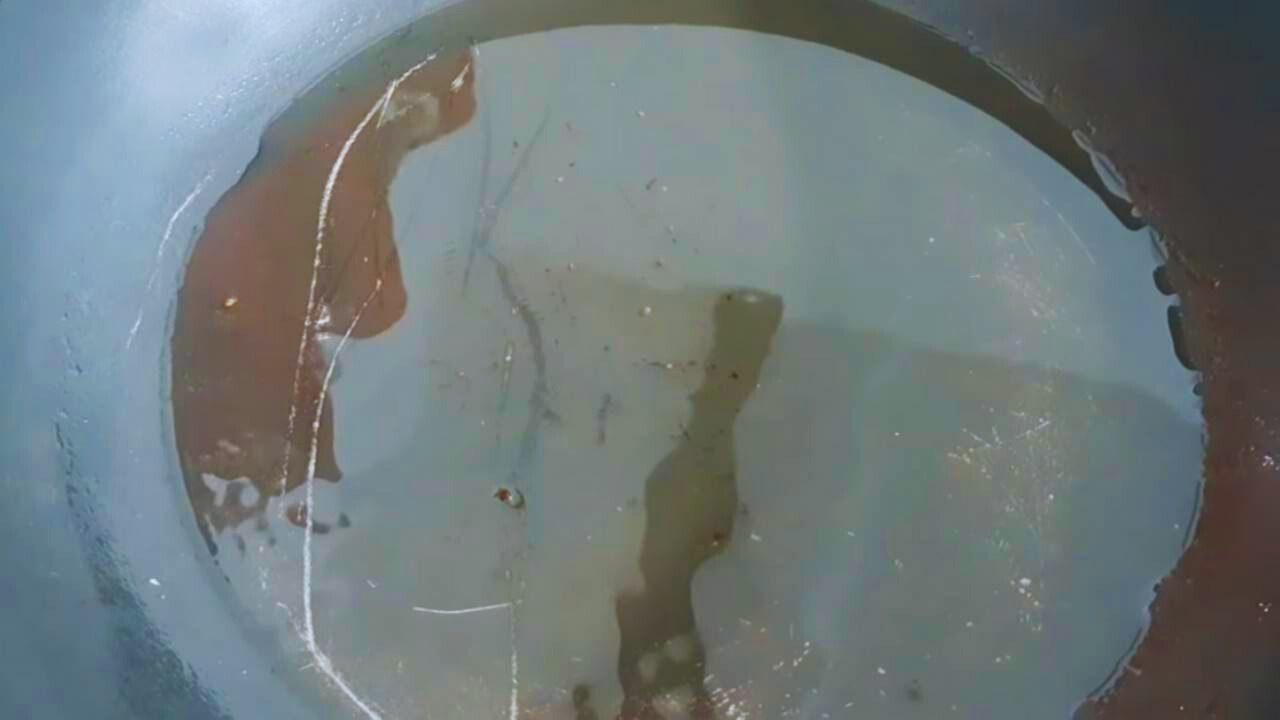
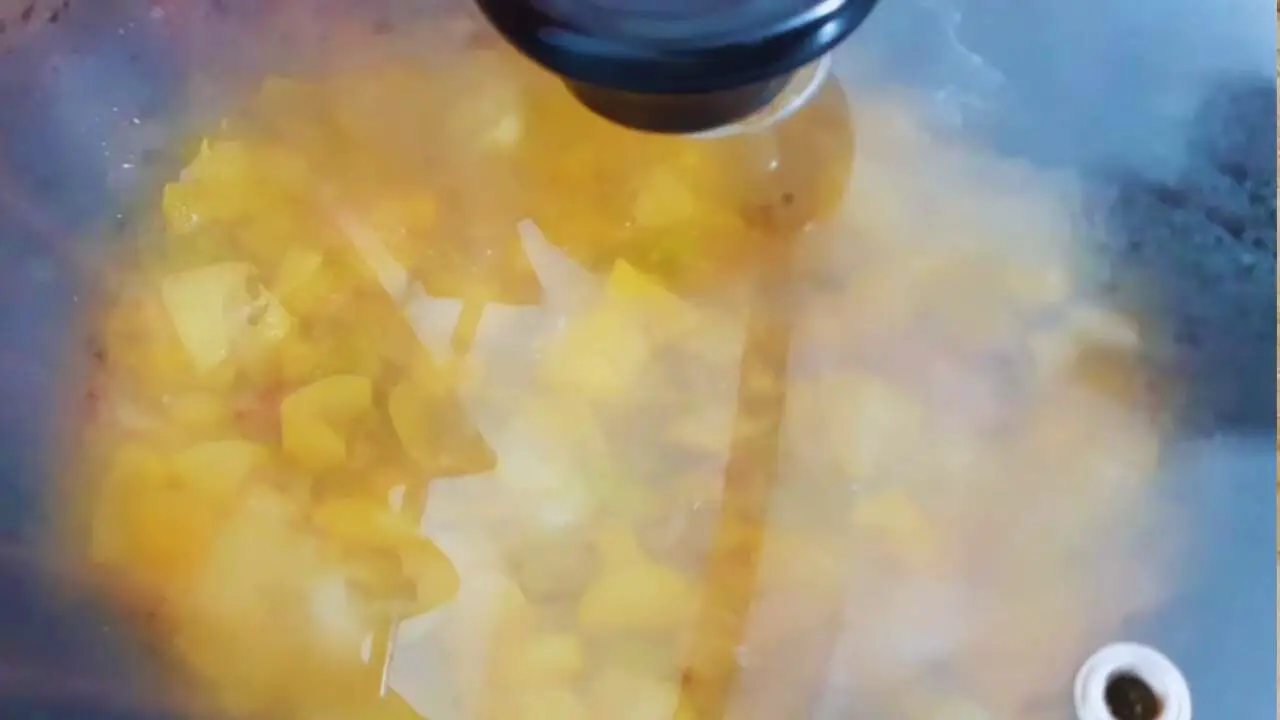
Step 13: Now, for tempering the curry leaves chutney, take a frying pan or wok, put about 5 tbsp of white oil in it, and heat it on a medium flame on your gas stove.

Putting about 5 tbsp of white oil in frying pan

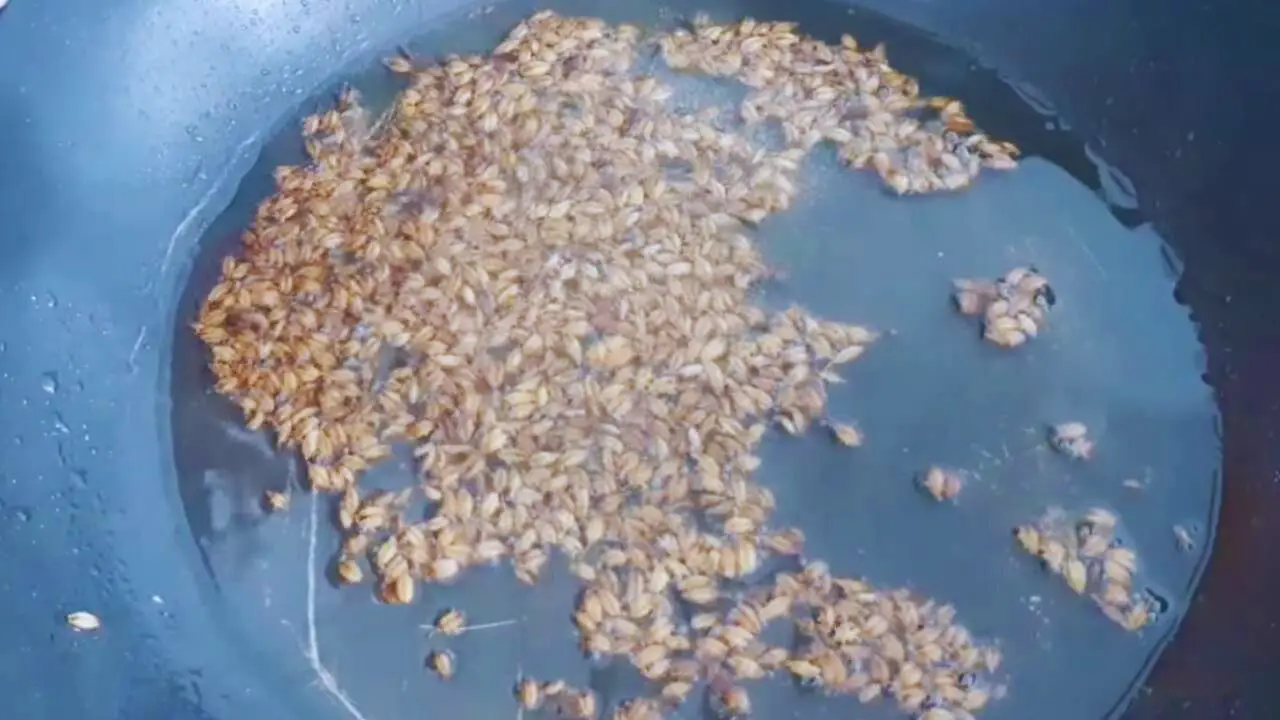
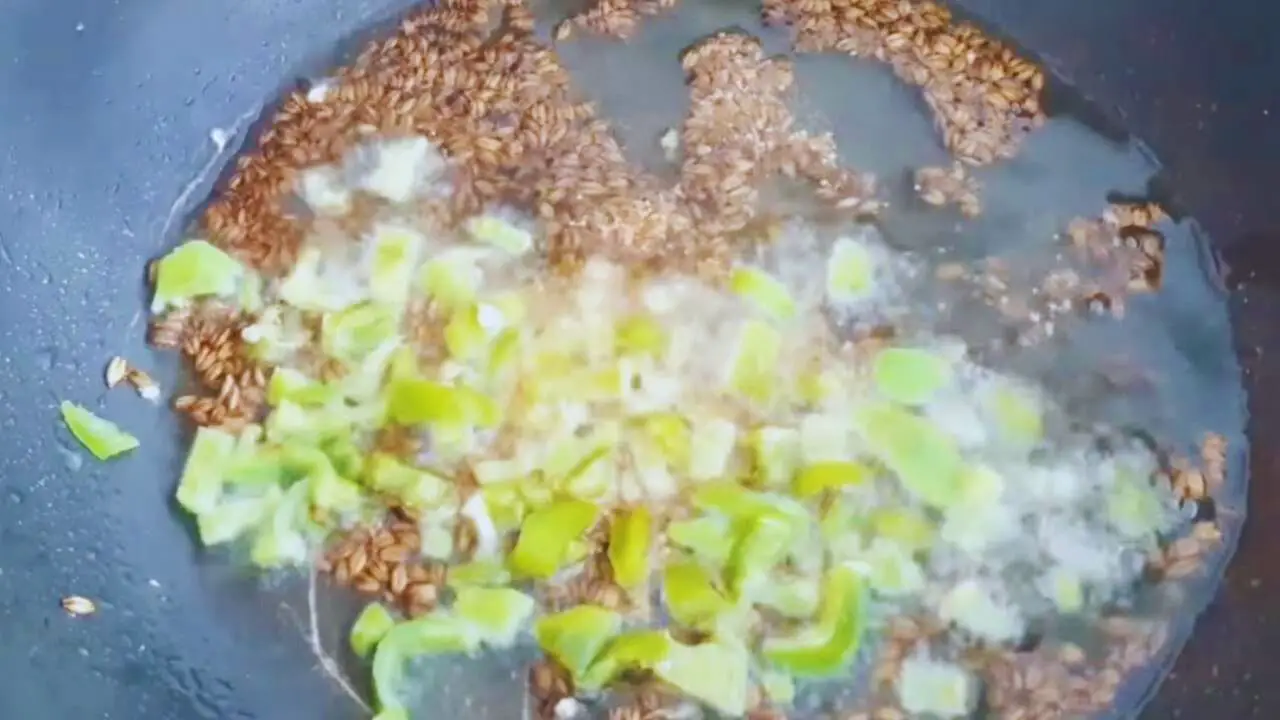
Step 14: When it is hot, add 1 tsp of cumin seeds in it. Let it crackle and change color.

Adding 1 tsp of cumin seeds

Step 15: When it does, add ¼ tsp of asafetida in it.

Adding ¼ tsp of asafetida

Step 16: After a short while, add 2 finely chopped green chilies in it.

Adding 2 finely chopped green chilies

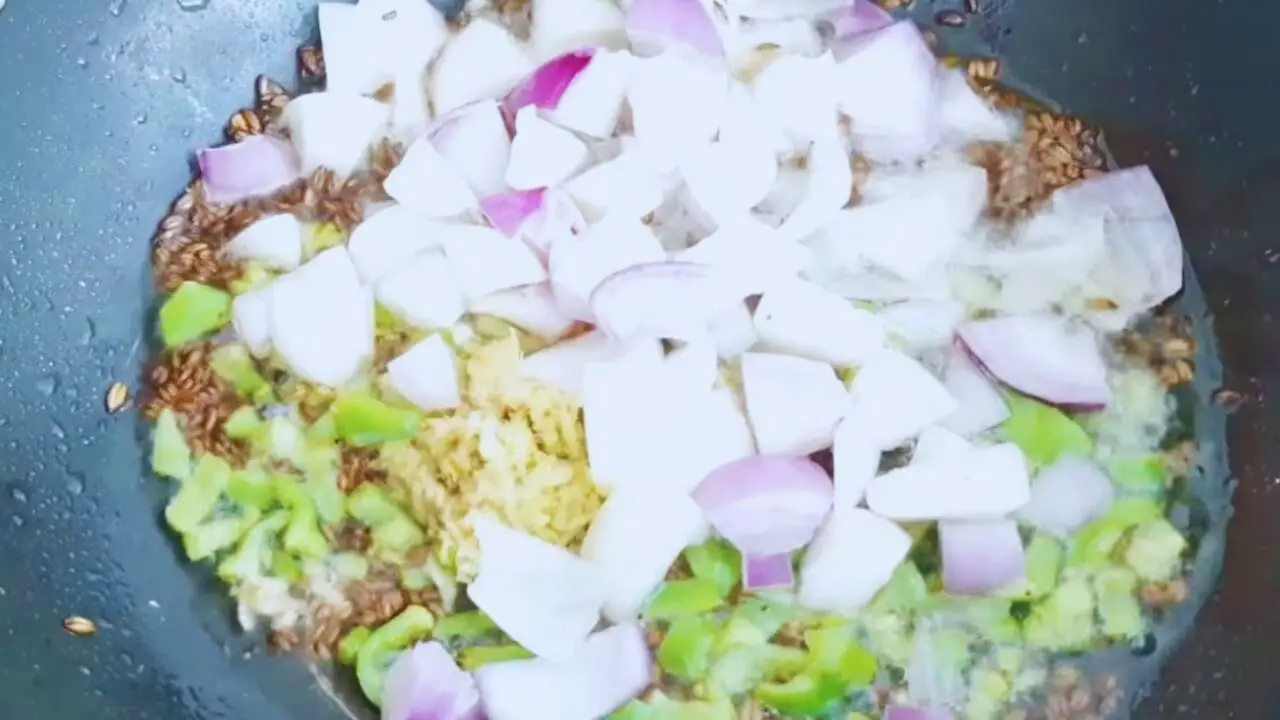
Step 17: Then add 1 tsp of ginger-garlic paste to the content.

Adding 1 tsp of ginger-garlic paste to the content

Step 18: Finally, add two medium pieces of onions, roughly chopped, to the content.

Adding two medium pieces of onions

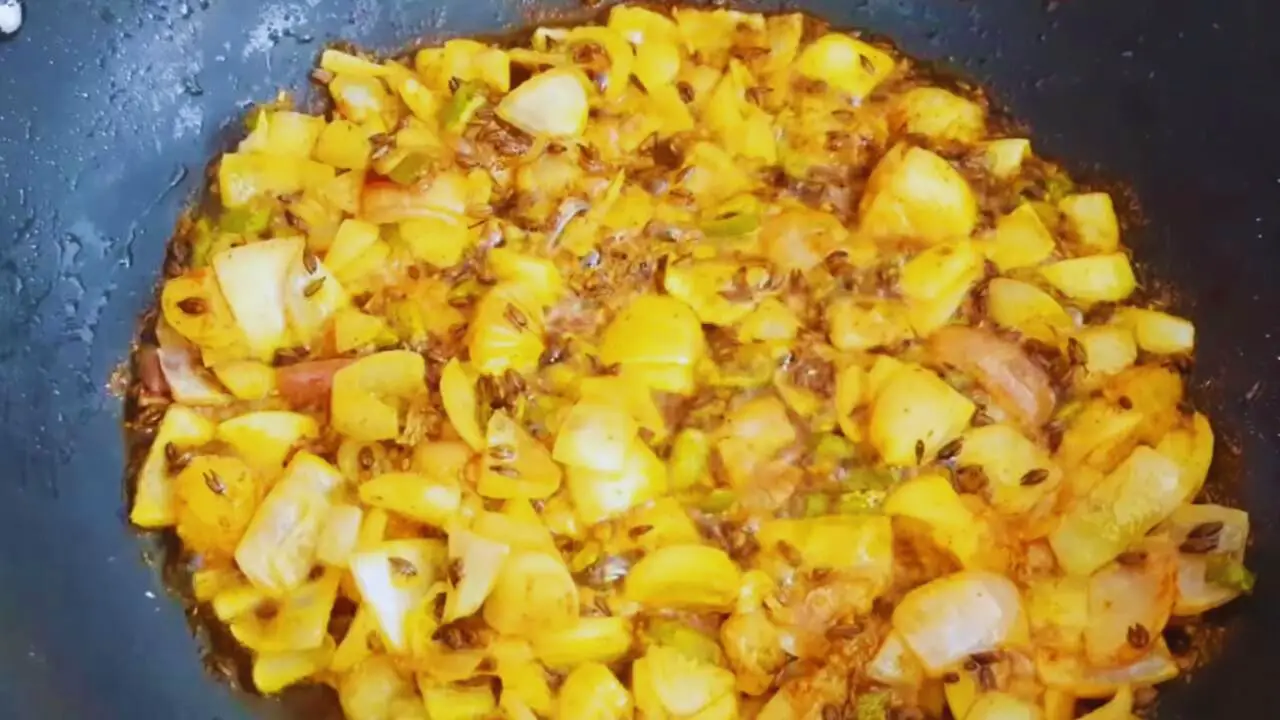
Step 19: Sauté the ingredients for a minute or two until the onions turn translucent.
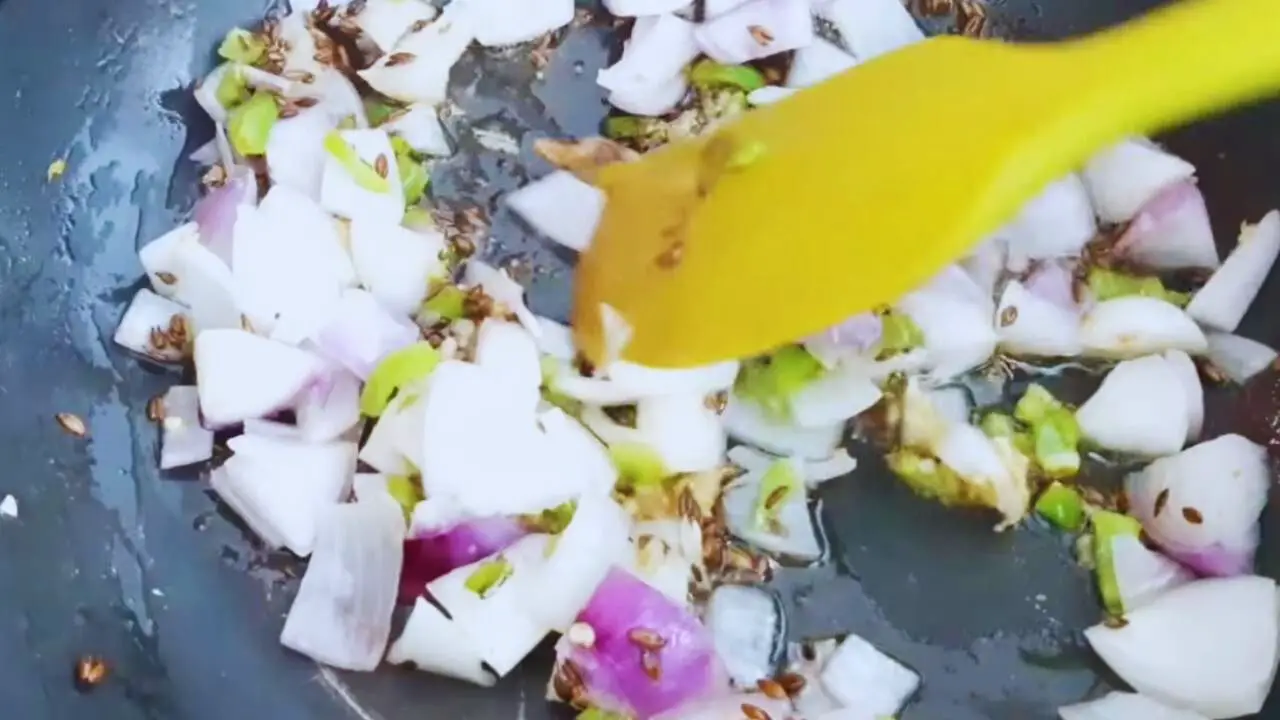
Sautéing the ingredients

(Expert tip: You may cover it but make sure that you keep checking it continuously to prevent overcooking. Do not overcook them as that will reduce the taste and flavor of the curry leaves chutney).

Step 20: When the onions just start to turn light brown, add ½ tsp of table salt and ½ tsp of red chili powder to the ingredients.

Adding ½ tsp of table salt and ½ tsp of red chili powder to the ingredients

(Expert tip: You can alter the quantity of salt and red chili powder according to your taste and preference).

You May Also Like:  Lime Pickle Recipe | Nimbu ka Achar

Step 21: Then add ½ a tsp of turmeric powder to it.

Adding ½ a tsp of turmeric powder

Step 22: Mix everything well and stir them for about a minute or two more so that these are nicely cooked.

Mix everything well and stirring

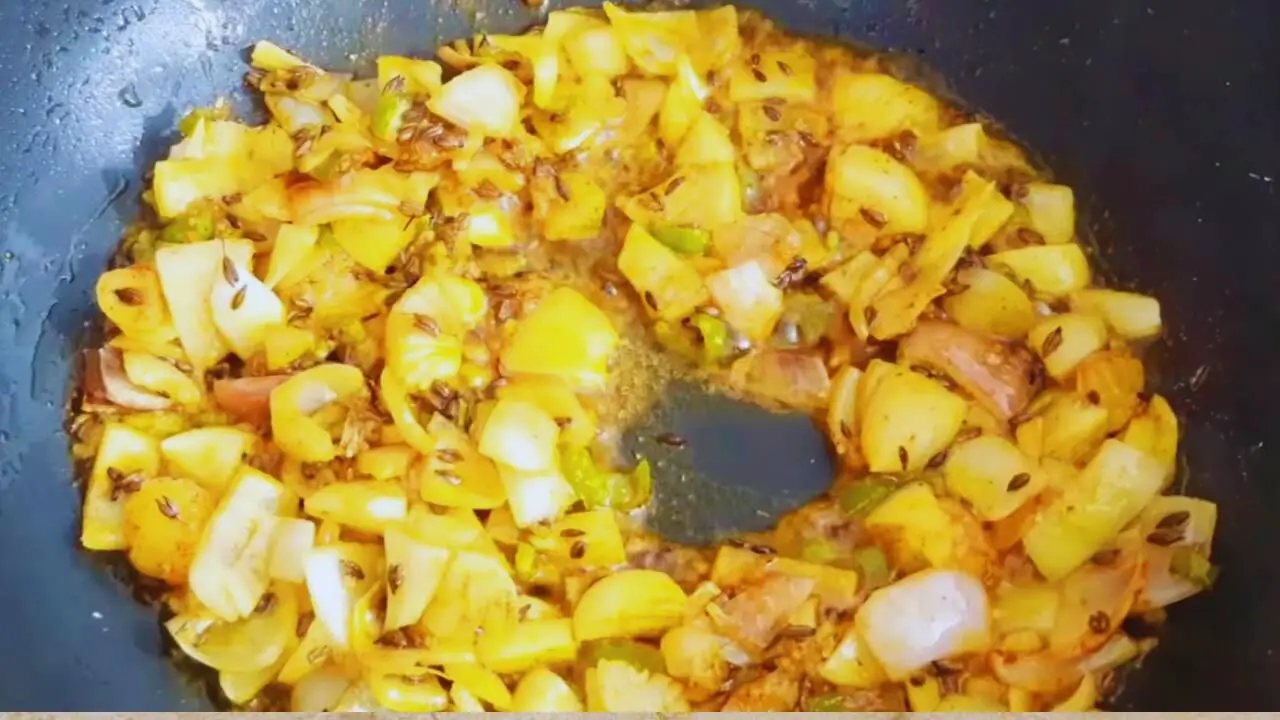
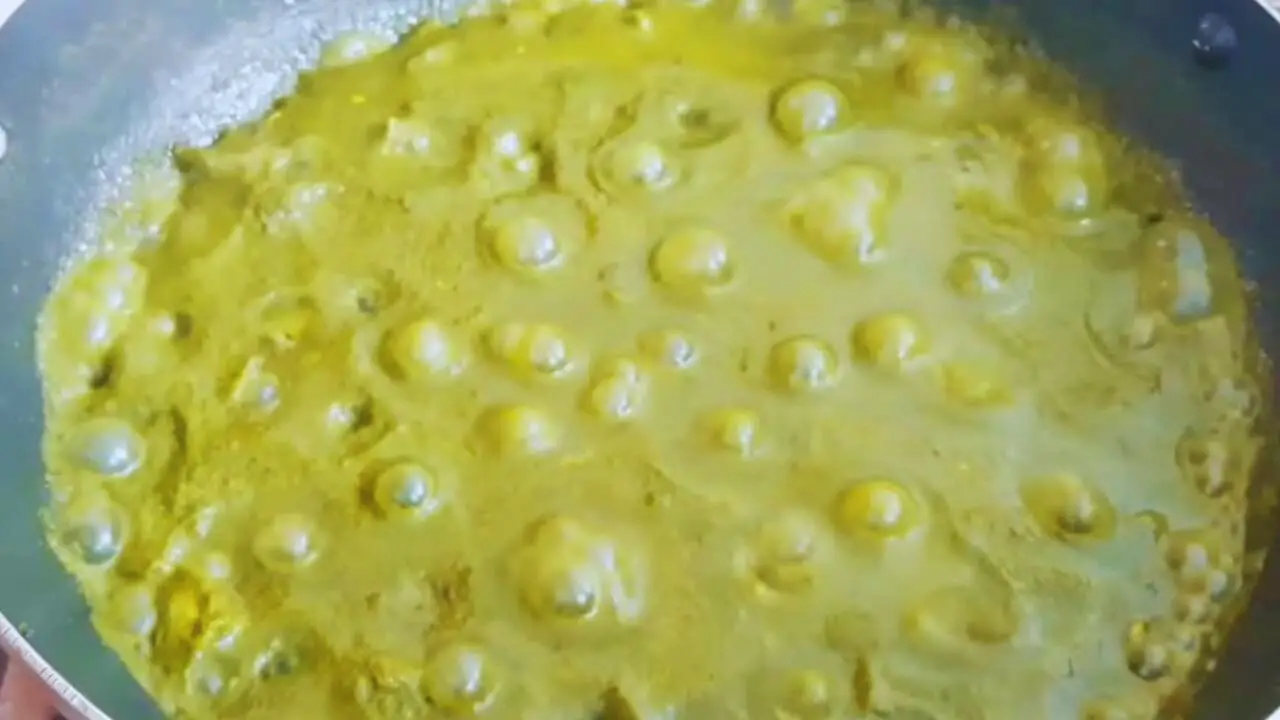
Step 23: Cover it for faster cooking. This will also lower the chances of burning the ingredients as covering the wok will create vapors. However, that does not mean you do not need to check the masala intermittently.

Covering it for faster cooking

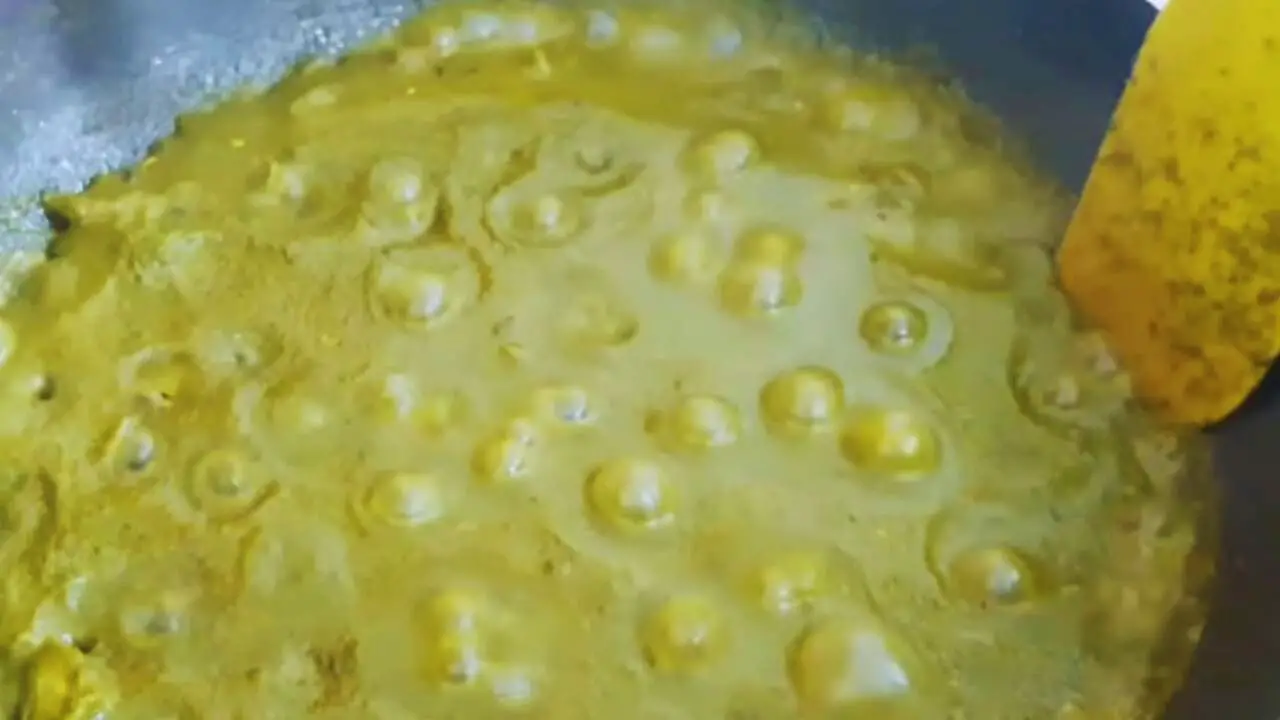
Step 24: When the ingredients are cooked nicely, it will release oil from the sides.

The ingredients are cooked nicely

Step 25: When you notice it, pour the curry leaves paste that you kept aside.

Pouring the curry leaves paste

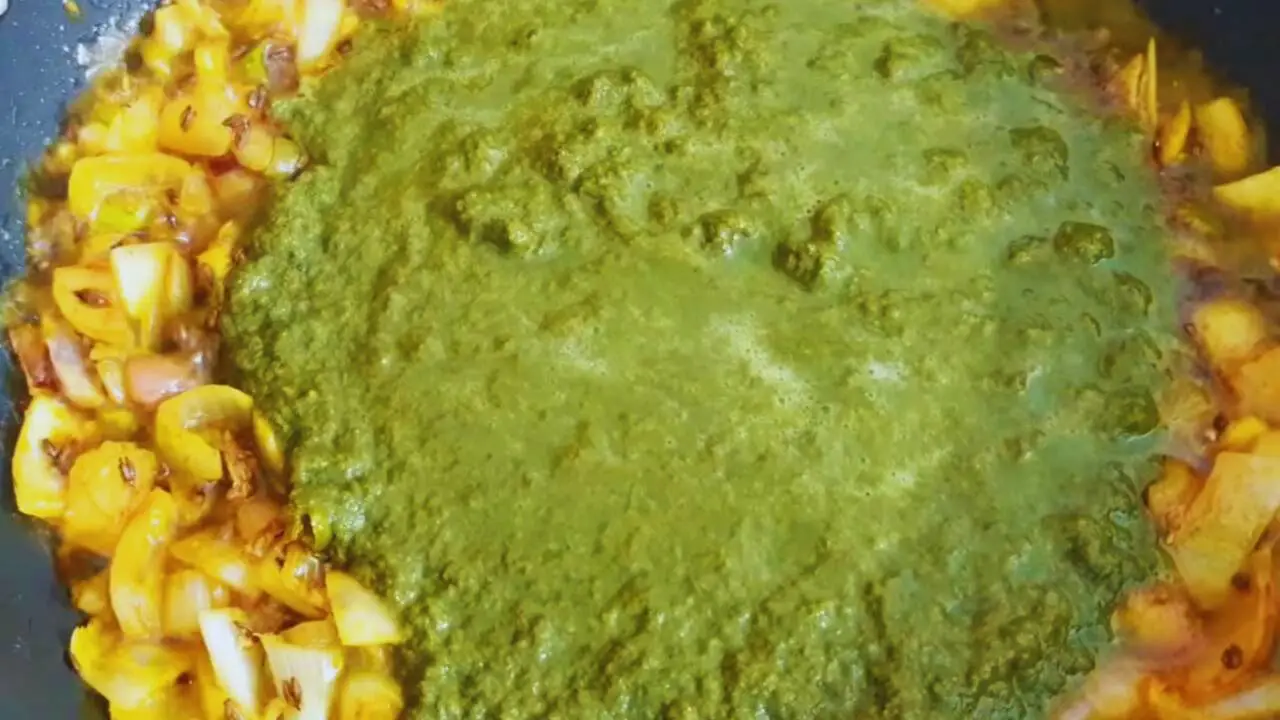
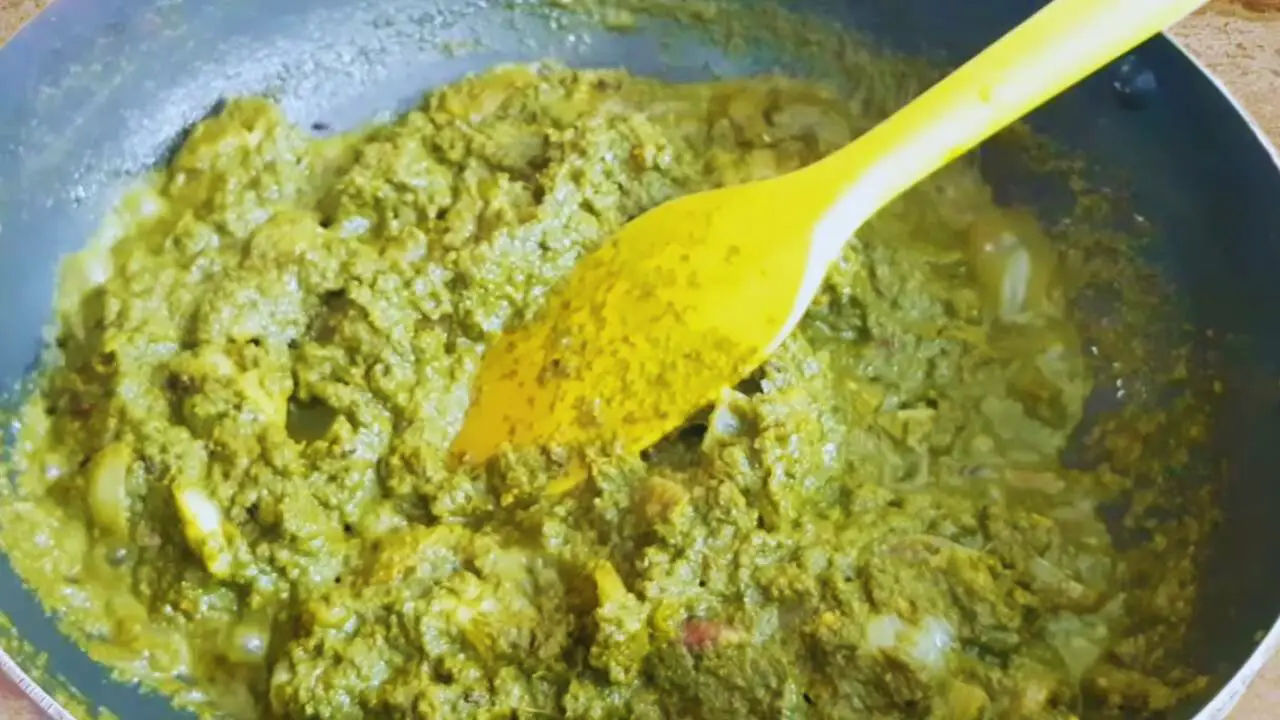
Step 26: Mix them well.

Mixing them well

Step 27: Cover the content and let it cook for another 2 to 3 minutes. Check whether it has come to a boil.

Letting it cook for another 2 to 3 minutes

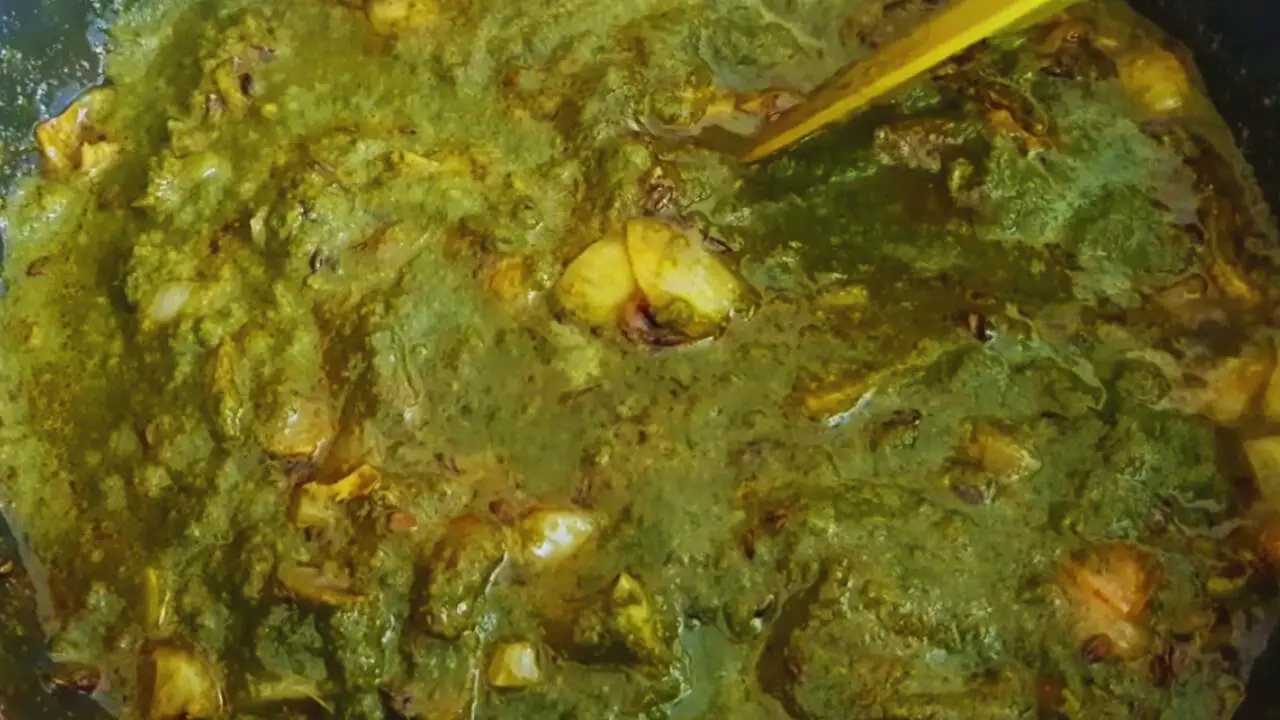
Step 28: Give it a final stir.

Giving it a final stir

Step 29: Check the consistency.

Checking the consistency

(Expert tip: You may add a spoonful of water if you do not want a thick consistency. But make sure that you let the water boil for some time to remove its bland taste).

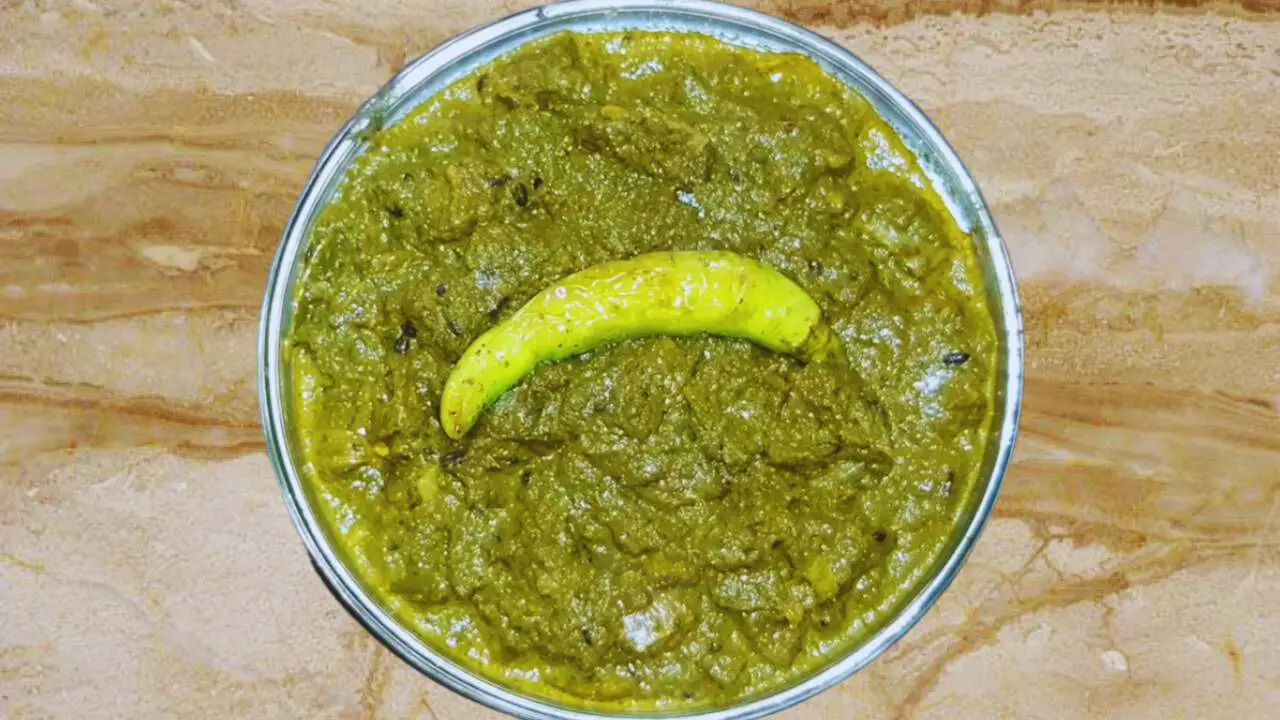
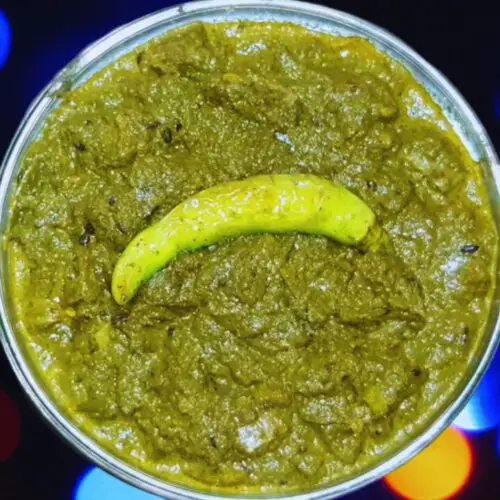
Step 30: Transfer the content into a bowl and your tasty curry leaves chutney is ready to serve with a variety of snacks and dishes.

Curry leaves chutney is ready

Pro Tips for Cooking Curry Leaves Chutney

Choose Fresh Curry Leaves: Opt for fresh, vibrant curry leaves to ensure a robust flavor in your chutney. The quality of the leaves greatly influences the overall taste.

Enhance Grinding Techniques: For an authentic taste, consider using a traditional grinding stone (sil batta) or mortar and pestle set (haman dista). While a grinder is convenient, the former methods impart a unique texture and flavor to the chutney.

Liquify with Strained Water: If you prefer a smoother consistency, add a spoonful or two of the strained water from boiling the curry leaves. This not only helps in grinding but also enhances the overall liquidity of the chutney.

Adjust Spice Levels: Tailor the quantity of salt, red chili powder, and other spices according to your personal taste preferences. Experimenting with spice levels allows you to customize the chutney to suit your palate.

Careful Onion Sautéing: When sautéing onions, ensure they turn translucent without overcooking. Overcooked onions can diminish the final taste and flavor of the curry leaves chutney.

Watch for Oil Release: The tempering process is complete when you notice the release of oil from the sides. This indicates that the ingredients have been adequately cooked, enhancing the richness of the chutney.

Consistency Matters: Achieve the desired consistency by adjusting the amount of water during cooking. If a thinner chutney is preferred, add a spoonful of water, but allow it to boil to eliminate any bland taste.

Serve Variety: While traditionally paired with snacks, curry leaves chutney is versatile. Experiment with serving it alongside a range of dishes like dosa, idli, rice, or even as a dip for appetizers.

Curry Leaves Chutney Storing Tips

Use Airtight Container: Store your homemade curry leaves chutney in an airtight container to prevent loss of flavor.

Refrigeration is Key: Refrigerate it to maintain its freshness. This will help preserve its flavors for an extended period.

Avoid Contaminating Spoons: When serving the chutney, use clean, dry spoons to prevent introducing moisture and contaminants. This practice helps maintain the chutney’s quality over time.

Freezing Option: If you want to extend the shelf life further, consider freezing smaller portions of the chutney in ice cube trays. Once frozen, transfer the cubes to a sealed freezer bag. Thaw individual portions as needed.

Top Up with Oil: To create a protective layer and prevent the chutney from drying out, consider topping it up with a thin layer of oil before sealing the container. This also helps enhance the chutney’s flavors.

Avoid Frequent Temperature Changes: Minimize temperature fluctuations by taking out only the amount needed and promptly returning the rest to the refrigerator or freezer. This helps maintain the chutney’s texture and taste.

Do Not Store for a Long Period: Do not store the curry leaves chutney for a long period even if it may last longer. Always consume it within a week and prepare a fresh lot for the best taste experience. The flavors tend to be at their peak during the initial days.

You May Also Like:  Pakora Chutney Recipe | Pakoda Chatni

How Does Curry Leave Chutney Taste?

Rich and Earthy: The chutney boasts a profound richness and earthiness derived from the fresh curry leaves. This imparts a robust and wholesome flavor to the overall concoction.

Spicy and Aromatic: With the perfect blend of fresh green chilies, red chili powder, and aromatic spices, the chutney delivers a delightful kick of spiciness. This interplay of flavors adds an exciting element to your palate.

Balanced Saltiness: The addition of table salt in measured quantities ensures a well-balanced saltiness that enhances the overall taste without overpowering the natural flavors of the curry leaves.

Savory and Umami: The sautéed onions, cumin seeds, and ginger-garlic paste contribute to a savory depth with a hint of umami. This complexity of flavors elevates the chutney to a culinary masterpiece.

Mildly Tangy: The careful use of tamarind in some variations imparts a subtle tanginess, balancing the richness and spice. This mild tanginess adds a refreshing touch to the chutney’s overall taste.

Warm and Comforting: The tempering process, along with the infusion of turmeric, creates a warm and comforting sensation. It’s like a flavorful hug for your taste buds, making it a perfect accompaniment for various dishes.

Fresh and Herbal: The use of fresh curry leaves not only provides a unique herbal undertone but also contributes to a fresh and invigorating taste. This freshness distinguishes homemade curry leaves chutney from store-bought alternatives.

Curry Leaves Chutney Featured Image

Curry Leaves Chutney Alternatives

If you are specifically looking for alternatives that mimic the flavor profile of curry leaves chutney, there isn’t any that will replicate the exact and unique taste of it.

However, here are a couple that share some common elements and may serve as flavorful substitutes in certain recipes:

Coriander-Cumin Chutney: Combining coriander leaves, cumin seeds, green chilies, and a touch of lemon juice can offer a flavorful alternative with some similarities to curry leaves chutney.

Mint-Coriander Chutney: Blending fresh mint and coriander leaves with green chilies and spices can provide a refreshing and aromatic chutney that complements various dishes and can be used as a substitute for curry leaves chutney.

What Dishes Can Curry Leaves Chutney Be Served with?

Dosa: Spread a layer of curry leaves chutney inside or serve it as a side dip with dosa for a burst of flavor.

Idli: Enjoy the chutney as a side accompaniment with soft and fluffy idlis.

Vada: Dip your crispy medu vada or masala vada into curry leaves chutney for an extra kick.

Pakoras: Whether it’s onion pakoras or mixed vegetable pakoras, curry leaves chutney adds a tasty contrast.

Bhajis: Serve with assorted bhajis such as potato bhaji or spinach bhaji for a delightful combination.

Samosa: Elevate the taste of samosas by dipping them in this flavorful chutney.

Rice Varieties: Pair it with plain rice, lemon rice, or tamarind rice for an added layer of taste.

Curries: Serve alongside various curries such as potato curry, egg curry, or even chicken curry.

Roti/Chapati: Spread a thin layer on rotis or chapatis before rolling them up for a flavorful twist.

Upma: Drizzle some chutney over upma to enhance its taste and texture.

Pongal: Enjoy it with Pongal, a popular South Indian dish made with rice and lentils.

Bread: Use it as a spread in sandwiches or wraps for an Indian-inspired twist.

Pasta: Surprisingly, curry leaves chutney can also be a unique addition to fusion dishes like pasta.

Recipe Card

Curry Leaves Chutney Featured Image

Curry Leaves Chutney

By Mita Mondal
Curry leaves chutney is a yummy sauce made from fresh curry leaves, spices, and a special seasoning. It adds a delicious taste to lots of Indian snacks and dishes.
5 from 1 vote
Prep Time 10 minutes
Cook Time 10 minutes
Total Time 20 minutes
Course Condiments
Cuisine Indian
Servings 10
Calories 64 kcal

Instructions
 

  • Prepare Curry Leaves: In a pot, boil water with a pinch of salt. Once hot, add fresh curry leaves and cook until they soften and lose their vibrant green color.
  • Make a Paste: After straining the cooked leaves, grind them into a fine paste using a grinder. Use a bit of the strained water to liquefy the paste, if needed.
  • Temper the Chutney: Heat white oil in a pan. Add cumin seeds and let them crackle. Then, add asafetida, finely chopped green chilies, ginger-garlic paste, and roughly chopped onions. Sauté until the onions turn translucent.
  • Spice It Up: Sprinkle salt, red chili powder, and turmeric powder into the mix. Stir well and cook until the ingredients release oil from the sides of the pan.
  • Combine & Cook: Add the prepared curry leaves paste to the pan. Mix thoroughly and let it cook for a few more minutes until it reaches the desired consistency. Adjust the thickness by adding a little water if necessary.
  • Serve: Transfer the chutney to a serving bowl. It's now ready to accompany various snacks and dishes.
Subscribe to My YouTube Channel Mitar Cooking!

Notes

Freshness Matters: Opt for vibrant and fresh curry leaves as they significantly impact the chutney's taste. Avoid using wilted or dry leaves for the best flavor.
Texture Preference: While a grinder is convenient, using a traditional grinding stone (sil batta) or mortar and pestle (haman dista) can lend a unique texture and enhance the taste of the chutney.
Adjusting Consistency: Control the thickness of the chutney by adding a few spoonfuls of the strained water used for boiling the curry leaves. This helps achieve the desired texture.
Flavor Customization: Tailor the spice levels according to personal taste preferences. Experiment with quantities of salt, red chili powder, and other spices to create a chutney that suits your palate.
Careful Onion Sautéing: Avoid overcooking the onions during the tempering process as it can diminish the overall taste and flavor of the chutney.
Oil Release Indicator: The tempering is complete when the ingredients release oil from the sides of the pan. This signals that they are adequately cooked, enhancing the richness of the chutney.
Consistency Check: Ensure to check the consistency of the chutney before finishing. Add a small amount of water if a thinner consistency is preferred, allowing it to boil to eliminate any raw taste.
Versatile Serving Options: Besides traditional pairings with dosa, idli, or rice, experiment with serving the chutney as a dip for various snacks or fusion dishes like sandwiches or pasta for a unique twist.
Storage and Freshness: To maintain its freshness, store the chutney in an airtight container in the refrigerator. Ensure to use dry spoons when serving to prevent contamination and preserve its taste.
Freezing Tips: If planning to freeze, portion the chutney into ice cube trays for convenient use. Once frozen, transfer the cubes to a sealed freezer bag, thawing individual portions as needed.
By paying attention to these recipe notes, you'll be able to finesse the flavors and consistency of your Curry Leaves Chutney, ensuring a delightful addition to your meals and snacks!

Nutrition Info (Estimation Only)

Nutrition Facts
Curry Leaves Chutney
Amount per Serving
Calories
 
64
Calories from Fat 63
% Daily Value*
Fat
 
7
g
11
%
Saturated Fat
 
1
g
6
%
Trans Fat
 
0.03
g
Polyunsaturated Fat
 
2
g
Monounsaturated Fat
 
4
g
Sodium
 
124
mg
5
%
Potassium
 
9
mg
0
%
Carbohydrates
 
0.3
g
0
%
Fiber
 
0.1
g
0
%
 
0.03
g
0
%
Protein
 
0.1
g
0
%
Vitamin A
 
40
IU
1
%
Vitamin C
 
4
mg
5
%
Calcium
 
7
mg
1
%
Iron
 
0.2
mg
1
%
* Percent Daily Values are based on a 2000 calorie diet.
Tried this recipe?Let me know how it was!
Follow Me @Mitar.Cooking or Tag #mitarcooking!
Like Page @MitarCooking or Tag #mitarcooking!
Follow Me @MitarCooking or Tag #mitarcooking!

Conclusion

In conclusion, indulge in the delightful world of homemade curry leaves chutney—a versatile, flavorful companion that effortlessly elevates your favorite snacks and Indian dishes.

With simple steps and expert tips, savor the rich and aromatic experience of this culinary masterpiece.

Was this helpful?

Yes
No
Thanks for your feedback!
Recipe Rating


0 Comments
Inline Feedbacks
View all comments
Scroll to Top